Andrea Mowry and Color Confidence

1

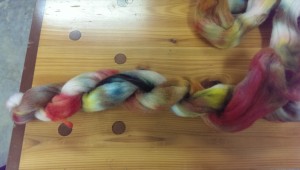
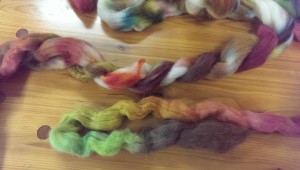
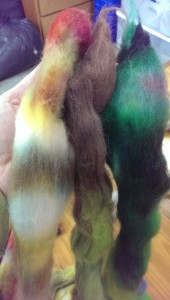
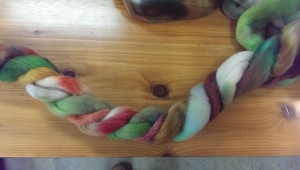
Last October I took a class from Andrea Mowry, of the popular “Fade” patterns on Ravelry, called “Color Confidence”. The class was paid for by a scholarship from my Guild, one of the great benefits of being a member. Her color change patterns are similar to an ombre, but instead of going from light to dark, they go from one color to another. My hope was to learn through her color combination techniques, ways to use various 4oz braids that we all seem to purchase without necessarily having any plan for. Her patterns primarily use the speckled, hand-painted yarns that are so popular right now, but there is a lot of handspun that also ends up being colorfully variegated, so my thought was that handspun would be a reasonable substitution.

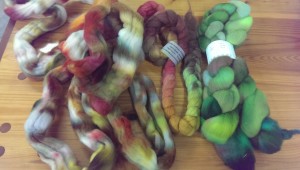
Speckled commercial yarns; hand-dyed handspun yanrs

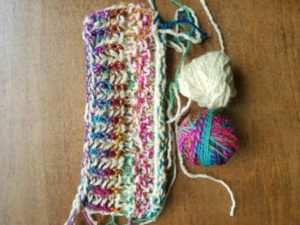
The first part of the class was learning how to do two-color brioche knitting, which is one of her favorite techniques. Although it involves brioche-specific stitch names, once you get the hang of it it’s fairly easy to see how it works, especially if you are using dissimilar colors. It also helped that Andrea was a good, patient teacher! If you think you might be interested in learning the brioche stitch, I would recommend actually taking a class. You will end up with a lightweight, two-sided fabric, with the background color having the effect of “muting” the foreground color.

Brioche stitch side A

Brioche stitch side B

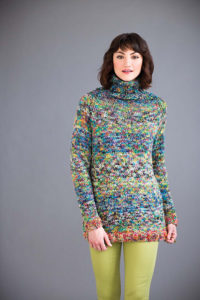
The rest of the class focused on Andrea’s techniques for combining color, or in her words, “painting with yarn”. The first technique she discussed was the marled effect you can get by simply holding two strands of different yarn together and knitting. This look seems to go in and out of fashion, but it’s been very popular in Vogue Knitting for the past several years, and it is an interesting way to do optical blending. This is also easy to replicate with a two-ply barber pole handspun.

Vogue Knitting Late Winter 2017

Vogue Knitting Late Winter 2017

She then discussed color pooling, and how she breaks up the occasional patches of color that can show up in odd places in your knitting. She is a big fan of using textured stitches, like garter stitch and lace patterns, to visually visually break up the pooling. We knit some samples of two yarns held together in garter stitch, and I chose a solid red and a red-with-lots-of-other-bits-of-color handspun, and I was surprised how much the garter stitch toned down all the other colors. Visually the swatch looked mostly red. After thinking about it, I shouldn’t have been so surprised: a yarn that’s 100% red combined with a yarn that’s 50% red will end up looking 75% red. Combining that with garter stitch, where you are basically seeing only every other row, and of course it will tone down the variegation dramatically.

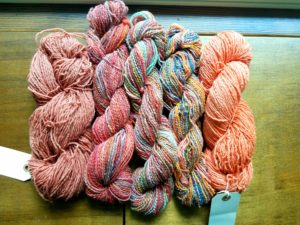
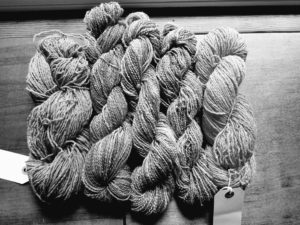
We then talked about color value, or where a particular color falls on a greyscale. For colorwork such as Fair Isle or mosaic knitting, Andrea recommended having high contrast in value, otherwise the finished motif will look “muddy”. For her Fade technique she recommends using a low contrast in value. When considering whether the colors you like actually work together as far as value, she showed us that by taking a black-and-white picture of your fiber on your cell phone, you can easily see if you’ve got a high or low contrast, because the photo will take away the hue and leave only the value. When Andrea picks yarns for her Fade patterns, she is looking for a greyscale gradient.

Natural-dyed and ice-dyed yarns

The same yarns in greyscale

Finally, she discussed how she transitions from one color to the next. She recommends using yarn from the same dyer when you first start trying her patterns, because you will be able to find families of color combinations to help your Fade blend smoothly. If you are the dyer, so much the better! One of her techniques is to use the Fibonacci sequence to gradually decrease one color and increase the next color, rather than just dropping one color and starting the next.

An example of the Fibonacci sequence, Vogue Knitting Early Fall 2017

Reverse stockinette stitch will hide lines between color changes more easily than regular stockinette. Adding mohair or another fiber with halo will help blur or “fuzz out” color changes. And finally, you can always Fade into a neutral!

For me, the biggest tip was her advice, when choosing colors, to pick something that will look good with your skin tone at the part that’s going to be up by your face. That way your finished project will look good on you, and you will still have the freedom to experiment with colors that you wouldn’t normally think you can wear.

Taking this class really made me consider the role that stitch texture and the physical structure of the yarn being used plays in the perception of color, which I will definitely keep in mind for future projects. Added to that, Andrea was charming and generous with her knowledge: if you are a class-taking sort of person, I would certainly recommend her.
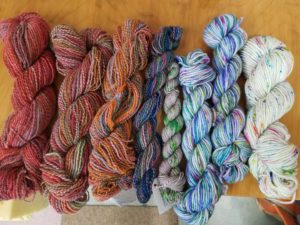
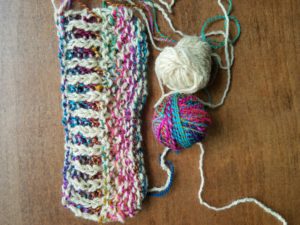
But how much mordant do you *really* need?

2

This is THE question, isn’t it? I think a lot of people, myself included, just start with a formula they find somewhere but don’t take the time to test it against other options. The good news is, I’ve done a test for you. I’ve done a mordant strength test with aluminum acetate previously; this is a mordant strength test with potassium aluminum sulfate, aka, alum mordant for protein fibers.

My underlying question in doing this experiment is how best to handle wool, alpaca and silk blend roving— how much heat, agitation, time and mordant gives the best result? And do I need to use cream of tartar (potassium bitartrate)? My preferred outcome will be good color uptake while still having a nice hand and easy spinability.

The first recipe I came across was from John and Margaret Cannon in Dye Plants and dyeing, which uses 18% WOF alum and 6% WOF cream of tartar. I started using it and had good results, but in my natural dye class we use 10-15% alum with no cream of tartar. I usually bring my mordant bath up to temperature (about 160-170F), turn off the heat, and let my fiber sit overnight. In class (where we generally use fabric samples, not yarn or roving) the fiber is at constant temperature for an hour (170F or so— not boiling, but steam coming off the water) and then removed and rinsed. The least amount of alum mordant I’ve seen used is from Jenny Dean, just 8%, but with 6% cream of tartar.

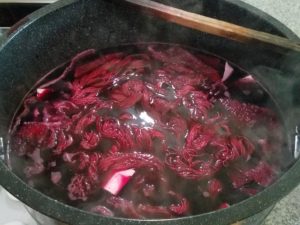
This experiment is my fairly best comparison of apples to apples to apples, starting at the low end of 8% alum, ending at the high end of 18%, and splitting the difference at 13%. All mordant strengths are tested with and without cream of tartar, and processed at heat (170F) for one hour, or brought up to heat and then turned off and let sit overnight, for a total of 12 different samples. Both wool, silk, wool/silk blends and a silk/plant fiber blend were sampled, in the form of fabric and also commercially prepared organic undyed yarn. All samples of the same mordant bath were processed together, and all samples were wetted out for at least an hour. In the end, ALL of the samples went into the SAME dyepot of 20% WOF cochineal, a good strong dyepot, with the hopes of disambiguation.

There were some interesting results!

Even before I mordanted anything, the visual difference between the alum with/alum without cream of tartar bath was obvious. With cream of tarar, the bath was clear. Without, it had a cloudy, milky look. This persisted after the fiber was removed from the mordant bath. The ph of each bath remained the same, about 3-4.

After I’d mordanted my samples, but before I’d dyed anything, I tested  the hand, or feel, of all my samples— the common complaint about increased alum strength is that is can make the fibers feel “sticky”. With all of my wool samples, regardless of alum%, those without the cream of tartar felt coarser. The yarn especially felt sticky without cream of tartar. On the silk noil samples, the samples WITH cream of tartar at 8% mordant strength had a more noticeable yellow cast . The hand of the silk noil and habotai were not discernibly different, but the silk-faced plant blend and the wool/silk were definitely smoother/nicer with the 6% cream of tartar.
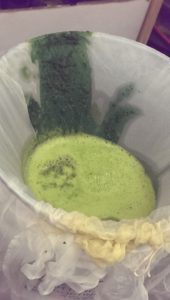
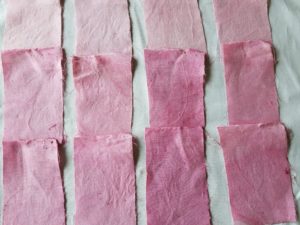
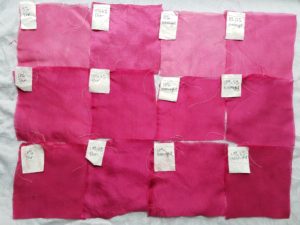
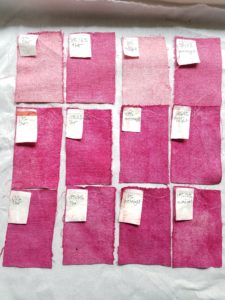
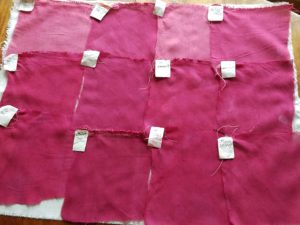
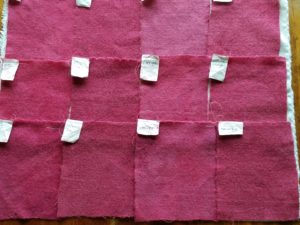
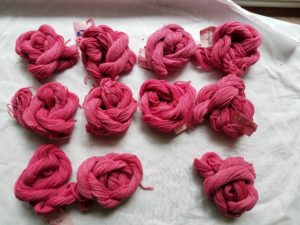
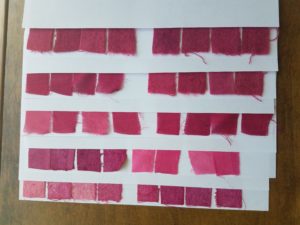
So what about the color? Take a look! These samples are all laid out in a 4×3 grid as follows:

8% 1hr, 8%/6% cream of tartar 1hr, 8% overnight, 8%/6% overnight

13% 1hr, 13%/6% 1hr, 13% overnight, 13%/6% overnight

18% 1hr, 18%/6% 1hr, 18% overnight, 18%/6% overnight

Silk/hemp blend— my “control”. In real life I’d use aluminum acetate to mordant this.

Silk habotai. The cream of tartar definitely helps the dye uptake, especially noticeable at the lowest strength mordant.

Silk noil. The unevenness of color I attribute to not enough wetting out time. In the future anything with silk will soak overnight.

This is a thin 60%silk/40% wool twill. I was surprised that I liked the 18%/6% 1hr mordant the best.

Medium weight wool challis. Not as great a difference between the 13% and 18% mordant strengths as on the silks.

Commercially prepared undyed organic merino yarn. I didn’t scour it, and I should have! I think the color uptake at all mordant strengths would have been much better. The 18% overnight skein is missing— I ran out of yarn.

Takeaways:

Its pretty clear that more mordant equals more dye uptake. This was a strong dyebath, with plenty of color left over (I dyed several more yards of fabric afterwards with the leftover bath). Between 13% and 18% the difference isn’t as stark as at 8%, so I might do an additional test at 15%WOF and see if I can see a big enough difference to merit the additional mordant.

It’s not so clear in the photos, but the samples mordanted on heat for one hour had a nicer, more even color than the ones brought up to temperature and then left to cool overnight. This surprised me. In the future I will probably keep on heat for one hour, then let cool naturally before removing the fiber. This has also dissuaded me from trying a recipe I found on the internet for mordanting in cold water!

I will definitely be wettting out silks overnight, and scour any fiber I haven’t already prepped myself. I will use cream of tartar, for both mordant uptake and nicer hand. The final test, of course, is a light-fast test. My hypothesis is that the higher mordant strength will be more fast.
Light-fast test in progress.

At this point I’m of the opinion that the prep work, from scouring through mordanting, is the key to nicely dyed fiber. The dye bath is basically proving how good a job I’ve done. A stronger dye bath won’t produce any more color than the amount of mordant bonded to the fiber. This test was done with cochineal, which won’t dye without some sort of mordant; if I was dyeing with something substantive like onion skin, the extra mordant strength may be unnecessary.

I hope this helps answer the question of how much mordant *you* really need: by all means, do your own experiments!


Surface Design with Natural Dyes

2

Rachel: “I found these cute block-printed throw pillows I want to make. How can I do that with natural dyes?”

I’m mostly a spinner and knitter, but in the natural dye classes that I attend at OCAC, there are a lot of people who focus on textiles. We’ve used a simple technique to get a lot of different results, and it’s really a lot of fun.

You will need the items you wish to print with: print blocks, stencils, potato stamps, paintbrushes, silkscreens, or anything else, and a few pieces of equipment: a blender, a steamer, an old bedsheet, and gum tragacanth. Gum tragacanth is a natural product that is most often used making fondant for cakes. Here it’s used as a “sticking” medium. What’s good about gum trag vs. other similar products is that it doesn’t interfere with or change the color of your dyestuff.

The technique: mix up some gum trag and water in a blender. Say, 1/4 C gum trag and twice a much water. You will hear and feel the mixture get thicker after about thirty seconds. If it’s too thick, add more water. If it still seems a little runny, let it sit for a bit, it thickens over time. Don’t mix more than you’ll need for your project at hand, because it only lasts about a day in the refrigerator. (Obviously it will be easier to judge once you’ve done it, but a little medium goes a long way.) You will want it thick enough to adhere to your stamps, but not so thick that you lose definition. If you’re silkscreening, you’ll want the thickness of silkscreen ink. Make some practice stamps before you commit to your fabric!

Mordant Printing

You can mix a mordant into your gum trag mixture. We used very small amounts of copper and iron, and a slightly less small amount of alum during our classes.

Gum trag with mordants

Gum trag with mordants

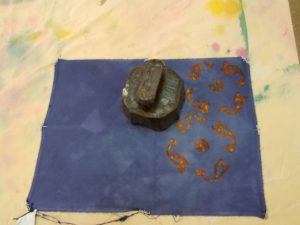
Here is a thread spool print with copper mordant:

2016-10-04-19-39-50

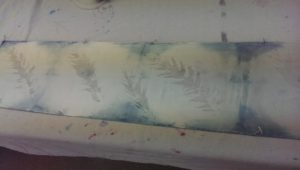
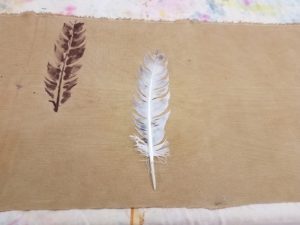
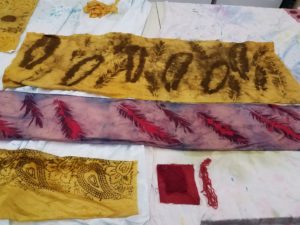
Here I’ve printed on a silk scarf previously dipped in indigo with alum, using a feather for my print:2016-10-04-19-59-47

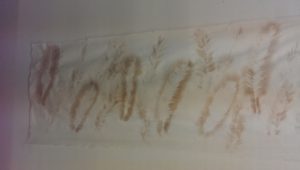
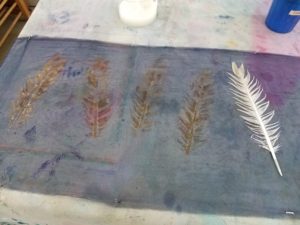
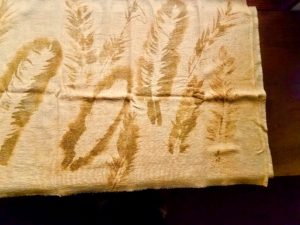
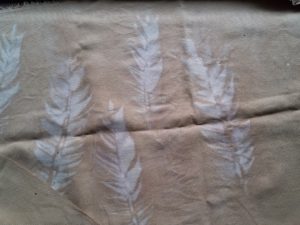
Here I’ve used an iron mordant on silk noil, again with feathers. I used an old paintbrush to apply the mordant mixture:

2016-10-04-19-40-51

Discharge Printing

You can mix and acid or a base into your medium to discharge color on an already dyed piece.

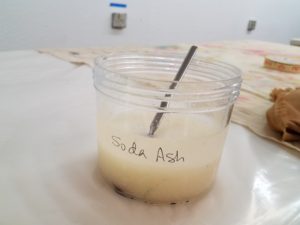
Gum trag with soda ash

Gum trag with soda ash

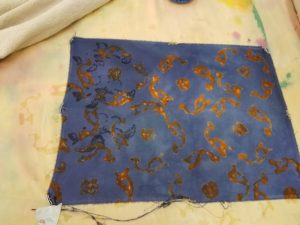
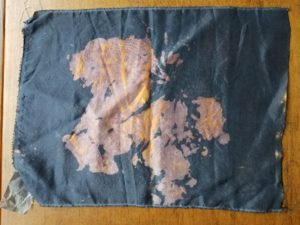
Here I tried using soda ash to shift the color on a pisolithus mushroom-dyed piece of silk:

2016-10-18-19-17-33

Here I’ve used tartaric acid to discharge the logwood dye on silk organza:

2016-10-18-20-22-27

You can do combinations of these techniques:

2016-10-18-20-22-36

Discharging with a print block

And printing with an iron mordant

And printing with an iron mordant

How to set your prints:

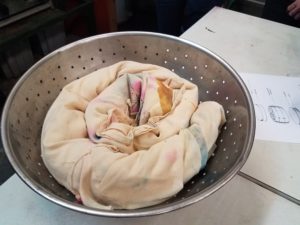
Lay out your dried fabric on an old cloth in a single layer, fold extra cloth over, and roll up, jelly roll style so that it will fit in your steamer basket. You want STEAM ONLY! Take care that the water is not getting into the bottom of the basket, and place a towel or piece of felt on top underneath the lid to keep condensed water from dripping back down. Make sure you’ve got steam going before placing your jelly roll in the steamer basket. Steam ten minutes, and remove carefully. Let cool until it’s comfortable to handle, then unroll.

Jelly roll in steamer basket

Jelly roll in steamer basket

Wash your steamed fabric in warm, soapy water to get the gum trag residue out. It still contains mordant, discharge or dye, and if the excess isn’t washed out it will go into your dye pot and change the result.

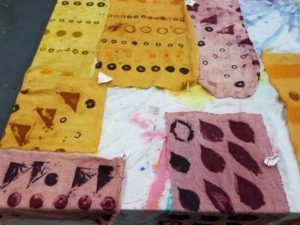
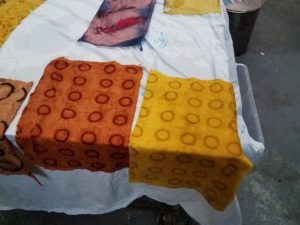
Here are some results after dyeing our prints. The yellow is from onion skins, the pink from Brazilwood, and the orange a combo of both.

2016-10-11-19-47-43

2016-10-11-19-33-30

Here are my feathers. You can see that the gum trag wasn’t washed out completely by the extra dark muddiness around the onion skin feathers.

2016-10-11-19-33-24

I decided to after-mordant the whole piece in alum, and not only did that get rid of the excess print fuzz, it changed the color of everything. It’s a bit 1970’s decor now, but I think it will still make a nice pillow:

2016-11-14-14-09-41

For the discharge printing, you don’t necessarily have to steam the piece before washing. Here’s a sample of logwood on silk that I discharged by painting the back of a leaf with gum trag and citric acid, and then simply washing when I liked the result. It made a nice multi-colored effect:

2016-11-14-14-07-15

I steamed my Ph-shifted fabric, and once I washed it out it ended up being merely discharged. I think I would have had better results if I’d washed it out as with the leaf print:

2016-11-14-14-10-18

And here is a piece of silk crepe de chine that I silkscreened with alum and then dyed in Osage orange:

2016-11-14-14-16-07

So, to answer your question Rachel, you have a lot of options. You can make a mordant print on unmordanted fabric. You can make a (different) mordant print on mordanted fabric. I didn’t include any photos, but you can mix natural dye extracts with your gum trag and print directly that way, with color. You can discharge already-dyed fabric. And you can do combinations of these techniques. You’ll no doubt have noticed that all these examples are on silk, but many of my classmates used this same technique on cellulose fibers.

There is also the option of surface design using natural pigments, which I’ll cover in my next post.

Fresh Leaf Indigo

4

The hardest part about dyeing with fresh leaf indigo is growing the indigo. One of the people in my natural dyeing study group did all the hard work, and brought it in to share. This is what fresh Japanese indigo looks like:

Japanese indigo, persicaria tinctoria

Japanese indigo, persicaria tinctoria

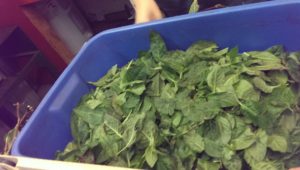
The leaves are picked off the stems:

2016-09-27-18-42-19

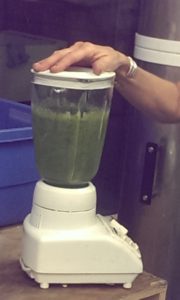
Then blended with ice water:

2016-09-27-19-25-25

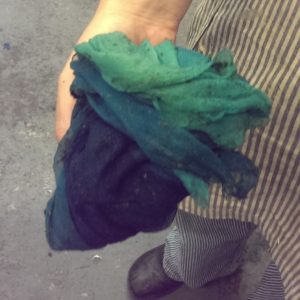
And strained through a cloth (in this case, silk):

2016-09-27-19-29-35

We squeezed out the cloth to extract as much juice as possible, and this was our dye bath. We put our fiber in, a mix of wool, linen and silk:

Fresh indigo dye bath

Fresh indigo dye bath

We massaged the items in the bath occasionally, and let them sit in the bath about an hour. The bath began to oxide:

2016-09-27-19-43-03

We then removed the items from the bath and let them air out. The color slowly changed from green to blue on silks, a pale green on linen, and a dark blue-green on wool. The oxidation time was much slower than with a reduced-indigo vat.

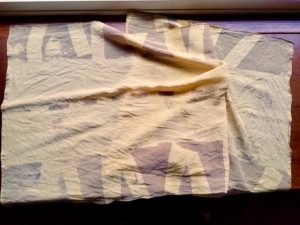
This is the silk straining cloth:

Straining cloth after several batches

Straining cloth after several batches

Straining cloth after half an hour

Straining cloth after half an hour

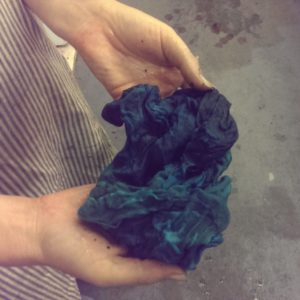
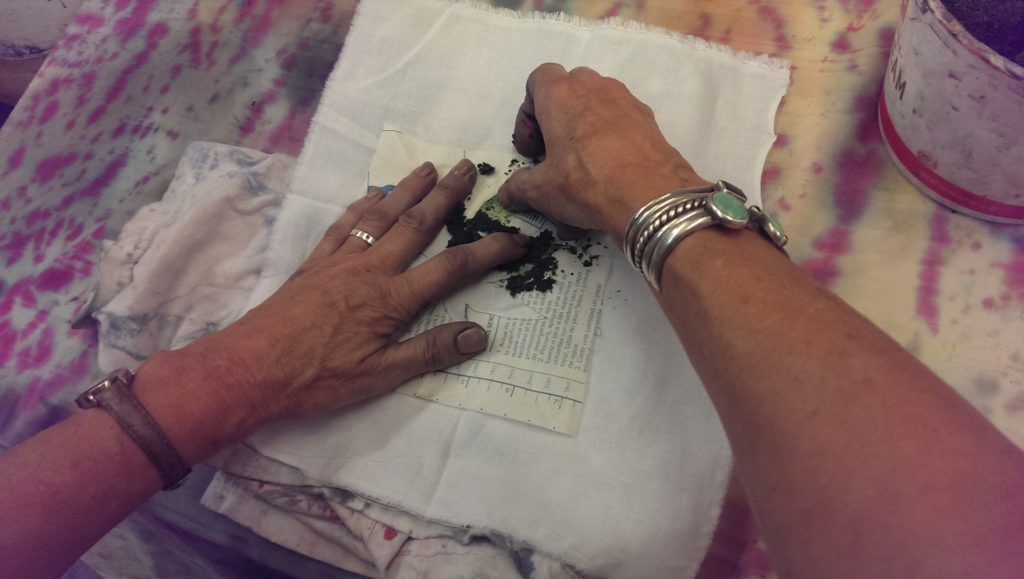
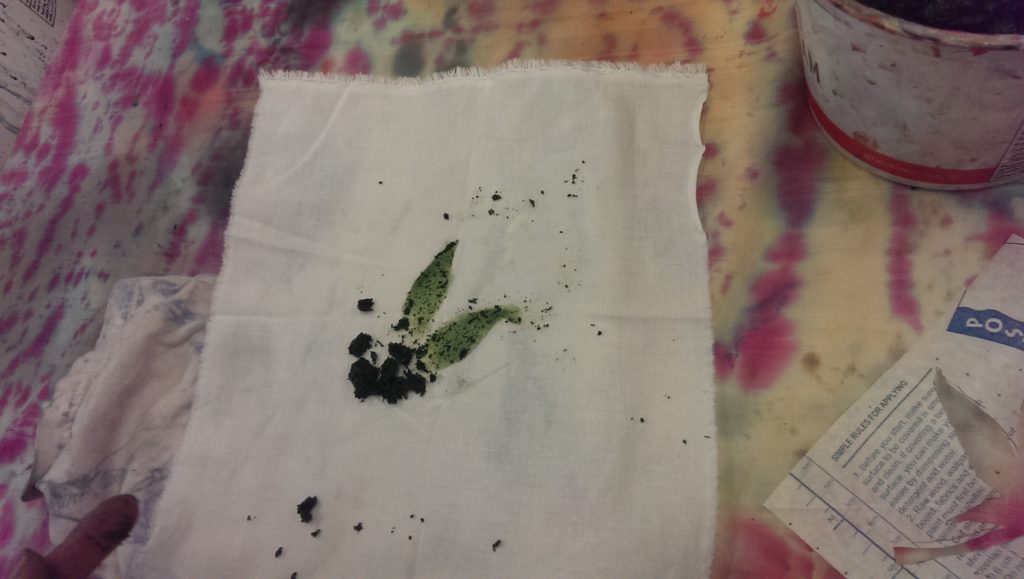
Bonus round: we also used the leftover pulp from the straining cloth to  “paint” on fabric— basically rubbing it into the fiber like a grass stain.

2016-09-27-20-07-01 2016-09-27-20-08-13

We let the pulp-prints dry and oxidize before rinsing. And although we did not do this step, here are instructions to precipitate out the indigo from a fresh bath, to use in a reduction vat. It’s a great teaching article using fresh woad.

Japanese indigo seeds are available from various places on line, and the plants like a warm, humid environment. Humid places can get several crops per season before the plants die. Places that are dry in the summer (like western Oregon) can get one crop during the growing season with irrigation.

How To Cheat at Yarn Samples

2

I’m a half-hearted swatcher at best. And I’m lazy. If I have a very specific project in mind then I’ll sample and swatch to make sure the colors, gauge and finished knit sample are what I want. But I will also admit to buying pretty dyed braids solely because I’m intrigued by the color combinations…and I will just sit and admire them without a plan to best showcase them. I hate doing spinning swatches with these braids, in part because I only have 4oz in that colorway, and if I don’t like the result I end up with less finished product once I come up with something I do like.

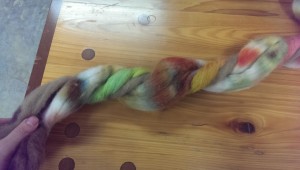
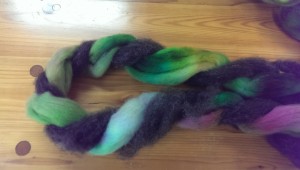
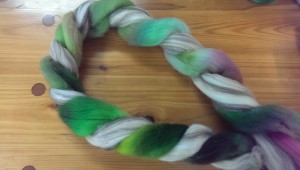
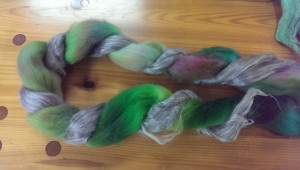
I bought these three braids last year, thinking they went together color-wise. I’m sure I could make a Knitty möbius shawl, or I could send them through the drum carder a little and they would blend together nicely. But I bought these braids because the colors are placed together as they are, and I’m interested in how plying can bring out the best (or not) in a finished yarn.

What to do with you braids?

What to do with these braids?

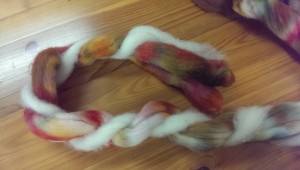
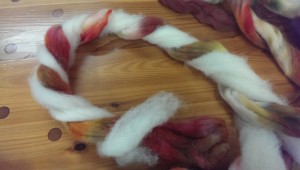
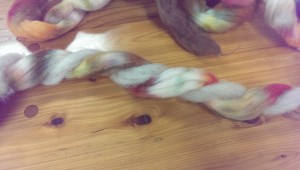
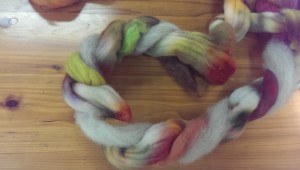
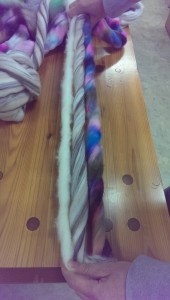
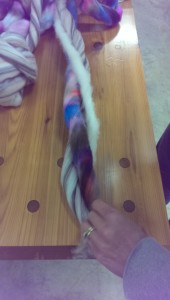
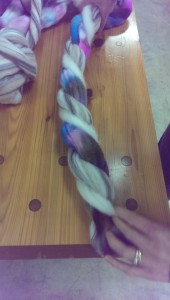
I had an idea: if I treat each braid as a macro single, I can get a reasonable idea of how any sort of finished yarn would look. It’s not a complete replacement for making sample yarn, but it gives a fair idea of how the end result will read. I simply put some twist into the roving and away I went. Here’s the roving on the left, plied onto itself:

Two-ply

Two-ply

All the white in that braid really shows up. It’s kind of busy. Here it is as a two-ply with the alpaca braid in the center of the first photo:

image

Two-ply with alpaca braid

This isn’t displeasing to me. The alpaca definitely cuts down on all the white.

Here are the three braids plied together in a three-ply:

Three braids...

Three braids…

image

…three-ply

Now that I look at them like this, I can see that the sea-foam blue in the mostly-green braid really doesn’t look good to me with the other colors. What are you doing there, sea-foam?! The good news is, I haven’t spun any yarn yet.

Here are some more options, plying with white Shetland roving from my sheep:

Two-ply

Two-ply

image

three ply

I like the two-ply, I think the three-ply has too much white. However, with the right project it could be nice.

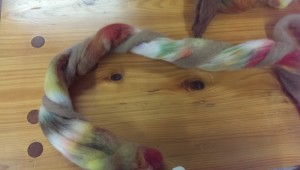
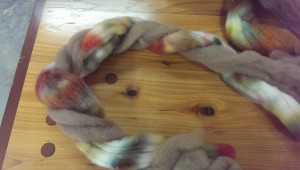
Some more options, with a natural brown ply:

Two-ply with brown

Two-ply with brown

Three-ply with brown

Three-ply with brown

Three-ply with alpaca and brown

Three-ply with alpaca and brown

I think if the brown roving was a little richer in color it would look fabulous. I could either over-dye that brown roving, or actually clean and card the lovely brown fleece from Charlie that’s sitting in the barn.

Here’s what I finally ended up with, and the good news for me is that it might enable me to start in on a project that I’ve had in mind for a while. I split the difference between the brown and the white roving, and tried a white with red-tipped Shetland lambswool fleece that I bought:

Brown and white heathered roving

Brown and white heathered roving

Two-ply

Two-ply

Three-ply with heathered roving and alpaca

Three-ply with heathered roving and alpaca

I really like this. The bright colors pop without being too garish. I think it will be a pretty, interesting yarn that I will be excited about spinning and knitting with.

Now for the green braid that didn’t actually go with the other two. I sort of assumed I’d ply it with black:

Two-ply with charocal

Two-ply with charocal

But that sea-foam is still a problem to me!

image

Two-ply with cyan

Again, the white parts just really stand out in a clunky way for me.

Here we have plied with a natural-colored merino blend:

Blended colored merino roving

Blended colored merino roving

image

Two-ply

I like this better than plied with the dark colors, which surprises me. If I’d been spinning to swatch I don’t think I’d have even bothered to try this. The other thing I like about this technique is that I can get an idea of how the barber-pole striping might look.

I also like this option, plied with a yak/silk blend:

Two-ply with yak/silk

Two-ply with yak/silk

For me, this is the winner. This might motivate me to spin up some Blue-the-goat mohair and do a boucle with this. In any event, I’m excited about this braid again, instead of feeling vaguely guilty that I haven’t done anything with it.

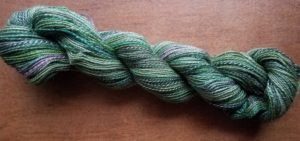
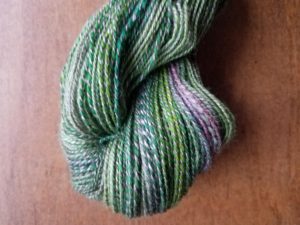
Update: here is that green braid actually spun up with the yak/silk. As I was playing it I felt disappointed in the result, but once I skeined it, it really loosks just like my quick sample, except much, much nicer:


Here is La Technique:

image image image


Add twist (in the same direction) to your “singles”. Hold them together, then turn them back around each other in the opposite direction until you have a nice ply. It took me just a little practice to get the hang of it, and now I can make mock-ups of all kinds of yarns. I’m pretty excited about this, because now I can make decisions without making any commitments.

Fun with Cochineal

2

After indigo, I bought a cochineal dyeing kit which contained the bugs, several mordants and some vague instructions. (I say the instructions were vague, but really they gave several options as far as time vs. temperature in mordanting. It’s one of those things that once you know what’s going on makes perfect sense.)

Rachel and I did a test run when she was here last April (Sheep Cabana retreat: dye as much stuff as possible in 48 hours), and here is what we came up with:

Cooking and straining some cochineal bugs

Cooking and straining some cochineal bugs

We started with 4oz of dried cochineal (which is a lot), cooked them for about an hour and then strained the liquid into the dye pot. I saved the used bugs for later. Then we mordanted our wool. We used some white Shetland and some grey mohair locks, and mordanted with both alum and tin, by simmering our fiber in each mordant bath for about an hour. I would say that our mordanting pots weren’t large enough, because the tin-mordanted wool definitely felted.

The dye pot

The dye pot, onion bag of mohair locks on top

We could have used a bigger pot.

Viola!

Viola!

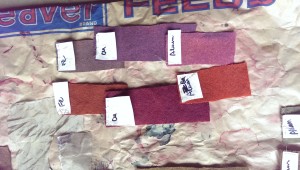
Here are the results, from top clockwise: tin mordanted wool, alum mordanted wool, alum mordanted mohair, iron after-mordanted wool, iron after-mordanted mohair.

Rachel left, and after a couple of months I got out the leftover cochineal bugs again and tried some more dyeing. (Those bugs sat on my patio in that plastic container, above, the whole time, ignored. I had no issues with them rotting or anything else unpleasant.) I re-simmered the bugs and left them sit overnight in the pot, and strained the bugs out in the morning. Then I did a series of successive dyeing on 50g each of alum and copper-mordanted wool:

Top, alum mordant Bottom, copper mordant

Top, alum mordant
Bottom, copper mordant

I heated the cochineal dye pot, added the mordanted wool and let it sit out on the patio here either all day or overnight. The total hands-on time was probably 1/2 hour.

Here it is spun up:

Successive alum mordant, left to right, with copper mordant wound into a cake far right. The orange is the immediately adjacent cochineal overdyed with weld.

Successive alum mordant, left to right, with copper mordant wound into a cake far right. The orange is the immediately adjacent cochineal overdyed with weld.

I’ve been taking some natural dyeing classes at the Oregon College of Art and Craft, and one of the neat things we did was dye with cochineal with no metal mordants. Instead we used 25% WOF of cochineal, 10% WOF powdered gallnuts (Gallic acid) and 10%WOF citric acid, all in the dye pot at once. Hot tip: we ground up the cochineal bugs and a little water with a mortar and pestle. No soaking required.

We simmered wool and silk noil for an hour and got these lovely colors. The cochineal strikes the wool and silk differently!

Shibori cochineal on wool

Shibori cochineal on wool

Left, wool, right, silk noil

Left, wool, right, silk noil

These are nice colors on their own, but I also wanted to experiment with this dyeing method as a base color. Here is the same fabric overdyed with indigo. One of the very interesting things about cochineal is that the color will shift from red to blue, depending on Ph. The middle samples are overdyed with indigo (about Ph 12) and rinsed, the far right are the same, but rinsed in a white vinegar solution (about Ph 3).

Cochineal overdyed with indigo

Cochineal overdyed with indigo

I also tried some after-mordanting, with iron, copper and alum mordants:

Left, iron after-mordant Middle, copper after-mordant Right, alum after-mordant

Left, iron after-mordant
Middle, copper after-mordant
Right, alum after-mordant

There is really a lot you can do with these little bugs, and a huge range of color, depending on what techniques you use. In other words, fun!

Gift Ideas for the Fiberista

2

Rachel suggested we put together a list of fun or useful gifts for the fiber fanatics in your life. Which is funny, because every year before Rachel’s birthday or Christmas I get an email from her husband asking for gift suggestions. In Rachel’s case I’m at an advantage, because we talk about our fiber plans daily, but putting this list together I’m at a disadvantage because nothing on this list is on the list I made for Rachel’s husband! My spinning Guild also has it’s year-end gift exchange in a couple of weeks, so it seems like there’s always an opportunity to buy (or make!) a well-received gift.

Here are some useful tools:

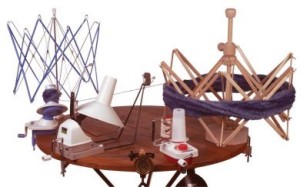
a ball winder

a ball winder with yardage counter

a yardage counter

a swift

Ball winders and swift

Ball winders and swift

a niddy noddy. Make a custom-sized one on the cheap out of PVC.

small scissors

measuring tape

a wraps-per-inch gauge

blocking pins

a diz:

Diz

a hackle

a blending board

a dog comb or flick carder for preparing fleece

a few extra bobbins for their spinning wheel. These are always welcome, but be sure you know what kind of wheel your friend has—different manufacturers make different sizes and they’re not always interchangeable.

soap nuts

spinning wheel oil! I’m always having to depend on my fellow Guild members when my wheel starts whining during meetings, because I don’t have a small travel tube of it.

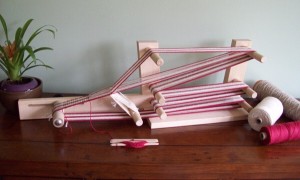
Does your friend weave? How about a travel loom, a pin loom or an inkle loom? There are plenty of instructions online on how to make a PVC inkle loom.

Inkle loom

Inkle loom

Does your friend only spin wool or alpaca roving? Maybe a gift of cotton, flax, an interesting synthetic fiber, or silk hankies. Rachel and I have found that spinning different types of fibers really helps with our overall technique. A tip: if you give silk hankies, include a bottle of talcum powder. It smooths over the rough places in your hands and makes mawata spinning a breeze.

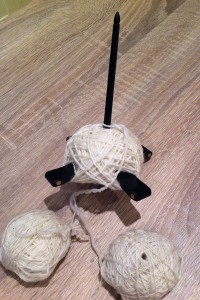
Does your friend have a drop spindle? A Turkish drop spindle? There are lots of beautiful hand-made spindles out there. Look on Etsy or search online for hand-crafted spindles.

Turkish spindle

Turkish spindle

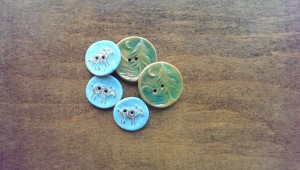
Notions. I love giving and receiving buttons. I find they inspire new projects, and you can usually find designs for anyone’s favorite interests. Etsy is also a great place to find handmade notions and shawl pins, by artists local to your area or from around the world.

Locally crafted ceramic buttons made by BeadFreaky that I found on Etsy

Locally crafted ceramic buttons made by beadfreaky that I found on Etsy

A salad spinner. These work great for getting the wet out of small batches of fiber. If you think your recipient will be confused, include a little unwashed fiber in the basket. Another tip: if your friend is in need of a salad spinner for, well, salad, definitely get her two! Thrift stores are a great place to find perfectly good second hand salad spinners for fiber processing.

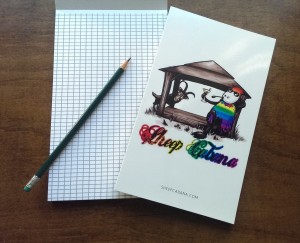
Knitter’s graph paper. Great for charting things or keeping track of where you are in a pattern (ahem, Rachel). We happen to have a handy-sized Sheep Cabana version available in our brand new Etsy shop:

Sheep Cabana Knitter's Graph Paper

Sheep Cabana Knitter’s Graph Paper

Books. We are a bit on the fence about books. I like ones that are reference books, stitch dictionaries, and other how-to types.

If your friend really likes making socks, the latest sock-pattern book might be up his alley. I would check out his library first. Your friend’s Ravelry queue or Pinterest boards are also good places to check for favorite designers and designs. Some designers on Ravelry also give the option to gift patterns electronically, which is great. Support your indie designers!

There are some novelty books out there which non-knitters tend to give knitters. Coffee table books, if you will. If you’re tempted by something like that, ask yourself how many faux-taxidermy meerkats or rustic-modern crochet ponchos your friend is going to make. If it’s a resounding “That many!” then go for it. But still: if your friend has an e-reader, consider the e-version of the book.

One last idea is project bags and small notions cases. Lots of people make these, probably people you already know in your Instagram feed.

If I’ve left anything off this list, it’s because it’s on Rachel’s surprise list. However, as far as gift giving goes, if in the long run your recipient would rather have something useful than be surprised, just ask them what they might want! I find that that’s often the most appreciated gift of all.


Autumn Leaves and Contact Dyeing

2
image

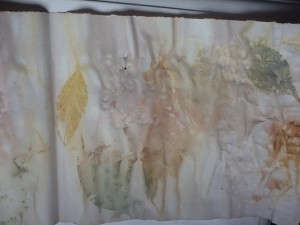
Instructor’s sample of leaf contact dyeing

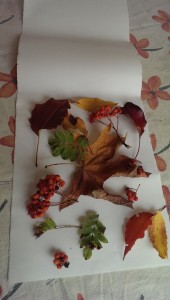
I had my first Natural Dyeing class at the Oregon College of Art and Craft last week. We started by walking the campus and collecting various autumn flora: fallen oak and maple leaves, pink-backed cherry leaves, fresh comfrey, spotted dying blackberry leaves, walnut hulls, tupelo, madrone and walnut leaves, Indian blood grass, and anything else that caught our eye. The ostensible purpose of this was to collect material to make our own contact dyed projects, but really it was to get us excited about natural dyeing. This time of year in the Pacific Northwest the ground is littered with dyestuffs, and the quick and easy method we learned yielded pattern as well as color.

image

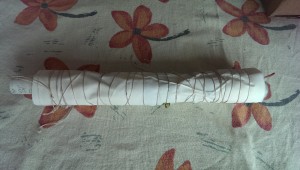
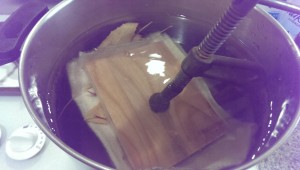
Once we collected our leaves, we laid them out onto fabric or paper, and either rolled up our fabric tightly around a stick (or for added color, around a rusty iron nail) or accordion folded and clamped for a shibori effect. These packets are then simmered in a water bath for an hour, and then removed and unwrapped.

image

image

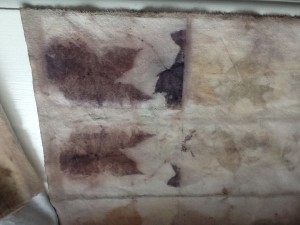
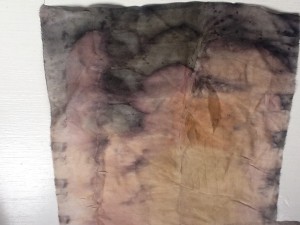
What I found most interesting about this technique is that there is really very little dye in individual leaves (for the most part tannic acids) but because of the wrapping or clamping, the color can’t migrate anywhere other than onto the fabric or paper. In other words, the opposite of leveling. In a lot of cases, the color transfer is more akin to printing— the fabric or paper is not really dyed per se, but stained or imprinted with the actual leaf color, giving pinks or greens which don’t exist as an actual dye. Our instructor cautioned us as much, saying that these colors will fade with washing or over time. That said, there definitely was dyeing of fabric around the periphery from the tannic acids, and also where the rusty nails provided an iron mordant.

Here is a leaf print where I had an iron plate clamped to the outside of my fabric packet:

image

Leaf print on silk noil with iron plate

And likewise wrapped around a large rusty nail:

image

Silk charmeuse leaf print wrapped around iron nail

Here is the difference of the dyestuffs on cellulose. For one, I didn’t get my packet wrapped tightly enough and the colors ran. For another, the yellows and greens remained printed while the tans of the tannic acids didn’t penetrate as much. I expect this to be a function of the density of the cellulose in paper form, and I would expect better tans on cotton yarn:

image

Wrapped leaf print on paper

This technique also led me to revisit my forays into dyeing with candy. I’d encountered poor results with a lot of candies that contained very little dye. So I tried some candy contact dyeing:

image

image

The candy melted pretty quickly, so it was hard to keep the fabric tight, but the dye migrated onto the fabric rather than into the dye pot. I can see some candy-related shibori in my future!

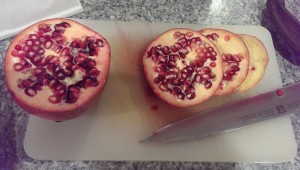
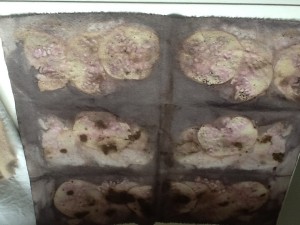
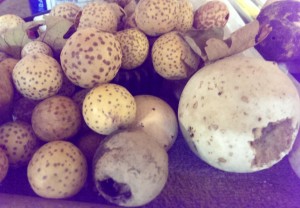
I’d also encountered  some inexpensive pomegranates at the grocery store last week, and per Rachel’s last post I bought them for some seasonal dyeing. Pomegranates contain ellegic acid, which are yellow tannins, so I thought this would be a quick way to see what sort of coloring I could get from them:

image

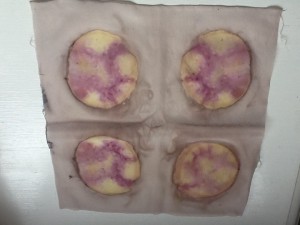
This is one slice of pomegranate:

image

Folded and clamped pomegranate slice on silk charmeuse

And here is multiple slices and layers, with the rest of the pomegranate in the dye pot:

image

Folded and clamped pomegranate on silk noil, over some walnut hull spots

Tight wrapping and clamping is the key to good transfer, but whether you are preserving autumn leaves, testing dyestuff potential, or finding another use for seasonal candy, it’s such a quick and easy technique that it’s definitely worth trying.

On Mordanting

8

Indigo is apparently the gateway drug of the natural dye world. It led me to try dyeing with cochineal, which should have led me to a better understanding of mordanting, except it didn’t. There are a lot of recipes, but not a fat lot of information out there on the science of natural dyeing. There is a lot of information on synthetic dyes. As it turns out, there is a good reason for this.

The history of synthetic dyes is also the history of organic chemistry, so the process of learning how to make synthetic dyes provided the chemical knowledge. The advent of synthetic dyes squeezed out the natural dyers’ guilds, so the new chemical knowledge wasn’t applied backward. There is a lot of good information out there on the invention of mauveine, the first analine dye. If you love history, how synthetic dyes changed the socio-economic world is fascinating, and it in part explains why there is precious little textile manufacturing still done in the US. Some of the more interesting monographs I’ve come across about the chemistry of natural dyeing are from India, Pakistan and Egypt, where there still are textile industries, and where scientists are taking another look at natural dyestuffs in order to have a more sustainable and less toxic impact on their environment. I’ve ended up learning about synthetic dyes, color chemistry, the quantum physics of color, synthetic fibers, and finally, mordanting and natural dyes.

That said, Maiwa and Turkey Red Journal are both excellent resources for natural dyeing information, including the chemistry, and they are both on the forefront of bringing the chemical knowledge back to the natural dye world.

So what is mordanting? If you are using metallic mordants, basically you are making your own acid dyes. Instead of using an acidic bath to promote ionic bonding as with synthetic acid dyes, the metal ions of the metal mordants have a similar polar effect. The mordants form covalent bonds with the color bearing compounds in the dyestuffs, which are the very strong bonds between atoms (sharing electrons in the outer shell). Since they are acid (polar) dyes, they therefore bond better with the positively charged amino acid chains (wool, silk) and poorly with cellulose (cotton, linen).

Tannic acid is a non-metal mordant, but “tannic acid” itself isn’t really a discreet chemical, but rather a broad heading under which several acids fall (which also happen to be tannins): Gallic acid, ellagic acid, and catechic acid. Most of the so-called “substantive” natural dyestuffs that require no mordanting have some form of tannic acid in them, for instance, sumac, pomegranate, fustic and cutch. Tannic acids bond well with protein fibers (think tanning hides), and also with cellulose plant materials. It also bonds well with the metal mordants, so plant fibers normally get pre-mordanted with tannic acid, and then again with the metal mordant.

I really wish I could tell you what chemical bonds are formed between tannic acids and these different fibers, but I’ve had no luck in finding scientific documentation thus far. I have to assume it’s not covalent bonding with cellulose just because fiber reactive synthetic dyes are so much more wash fast. I’m starting a natural dyeing class in October and I’m hoping to get to the bottom of this.

Nowadays aluminum acetate is available to mordant plant materials and the tannic acid step is debatable—this post and this post from Turkey Red Journal do comparisons of dyeing cotton cloth with different configurations of tannic acid/alum/aluminum acetate. Some of their considerations are cost and availability for dyers in poorer countries. Rachel does most of the cotton dyeing between the two of us, so I’m leaving it to her to take good notes on her findings.


image

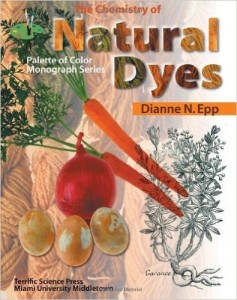
This monograph is great in detailing the chemical structure of wool. There is a lot going on in a strand of wool, aside from the positively charged dye sites. There are other chemical bonds that give rise to it’s strength and elasticity, and these are both things that can be affected by Ph, heat, and specific properties of different metal mordants like iron or tin.

There is a time vs. temperature factor in mordanting. A lot of recipes call for simmering your wool in your mordant for an hour, but that can easily lead to felting. Heating up your mordant and letting your wool steep overnight can often produce a more thorough saturation of the fiber and therefore more even dye uptake. Mordanting can take place before, during, or after the dyeing, but if it’s done prior to adding the fiber to the dye pot, there is more control over the mordant-to-fiber ratio, and the mordant bath can continue to be reused. This becomes more important when using the more toxic of the metal mordants, tin, copper and chrome.

Older mordanting recipes called for an excess of the metal mordants to ensure good dye uptake, in part because the strength of the mordant material was not guaranteed. Now we can source mordants with guaranteed strength and purity, so we can be a lot more precise and use recipes that leave little to no extra mordant in the bath. I did some trials with cochineal earlier this summer (that’s the next blog post). Using a recipe for a weighed amount of fiber, I tested my mordant bath to see if it was actually discharged (my copper did not seem to be), by adding more fiber to the “discharged” mordant bath and then soaking it in the dye bath and seeing if the dye strikes or not. When I was done I bottled up and saved my remaining mordant bath rather than tossing it out anywhere.

On hold for the next round of mordanting

On hold for the next round of mordanting

Once the mordant has bonded to the fiber it’s not going anywhere, so you can use different mordanted materials in the same dye pot, which is fun and interesting because you can see the effect the different mordants have.

Some metal mordants are toxic. Chromate poisoning is particularly unpleasant. Oxalic acid, often used to shift colors as an after-mordant is toxic. Synthetic “true black” acid dye is also toxic, as it contains chromium as it’s coloring component. None of theses things belong in the groundwater, or your septic tank, or near kids, pets or livestock. Entrapment is the state wherein metal particles are trapped in the steam from a water bath, and are then able to be inhaled, so don’t mordant in your kitchen. And for that matter…

Oak galls

Oak galls

A cautionary tale: we have a large tanoak tree growing next to the abandoned well out by our barn, and as a good source of natural tannins, I checked the interwebs for what the tannin concentration should be compared to oak galls, etc, for a possible recipe. What I found was that it wasn’t a tanoak. So I used a tree identification website rather than the book with illustrations I’d used initially, and the final question on the flowchart was “do the leaves smell like almonds when crushed?” Ironically as it turns out, this reminded me of the opening lines of Love in the Time of Cholera. My tree does smells like almonds when the leaves are crushed. It’s a cherry laurel, and when you boil the leaves you get hydrogen cyanide, which Nero used to poison his enemies’ wells. So. Back to collecting gall nuts.

The Science of Dyeing

5

What is color? When I studied philosophy as an undergrad, it was always treated as a “secondary quality”, that is, something that’s not intrinsic to the nature of the thing itself. And while it’s true that how we see color is a subjective function of our eyes and processing in our brains, the colors of things is entirely dependent on the physical makeup of those things. When we see color, we are seeing into the atomic and subatomic nature of things. In other words, a tree is green in a forest even if no one’s around.

image

To understand how color works, you need a little quantum physics. This monograph on color chemistry is concise, well-written, and with a little patience, accessible even for people like me who have only high school level chemistry and physics. If you are at all interested in how dyeing works, it explains everything.

image

I’m also slogging through this one. It’s highly technical and I can only digest a few pages at a time, but it details all the general information in the first book. If you want more after reading The Chemical History of Color, then this is for you.

image

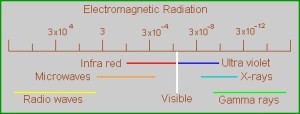
To very generally sum up, the visible spectrum that our eyes can detect takes place in a really small range of wavelengths, from red to violet. Everything of shorter wavelength then the red range is the infrared, and everything longer than the violet is the ultraviolet. How these wavelength are generated or influenced happens at the quantum level, with the interactions of the electrons within an atom or a molecule. The electrons need to be understood as waves, not particles as I learned in high school chemistry. There are four or five different models that explain wavelength production, depending on the arrangement of electrons in their shells around the nucleus, and how they combine, or don’t combine with other atoms. What’s neat about all of this is that our eyes are seeing what’s going on at the quantum level! (That’s my take on it. I can’t think of any good reason why humans spend so much time and effort changing the color of things, if not to influence the building blocks of the world itself.)

Natural dyeing shows us that there are some plants and insects that impart good, lasting color, and some that are fugitive. The beginning attempts at synthesizing these color compounds were all trial and error, but now computer modeling can predict what wavelengths a particular molecular configuration should yield, and how to bind it to a particular fiber. It should be noted that two things dyers care about, light-fastness and wash-fastness are two separate issues. Light-fastness depends on the ultra-violet spectrums’s influence, whereas wash-fastness depends on the type of bond with the fiber (for the most part). Ultraviolet wavelengths can greatly influence the visible spectrum. We see this when colors fade in the sunlight. This often comes into play in natural dyeing (with black beans and berries for example)…one of the advantages of synthetic dyes is that they’ve been designed to be less susceptible to this effect. Another advantage of synthetic dyes is their leveling ability, that is, to dye evenly. They’ve been designed to bond weakly with the fiber so that they can actually un-bond and re-bond, rather than strike all at once in a concentrated area. Some of the molecules used to produce color are quite large, especially in the blue range. This is why even when using an acid dye, there is still blue left in the dye bath even though it is fully exhausted. The color producing part of the molecule is so large that it will actually break off from the part that bonds to the fiber during the leveling process. One of the mysteries of indigo is how it’s able to produce a blue color out of a relatively small molecule (there are several theories).

Synthetic dyes are often described as brighter than their natural counterparts. This is because the synthetic dye molecule is emitting a vary narrow, specific wavelength, where a natural dyestuff, as a complex plant material, is emitting a broader range of wavelengths within that color band. Different mordants also affect the color in natural dyeing. The metals used in mordanting not only have the necessary number of electrons in their outer shells to form covalent bonds with the dyestuffs, but of themselves have different wavelength properties…precisely because of how the electrons are composed around the nucleus of the atom. (This website/app of the periodic table is great. It shows everything you might want to know about each element, down to the electron spins in each orbit.)

Color aside, to understand how dyeing works, you need chemistry: the chemistry of the fiber being dyed, and the chemistry of the dye. Here are two excellent blogs that explain the chemistry of synthetic dyeing in simple terms:

Gnomespun Yarns

Paula Burch’s All About Hand Dyeing

Again to sum up, there are different types of bonds that can be formed, and they depend entirely on what you are dyeing: the amino acid chains of proteins, or hydroxide chains of cellulose plant material, maybe a mixture of both in the case of synthetic fibers, (or none of these in the case of polyesters). Animal fibers have positively charged receptor sites, so ionic bonding occurs with acid dyes (and also some hydrogen bonding, which is like ionic bonding but smaller). Plant material’s OH hydroxide chains don’t have the positve charge sites that animal fibers do, so fiber reactive dyes are designed to form covalent bonds, which are very strong, in a basic, rather than acidic bath. Disperse dyes dye plastics at high temperatures and pressures, although there are disperse dyes available for the home dyer that work in the dryer. Direct dyes work through a force called substantivity, and they need to be rather large molecules in order for this force to work. Since they are so large they are not particularly wash fast, and the colors are often duller. They are generally used on plant fibers, and are a component of all-purpose dyes like Rit.

This post by Gnomespun Yarns does a good job explaining the difference between animal fibers and plant fibers, and how it affects dyeing. This one by Paula Burch does a good job explaining the different types of chemical bonds that are made with the various types of synthetic dyes. They are both well written, with nice diagrams, and really explain why it’s important to know the chemistry of what you’re trying to accomplish.

All of this is by way of the next blog post, which is about mordanting. The chemistry of natural dyeing is only very recently becoming well documented, and I’ve found that understanding the technology that succeeds it is the most straightforward way of getting to it’s precursor.


Hot Tips for Scouring Fleece

5

Our last Guild meeting was all about scouring fleeces, presented by Cydne Pidgeon.

Tip #1: If  you’re going to be scouring a whole fleece, place the fleece in a grocery basket that fits inside a large rectangular storage tub. You can fill your storage tub with hot soapy water and then lower the fleece in the basket. This way the fleece is always supported, even when lifting it back out to drain. You can have a second storage tub with hot rinse water at the ready. As a bonus, you can use your storage tubs for actually storing things when not in use.

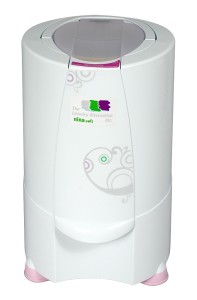
Tip #2: Don’t rinse it yet! Spin all that hot soapy water out before you rinse it. Cydne was doing this demonstration outdoors, and she had one of these devices:

image


This is an electric spinner. The advantage over your top load washer’s spin cycle is that it can go up to 1800 rpm, so it can get all the water out very quickly. It also runs on 110V instead of household appliance 220V, so it’s easy to plug in outside with an extension cord. It has a drain spout on the bottom so you can catch the rinse water, which is advantageous if you have a septic system like I do, so you can divert that grey water out of the sewer and onto your flower beds instead. This nifty device can be purchased here.

Cydne passed around a lock of scoured, spun-out Rambouillet, and it was very clean and almost dry. Since all the soapy water has been removed, there’s only need for one rinse. She spun the fleece in the spinner again after the rinse water, and it was clean, unmatted in any way, and again, almost dry. Fabulous!

Tip#3: If you’re only scouring some locks inside a mesh bag in a smaller bucket, you can still spin between the wash and the rinse…just use a salad spinner. These are readily available at second hand stores, so you don’t have to share with your lettuces.

Tip #4: If you are scouring very fine fiber (like angora), mesh lingerie bags are usually not small enough mesh to keep the fiber in. Bridal veil material is very fine mesh, and you can easily sew up your own bag with a zipper on top.

It’s hot outside. Those fleeces will be cleaned and dried in no time.