The Indigo Fruit Vat: La Technique

11

image

I recently took a class at the Oregon College of Art and Craft, on how to create a quick, environmentally friendly indigo fruit vat. This method was developed by Michel Garcia, a French chemist, botanist and natural dyer. This post is how to go about it. This other post tells you why it works.

The recipe is very simple: 1 part indigo, 2 parts pickling lime, 3 parts fructose, by weight. If you want to use powdered fructose, you just weigh all your ingredients out on a scale.

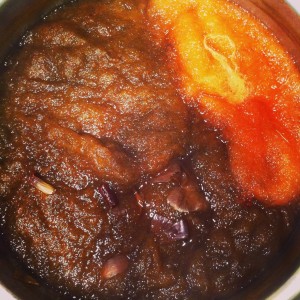
We used apple juice— cooked-down, mashed apples in water. Any sweet fruit will work, as will dates, or agave or honey, anything with fructose. The only thing not to use is citrus, which will change the Ph of the solution.

image

By volume, we filled the stockpots we were using about 1/4-1/3 full, then added warm tap water to about 2/3-3/4 full. From the approximate measurements, you can see that the fruit vat is very forgiving. The apple juice was hot and the tap water warm. A warm vat is desirable, but not over 140F, or the chemical reactions won’t take place. The amount of water is not important, other than to have enough space to dye under, because it must all be done below the surface.

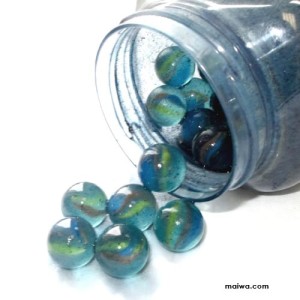
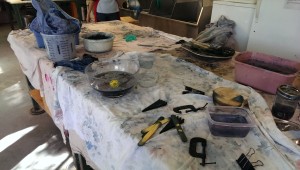
Next the indigo is added. We used 20g of powdered indigo for our stockpot. Since indigo is insoluble, it’s hard to stir in without either agitating (i.e. adding oxygen) the pot quite a bit, or having it sit on the surface. To get around this, we put the indigo and some water in a small mason jar with marbles and shook that mixture around vigorously for a few minutes, essentially making a slurry. That was then carefully poured down the side of the pot, to again, minimize the amount of air being introduced into the vat. Any indigo left in the mason jar was swirled around with more water and added as before.

image

Then we added the pickling lime, also hydrated with some water, and again, carefully poured down the side of the pot. Since we used 20g of indigo, we used 40g of pickling lime.

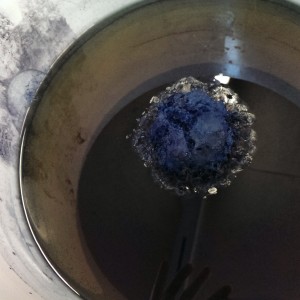
Then everything was given a good stir. By this I mean creating a vortex in the center of the pot, but not so much to be adding air back in. Once a good swirl was going, we held our spoons still against the side of the pot and let everything swirl to the center. At this point any oxygen bubbles come to the surface in the center of the pot. This is called the “flower”, and if the vat is working properly it should be a deep blue. The vat itself will be a clear greenish-yellow, and it will form  a skin on top.

Indigo fruit vat flower

Indigo fruit vat flower

We let the vats sit about an hour for the fruit solids to settle in the bottom of the pot, and for the reducing process to take place. However, out instructor dipped a piece of cloth into her vat about 5 minutes after she stirred hers, and it was already turning a light blue. It’s very fast!

As for the dyeing itself, it must be done below the surface of the liquid, to keep the oxygen out. The fiber should be wetted in warm water prior to dipping, again, to replace the air molecules in the fiber with water molecules. Dip gently down the side of the pot, and hold underneath for at least three minutes. YES WEAR GLOVES! Indigo doesn’t need a mordant, so you will dye your hands, too. During this time massage the fiber. This helps move the indigo into the fiber. As our instructor described it, “Indigo is a large, slow moving molecule. Give it some help.” Depending on what fiber is being dyed, it may be more or less tolerant of the alkaline solution it’s in. Cotton doesn’t mind, but silk and wool can be damaged from too long of contact— they can lose their luster. This is why traditionally cottons are dyed first, then silks, then wools. As the vat is used, it becomes less effective and also less alkaline. Because of the fiber structure of wool, it requires less of the indigo to achieve good color.

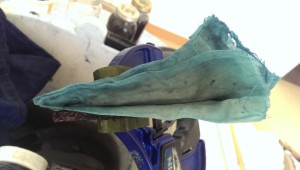
After your three minutes or so, bring the material out of the dye vat, and quickly hold it over another bowl to drip in. Any drips back into the vat also add air. Then you must expose the areas that you wanted dyed to the air, so that the indigo re-oxides and forms it’s electrostatic bond with the fiber. You will see it turn from yellow to green to blue, as this process happens. The rule of thumb is to have to material exposed to the air for at least as long as it was in the vat. If the material doesn’t oxidize, it hasn’t been dyed. The other rule of thumb is that at least three dips into the vat a required to achieve a good color. Each subsequent dip happens in the same way, with airing out in between.

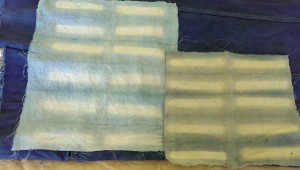
Making sure to air out between the folds for good oxidation

Making sure to air out between the folds for good oxidation

The materials you have dyed will be lighter once they’ve dried, so it’s best to get it darker than the final result you want. Each dip in the vat adds another layer of indigo to the material, so it will be more colorfast than just one dip.

Once the color is to your liking, rinse the material and let dry. If it’s wool or silk, soak in a vinegar/water solution to return the Ph to the liking of the fiber, then soak in a mild soap and water, and rinse. Rinsing is only removing the indigo that didn’t bond to the fiber.

The indigo water that runs off from the dyed material in the vat has been oxidized, so don’t add it back to the vat.

Using an indigo vat can only happen for so long before it stops working. This is not because the indigo is used up, rather, it’s because each “dip” into the dye vat also re-introduces oxygen, so the indigo becomes unavailable again, and there’s not enough fructose left in the vat to get the chemical conversion going again. When you are done for the day, add more fructose to your vat, and you can check the Ph with a Ph test strip. It should be around 9-10. If it’s lower than that, add more pickling lime.

When you want to use your vat next, add more fructose, stir the vat again and let the flower come to the surface. It should be dark blue. If you’ve used the vat a few times and the flower is light blue, you will need to add more indigo.

If you want to dispose of your vat, whisking air (specifically the carbon dioxide in the air) in will turn the pickling lime into calcium carbonate, aka chalk. You can go ahead and water your plants with this. Maybe a nice indigo plant.
Indigo-a-go-go: Better Dyeing through Chemistry

10

I recently took a class on making an indigo fruit vat. The class was great, the vat is quick and easy and you can read how to do it here, but when it was over I was left wondering what’s going on in there?

The interwebs are sort of helpful, in that you can read all about what happens in the indigo dye process, but there appears to be an underlying assumption that dyers aren’t interested in the chemistry behind what they’re doing, so there’s not a lot out there that puts it in layperson’s terms. And they tell you chemically what happens, but not why it happens. Personally, if I know how a process works, I find it a lot easier to do the steps involved correctly, because it makes sense why all the steps are there. If I’m trying to get a bunch of molecules to do what I want them to do, it will be more efficacious if I’m not bumbling around blindly.

So I’ve spent a good amount of time looking for answers to this question, and what I ended up finding was that the ways and means of indigo extraction and dye methods mirror a lot of other human technologies— in the automotive world I call it the Technology of the Day.

This is indigo:

image

This molecule is not what is found in indigo-bearing plants (and snails!). True indigo (indigofera tinctoria) and woad, for instance, each contain different indigo precursors— molecules that will turn into indigo once they’ve been oxidized.

This is indican:

image

This is the precursor to indigo found in the indigofera tinctoria plants. The bow-tie shape is a glucose molecule.

This is indoxyl and this is what actually penetrates the fiber in the indigo vat. The bow-tie shaped glucose has been removed:

image


When making an indigo vat from fresh plants, all that needs to be done is remove the glucose part of the indican, and you get the smaller indoxl molecule. This is what will penetrate the fiber, and then turn into indigo with the addition of oxygen. Putting the fresh plants in a vat and fermenting them will remove the glucose, because the yeasts from the fermentation will eat the sugar part of the molecule and leave the indoxl behind. Here is a not only a nice article about different indigo precursors, but also a step-by-step tutorial on how to dye with fresh woad.

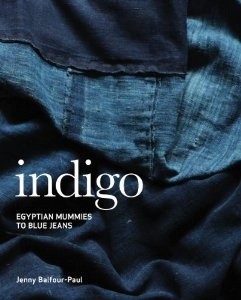
The indigo can also be precipitated out at this point instead of attaching it to a fiber. This will be the powdered indigo. The main thing to keep in mind is that once it’s been oxidized, it’s all the same indigo molecule; even synthetic indigo is identical. (*Mostly. I’ll come back to this later.) There is a lot of socio-economic history surrounding the trade and use of indigo, and it’s really fascinating, and I recommend this book which lays it all out in great detail:

image


The turning of soluble indigo-precursor plants into insoluble indigo is where we then go. The indigo can be moved around and traded rather than be tied to the place and season of the plant material. But it’s also one step forward, two steps back: that indigo molecule is not soluble in water. The indigo precursors in the plants are soluble, but in order to make indigo soluble, the oxygens on the indigo molecule need to form other bonds. The indigo needs to be turned into indoxl, then it can be worked into the fibers to be dyed. When the fiber in this dye bath is taken out and reintroduced into the air, lo and behold it oxidizes— it takes up the oxygen molecules from the air and turns back into the insoluble indigo molecule, where it is held fast by electrostatic bonds within the fiber. The best technical description that I found of how the indigo molecule bonds with fiber can be found here.

There are actually a lot of ways to go about making indigo soluble, and they all involve a reducing agent and an alkaline solution. This is the  indigo vat. There are a lot of reducing agents, some of them very effective, and also toxic. For instance, here’s the process for dyeing jeans. A reducing agent has free electrons that are readily available to bond with any oxygen in the vat, whether it be on the indigo molecule or oxygen from the air.

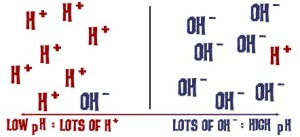
Indigo vats need to be alkaline. An alkaline solution simply has more OH ions than H ions:

image

I couldn’t really find any good descriptions as to why the vat needs to be alkaline— what work are those OH ions doing? I ended up calling my brother in-law, who has a degree in chemistry: a reducing agent adds it’s electrons to form other compounds, so the oxygen bonds on the indigo are transferred and form alcohol chains with the reducing agent. Alcohols are very water soluble. The OH’s in the alkaline solution strip hydrogens off this alcohol group and we end up with the indoxyl. The OH ions are highly reactive, and essentially make the solution even more soluble. The more OH ions, the stronger the alkaline solution is (and the more careful one needs to be in using and disposing of it).

As there are a lot of reducing agents, so there are a lot of ways to go about this reduction, and you can see echoes of the original use of indigo-precursor plants: Fermenting urine is a tried and true method, because the ammonia in urine is already alkaline. Another traditional method is fermenting madder root and bran with soda ash or lye. Fermentations, aside from eating sugars in the original vats, also produce sulfur-containing organic compounds as by-products, which are effective reducing agents. As with any fermentation, you are relying on a process that involves time, often days, at a constant warm temperature. Not only do you have to wait to do your dyeing, but you must rely on a successful fermentation process. Commercial denim dyeing uses very efficient but also much harsher solutions, to the point where repeated dips in the vat need to be carefully timed so that the oxidized indigo already on the denim doesn’t get re-reduced and therefore removed again from the fiber.

I’ve made soap, and I’m not a big fan of dealing with lye, so I’d prefer a weaker base. I’ve successfully made an indigo vat with the madder root and bran, and washing soda which has a weaker Ph than lye. It took about 10 days to be ready to use, and it’s, shall we say, a little stinky. This is the Technology of the Day part: how to get the result you want as cheaply and easily as possible. Cheap and easy are relative terms— for instance, what’s the cost to the environment, or the person using a highly alkaline solution? When you are done with the vat, how are you going to dispose of it? As a home dyer, you can make these choices for yourself.

The fruit-vat method that I learned uses fructose from cooked-down fruit, which are reducing sugars, and pickling lime (calcium hydroxide) to make the solution alkaline. Fruit sugars are an expedient way to make a vat because they have free electrons available at the end of their chemical chains, and so are oxidized rapidly. Interestingly, sucrose, table sugar, will not work. Sucrose is a combination of glucose and fructose, but the way that chemical bond is formed takes up the free electrons at the ends of both chemical chains. Sucrose is not a reducing sugar. But water boiled down with fruits, dates, or honey and agave, all work well, and of course powdered fructose. Citrus doesn’t have a lot of fructose anyway, but the acids in citrus are also going to also going to make the vat less alkaline, so it’s not recommended.

So the sugars bonds with the oxygen, then the OH from the pickling lime reacts with the resulting molecules. Eventually the reducing agent gets used up: the sugar is turned into an acid and so is no longer a reducing agent. Addition of acid will change the Ph of the vat. The enemy of the indigo vat is air, because that re-introduces oxygen into the vat, which turns the indoxl back into indigo, and uses up the reducing sugars. Less introduction of air into the vat means a longer dyeing session. The vat needs to be kept warm, so that those molecules move around and react with each other, but not so warm that the reactions don’t take place. (The traditional fermentation vats would be at the right temperature anyway, to maintain the environment for the yeasts and bacterias.)
image

*So it should all be the same color if it’s all the same indigo molecule. Yes. Except if the indigo is precipitated from a plant source, it’s not going to be 100% indigo. There will be other molecules from the plant and the surrounding soil in there as well. Depending on what they are can change the appearance of the color. Also, depending on what fiber is being used the color will appear differently, because of the way that indigo bonds with the space within the fiber. If it’s lustrous like silk or matte like cotton it will appear differently. Depending on how alkaline the solution is, the protein fibers of silk or wool can be damaged. Depending on how well the fiber is worked in the vat will also effect how the color appears, based on how thoroughly the indoxyl is actually worked in or not.

I’ve spent about a month since my indigo class trying to get answers to my question, and I finally feel pretty satisfied that I’ve learned what I wanted to know. This process has also shined a light on the fact that so many natural dye recipes are just that, recipes, without divulging the science and available technology behind them. My hope is to demystify the processes so I can dye with confidence and reasonable expectations. Cochineal, you’re next!

Plying is Blending

2
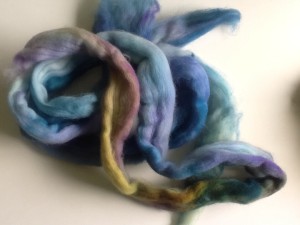
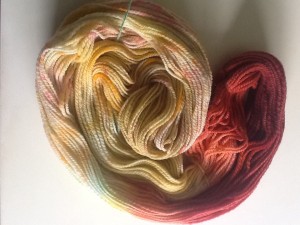
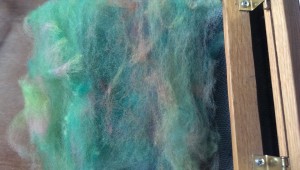
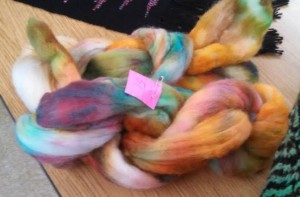
Malabrigo Nube roving Indiecita colorway

Malabrigo Nube roving Indiecita colorway

During my candy-dyeing experiment, I made roving that I was pleased with, but once I’d spun it and plied it with itself, I didn’t like the resulting yarn. I couldn’t find anything on the interwebs about how color changes through plying the same colorway. There are numerous examples of plying with neutrals, and there’s this nice Knitty article about how color changes when drafting vs. plying. So this experiment is to try and sort out how color changes through plying within the same colorway.

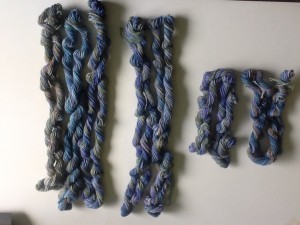
Here’s my singles laid out for plying: (from left to right) a single, chain-ply three-ply, two-ply, and three-ply.

Singles for plying

Singles for plying

Here they are plied:

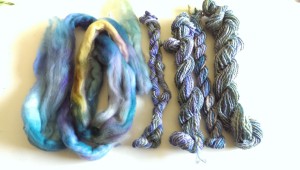
Roving, single, two-ply, chain-ply three-ply, three-ply

Roving, single, two-ply, chain-ply three-ply, three-ply

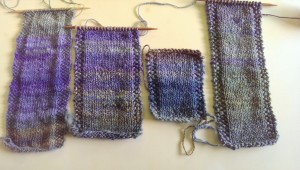
The three-ply appears obviously different. But the proof is in the pudding (or as Rachel says, the proof of the pudding is in the tasting), so I did some swatching:

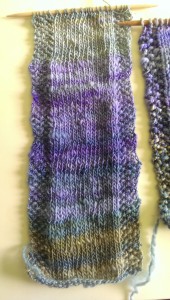
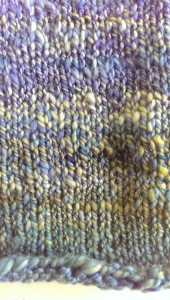
Single ply yarn

Single ply yarn

I didn’t really enjoy spinning this roving because it was a bit felted and didn’t draft very well. This resulted in a slubby single, but knit up I like the texture the slubs add. The colors and striping are the same as the roving. So if I like how it looks as a single, any plying is going to modify the colors and texture.

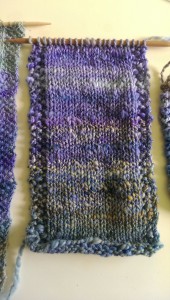
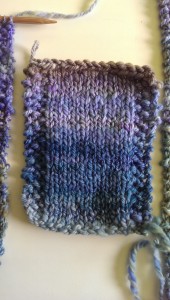
Two-ply

Two-ply

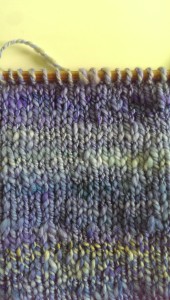
This swatch ended up being the most dynamic, color-wise. The areas of high contrast (the yellow bits) give it a marled look. Depending on the project, this could add a great deal of interest, or just make it busy. There is some color striping but it’s pretty random. The areas of low contrast, with blues plied with each other, are less vibrant than the same color in the single.

Two-ply close-up: muted blues

Two-ply close-up: muted blues

Two-ply close-up: marled yellows

Two-ply close-up: marled yellows

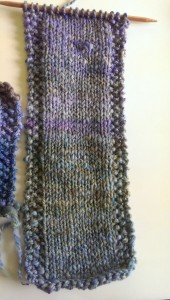
The chain-plied three-ply I expected to maintain the striping of the single swatch, just with thicker yarn, but the plying softened the color changes, and actually muted the colors:

Chain-ply three-ply

Chain-ply three-ply

I picked the three most contrasting singles for the three-ply to try and get the maximum color variation:

Three-ply

Three-ply

The color changes have been blended out, so while there are areas of different color, the overall effect is a very gradual shift. Except for one spot where all the slubs lined up, the slubbiness is gone too. I have an automotive background, so this really reminds me of a three-phase alternator, so made to cut down on the low-spots in alternating current and provide a smooth, constant flow:

It's all about the math!

It’s all about the math!

So: when plying with the same colorway, the ply is going to change the color. A two-ply will only have half of each each single, a three-ply will only show a third of each single. I definitely should have swatched the single I’d spun from my candy-dyed roving to see if I liked it as-is. Swatch early, swatch often!

image

Turning handwoven fabric into a garment

12
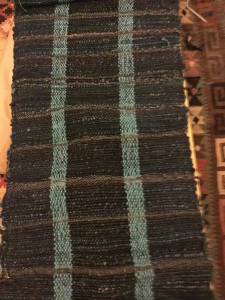
Handwoven awaiting transformation

Handwoven awaiting transformation

Rigid heddle looms may not be fancy or complicated, but do not be deceived. You’re not going to weave acres of jacquard, but don’t think placemats, table runners, scarves and hand towels are your only options on a rigid heddle loom.

Two years ago when I bought my little loom I had no idea that with some experimentation, practice and patience I’d be able to make a garment from fabric I’d created. For one thing, the idea of cutting my handwoven cloth terrified me. Also as relatively inexperienced seamstress, I wasn’t confident I could create a wearable garment.

I took the small amount of fabric I’d woven on a 20″ (50 cm) Ashford Knitter’s Loom up to Clacton-on-Sea for a lesson in sewing with handwoven with Sarah Howard. Sarah, along with Elisabeth Kendrick, is the author of Get Weaving, which I blogged about earlier this year.

Sarah helped me find a pattern that would work with the 175cm of fabric I had. We used a commercial paper pattern to get an idea of size and shape and then made some modifications for fit and the fabric.

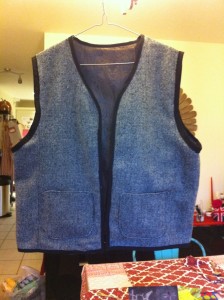
The next step was to make a paper pattern to use to then sew up a calico to see how the garment looked. I used some denim for the calico. It allowed me to see where changes were required (in the armpits!). Once that was done, I went a way with instructions to test out the pattern on store-bought fabric. Sarah says it’s important to do a trial run before diving into your handwoven. Lots of issues can be sorted out on the sample piece. For example, I found I needed to change the shape of the side pieces slightly. Making a sample made me think about bias binding and lining too.

sample garment

sample garment

My sample looked pretty good, but I realised I would have to do the pockets a bit differently on the final piece–ie with biased binding and the fabric backed by iron-on woven interfacing. I also decided that gold/black lining would not look good with the handwoven and went for a solid blue silk.

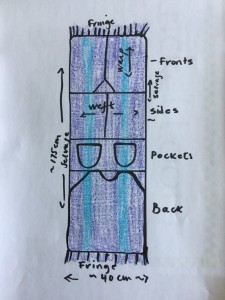
Here’s a couple things to keep in mind when you’re placing your pattern on your handwoven:

– Make sure all the pieces fit. Measure the length of fabric without the fringe.

– Think about the best use of your fabric’s selvedges and hemmed ends to reduce the potential for fraying and binding.

– Make a note of the direction of warp and weft in your fabric. How does that influence how you place your pattern on your fabric? You probably want all your pieces going with the warp.

My layout looked like this:

layout

layout

I was careful to place the pockets to match up with the stripes on the two front pieces.

The next step was to cut out the pieces.Once I did, I carefully applied strips of iron-on woven interfacing to the fabric to prevent fraying. Then I zig-zag stitched over that.

I sewed together the fabric pieces as well as the lining. I didn’t sew in the lining, but bound the piece together all at once with bias-binding tape. I made it myself, which wasn’t difficult, but it was time consuming. However, store-bought bias tape is pretty poor so I do recommend taking the time to make it yourself.

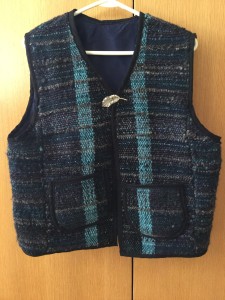
Et voila! Garment!

finished garment!

finished garment!

A few things to keep in mind when sewing with handwoven.

– Remember your woven fabric may be quite thick. How is that going to impact your seams? Will your garment work well with chunky seams?

– Use iron-on woven interface to prevent fraying. It also makes it easier to sew.

– Go slow! Once you machine sew handwoven fabric, it’s really hard if not impossible to pick out without destroying the fabric.

– Handwoven is stretchy. Think about how that might cause difficulties when sewing up or when putting in a lining.

applying iron-on woven interface

applying iron-on woven interface

Onion skins, madder & gorse blossom

1
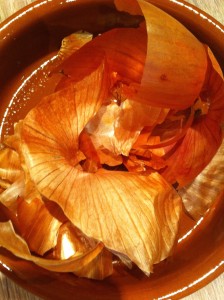
Onion skins

Onion skins

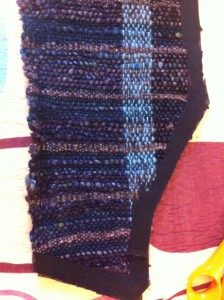
Natural dyeing is something I’ve wanted to try since one of my fellow guild members —Jackie Crook–gave a talk and demonstration last year. I’ve been saving onion skins, trying to grow woad, looking out for natural dye stuff as I’m driving through the Essex countryside. A few weeks ago after the first gorse blossoms appeared I got out my dye pots and started thinking about a dye garden.

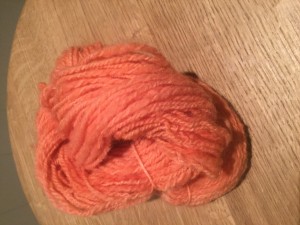
I’ve borrowed Jill Goodwin’s A Dyer’s Manual from the guild library. I followed her instructions for mordanting–I used Alum–and dye stuff to fiber ratios. I soaked madder, made a gorse blossom liquor an

Melon Colorado from madder

Melon color from madder

d boiled up some onion skins.

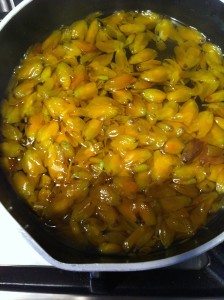
simmering gorse blossoms

simmering gorse blossoms

I used some White-faced Woodland and fawn-colored Shetland fleece as well as some BowmontXDorset (BoDo) and angora yarn to test.

The BoDo/Angora could have used a little more dyestuff to bring out a deeper red color. Next time I’ll be more careful about my dyestuff:fiber ratio.

top: gorse, bottom: onion skins

top: gorse, bottom: onion skins

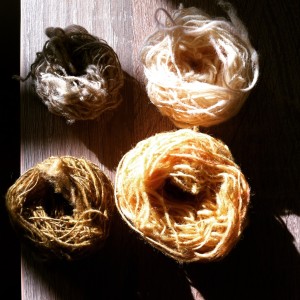
I was most excited by the onion skin result on the fawn-colored fleece. I gave a brilliantly rich green/gold/brown tone. The onion skins dyed the white fleece a lovely brown/gold.

Onion skins with two colors of fleece

Onion skins with two colors of fleece

The effect of the gorse blossom was much more subtle. The white fleece took on a soft lemon tone and the lighter parts of the fawn fleece did too.

One reason–apart from lack of time–I hadn’t gotten into natural dyeing was I thought mordanting the wool would be a pain–it wasn’t. I also wondered whether natural dyeing could possibly yield better results than acid dyes.

Well. Natural dyes yield much subtler tones. You’re not going to get fancy multicolored roving using this method. And that’s OK.

What about the dye garden? Well madder, woad, weld and polygonum tinctorium (indigo) seeds have been found. It’s still too cold to plant anything here, but the ground is being prepared.

Guild Challenge: The Electric Kool-aid Fiber Test Results

2

The test results are in! At our February Guild meeting, everyone brought their projects from the Kool-aid dye challenge.

Here are the winners, as voted by the Guild members:

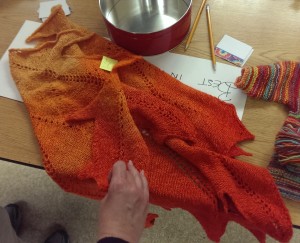
Leaf shawl, from different strengths of yellow #6, then overdyed to mitigate the obvious stripes. Lovely.

Leaf shawl, from different strengths of orange, then overdyed to mitigate the obvious stripes. Lovely.

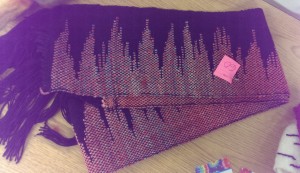
Saori scarf woven on rigid heddle loom, using blue and red dyes for a purple effect.

Saori scarf woven on rigid heddle loom, using blue and red dyes for a purple effect.

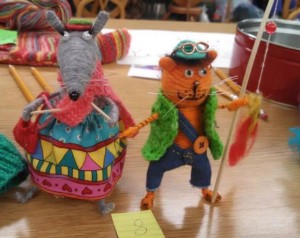
Grand prize winner. All colors used. Too adorable!

Grand prize winner. All colors used. Too adorable!

Here are some examples from people who have dyed with Kool-aid before, and know that it takes a lot of dye to get a lot of color:

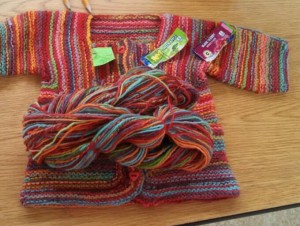
Child's jacket made from mitered squares. Love the intense colors.

Child’s jacket made from mitered squares. Love the intense colors.

"Sunset Colors" yarn. The turquoise shade is great.

“Sunset Colors” yarn. The turquoise shade is great.

Knit cowl. The charcoal grey tones down the vibrant colors.

Knit cowl. The charcoal grey tones down the vibrant colors.

Sophisticated roving with color blending.

Sophisticated roving with color blending.

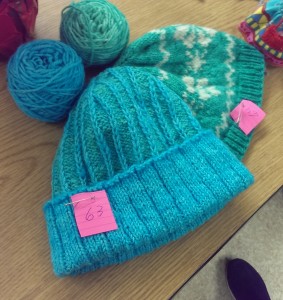
A pair of green and blue hats.

A pair of green and blue hats.

Here are some examples of using less dye to nice effect:

Knit cowl with pastel colors and grey alpaca for a tweedy look.

Knit cowl with pastel colors and grey alpaca for a tweedy look.

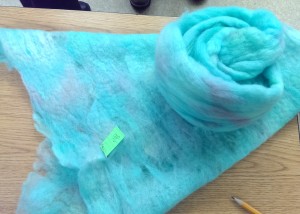
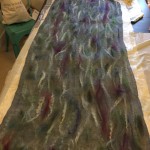
Nuño felted sky blue cloth with lavender undertones.

Nuño felted sky blue cloth with lavender undertones.

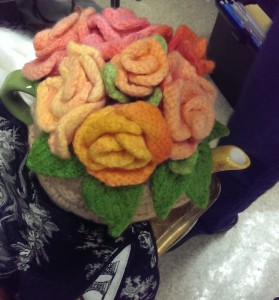
Tea cozy topped with knit flowers, which were hand painted with Kool-aid, just as one would marzipan.

Tea cozy topped with knit flowers, which were hand painted with Kool-aid, just as one would marzipan.

Some excellent examples of blending with neutrals:

The same hat-and-mitt set, two ways.

The same hat-and-mitt set, two ways.

Knit socks, blue and orange. The heathered blue tones down the orange.

Knit socks, blue and orange. The heathered blue tones down the orange.

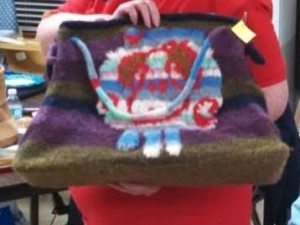
Felted bag with sheep. Lined and reversible!

Felted bag with sheep. Lined and reversible!

What did I end up doing? My initial attempt at using Kool-aid ended with yarn that I hated. I went off on a tangent and dyed a lot of fiber with candy. I made this project bag. I got Spinner’s Block. I got over it. And in the 11th hour, I spun and dyed this:

Targhee two-ply, dyed with a jawbreaker, tic-tacs and sprinkles, then gradient dyed with red-to-blue Kool-aid.

Targhee two-ply, dyed with a jawbreaker, tic-tacs and sprinkles, then gradient dyed with red-to-blue Kool-aid.

I didn’t win, but I learned a lot, including an appreciation for dying spun yarn, not just wool. Up next: bring on the natural dyes!

Nuno felting part one: rub n’ roll

2

Nuno felting is one of those techniques I’ve always admired and wanted to try, but never got my act together to do. A couple of months back I bought Felt Fabric Designs by Sheila Smith and again my interest in nuno felting was piqued.

I was particularly interested in some of the techniques Smith shows “laminating” fabrics using felt and also upcycling thrift store scarves and fabrics into felted patchworks.

But I haven’t tried any of those techniques yet. Usually I dive in and try techniques even if they’re a bit complicated, but this time I tried some of the simpler nuno felting processes.

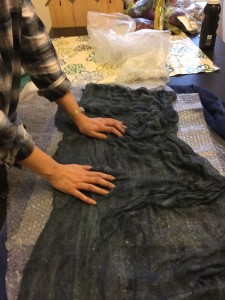
After a rummage in my closet I found a scarf I’ve never worn. It’s an open weave and 100% silk–ripe for nuno! Here it is on the table before felting. It’s on a strip of bubble wrap. I’ve spread light layers of Wensleydale roving and silk fibers on top.

100% silk open weave scarf readied for nuno

100% silk open weave scarf readied for nuno

The next step was to cover with an old net curtain, wet down with cool water, smooth some olive oil soap over the net curtain and begin to rub!

My good friend and avid felter Gaynor was on the scene to offer advice and lend her fingers for rubbing!

Gaynor flipped the fiber-covered side face down onto the bubble wrap to give it a little extra rub

Gaynor flipped the fiber-covered side face down onto the bubble wrap to give it a little extra rub

The bubble wrap provides the friction to felt the fibers into the silk scarf. Rubbing the fabric and fiber through the net curtain starts the felting process. Once you can peel the netting off without the fibers sticking to it, you remove the netting, place another layer on top then roll it up and begin to roll.

Gaynor’s tip for rolling the fabric in the bubble wrap was to roll the whole thing in a towel and roll it and then roll it some more. We didn’t keep an accurate count but I’d guess we rolled it a few hundred times in each direction?

What do I mean by rolling it in each direction? Well, once you roll your piece of fabric a few hundred times, unroll the bubble wrap bundle and re-roll it from the opposite direction and start the whole process again. It’s good to have a friend to help with the rolling if your arms get tired or you get a bit of finger ache.

Once you’re satisfied the fiber has mingled (or stuck) to your fabric give it a rinse in very hot water. Wad it up in a ball and throw it into the sink a few times. Then rinse with cold water. Take a look at your fabric. Have the fibers you’ve applied felted into it as much as if you would like? If not, give it a few more rolls in the bubble wrap and then the repeat the hot/cold rinses and throwing process.

Gaynor and I found that with this scarf, silk felted really well but the Wensleydale took a lot of persuading. If you’re after a shiny or even metallic effect go for more silk, less wool. Once the fabric is dry give it an iron, which brings out the silk’s shine.

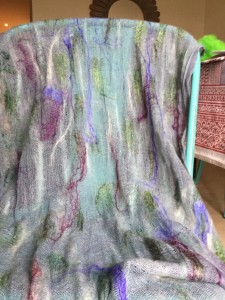
Here’s my final product. I love how this technique has turned a drab unworn scarf into something I’m now wearing all the time. Interested in some amazing nuno felting? Check out the Sheep Cabana Pinterest board.

Finished scarf: drab to fab!

Finished scarf: drab to fab!


Dyeing with Candy

5

Somewhere in between my Guild’s Kool-aid dye challenge and my obsession over sprinkle-dyed yarn, I woke up in the middle of the night and thought “Maybe I can dye yarn with actual candy sprinkles.”

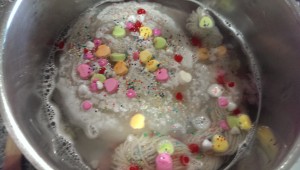
On the face of it, it’s not that crazy of an idea: it’s the same food grade acid dyes that are in the different packets of Kool-aid, along with some extra sugar, etc., that can be washed out in the rinse. After some test runs, I’m happy to report that, yes, you can dye yarn and roving with candy, and get some pretty cool results. There are some caveats here: some candies work great, some work not-at-all, and some are just not worth the trouble. It’s going to be cheaper and more controllable if you just use your favorite acid dye, but if you’re looking for something to do with candy besides eat it, this is a thing, and a pretty interesting thing at that. This would also be a great Valentine’s gift for the knitter/spinner in your life who has everything. (That’s a joke, they obviously need more fiber.)

The candy aisle

The candy aisle

I went to my local supermarket and shopped in their bulk candy aisle, which is extensive, and bought things I thought would be cool/effective in dyeing: jawbreakers, candy bracelets, red hots hearts, candy sprinkles, Lifesavers, tic-tacs, a bag of candy-coated, chocolate-covered sunflower seeds (yes, that did go horribly wrong. Sort of.) I didn’t buy any jelly beans (expensive!) or anything gummi (washing out gelatin) or anything else chocolate.

Jawbreaker, tic-tacs and sprinkles

Jawbreaker, tic-tacs and sprinkles

I started out with 2oz of superwash Merino in a just-simmering water bath with a splash of vinegar, and added a jawbreaker, some tic-tacs, and some sprinkles, and I had pretty good results. There was too much fiber for the amount of dye, and the jawbreaker left some weird candy pieces even after the rinse.

Washed and dried

Washed and dried

The Lifesavers were a disappointing bust. One takeaway is that translucent candy doesn’t require a lot of dye, and it just dissipates in the water without doing much of anything. Likewise the Nerds, the candy bracelets, the lemon heads, the colored sugar sprinkles, all didn’t contain enough dye to do anything. So too with the gobstoppers, the small version of the jawbreakers.

Lifesavers and 1oz Shetland roving

Lifesavers and 1oz Shetland roving

Lifesavers. Meh.

Lifesavers. Meh.

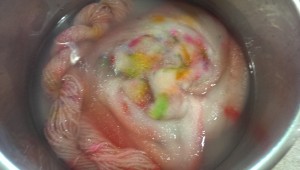
Surprisingly, the sweethearts candies performed like bath fizzies, and had a lot more dye in them than one would have thought. This is when I learned the real secret of candy-dyeing: it’s got to take a certain amount of time for the candy to dissolve in order for it to have deep color penetration, and it’s got to be in direct contact with the fiber. Just floating around in the water will result in washed out colors.

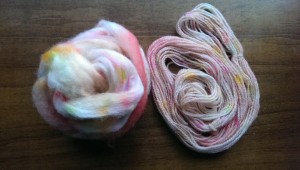
1oz Shetland roving, 1oz Llanwegnog handspun with Sweethearts, red hots and sprinkles

1oz Shetland roving, 1oz Llanwegnog handspun with Sweethearts, red hots and sprinkles

Melting and dyeing

Melting and dyeing

Rinsed and dried

Rinsed and dried

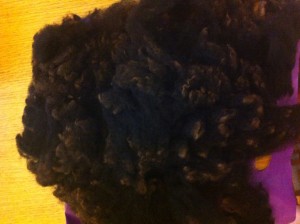
Because I had to know, I did dye some more superwash Merino with the candy chocolate sunflower seeds. Several things: I wouldn’t do this with anything but superwash, because I had to rinse it in hot dish-soapy water five times before it was reasonably chocolate-free. I inadvertently dumped the whole bag into the dye pot, and it resulted in a mostly chocolate brown colorway. When I let it cool there was hardened grease on the surface. I’m assuming it’s the palm kernel oil or what-have-you, but it was like skimming the fat off a pot roast. Also, there were sunflower seeds everywhere. (I think I was thinking, “less chocolate, less mess.”) BUT. Spinning this stuff up, it feels like cashmere. The fat content must have coated the fibers, because it’s simply a dream to spin. And it looks a lot like chocolate. I can’t not recommend this, especially if you have superwash sitting around not doing anything.

Superwash Merino dyed with candy-coated chocolates

Superwash Merino dyed with candy-coated chocolates

Chocolately handspun

Chocolately handspun

For a Valentine’s project, or a kid’s project, or just because you’re curious like I am, definitely go try dyeing up some fiber with candy.

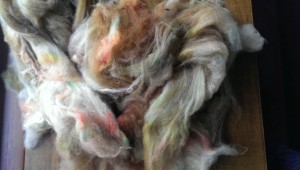
Additional candy-dyed rovings, washed and dried

Additional candy-dyed rovings, washed and dried

Get Carded Sideways

1

In one of the rabbit-warrens of the internet I stumbled across this blog blurb by Stephanie Pearl-McPhee (aka the Yarn Harlot) about sending fiber through your drum carder sideways. I immediately alerted Rachel, that this might be a thing. We had to put it to the test.

I started with a Corriedale batt that I’d already sent through the carder normally:

Corriedale batt

Corriedale batt

I split it in half and sent one half through again sideways:

What! That orientation is wrong!

What! That orientation is wrong!

This is the result. The sideways batt feels thicker and fluffier. I should also note that the fiber piled up in the middle of the drum instead of being spread out evenly.

Left, standard carding, right, sideways carding

Left, standard carding, right, sideways carding

As a different test, I sent an assortment of different staple lengths and fibers through. Longwool, and very crimpy short wool. I didn’t pick the crimpy short wool apart.

Sideways potpourri. This makes it scientific.

Sideways potpourri. This makes it scientific.

Here’s the resulting batt. Then I spun it all up.

Assorted wools batt

Assorted wools batt

Rachel here: Excuse me while I butt into Sal’s post. First of all can I just echo the WTFness of this sideways drumcarding development. Imagine me sort of open mouthed and wondering wha??? and ??? And thinking, well if the Yarn Harlot AND Judith McKenzie say this is The Done Thing, well….

Like Sal, I had to try this sideways drum carding myself. Sal has already described what happens–smaller, fluffier batts. That’s what I found too. Instead of thick and sometimes compacted batts you get fluffy rolags, like the ones you would make on hand cards–but bigger.

These were very easy to spin, like rolags. There was none of that peeling apart and fussing around with a big batt. It was all the good aspects of a hand carded rolag, only bigger and no sore wrists.

Some of the fiber I used was polwarth/silk roving that’s been in my stash for awhile. It opened up nicely when carded sideways and was a breeze to spin.

Lastly I put some scoured fleece (just washed, undyed, still a bit of a mess) through sideways. Here I didn’t see a huge difference putting unprocessed fleece through sideways. The batts were about the same. Having said that, once I get to the stage where I’m going to blend some of this fleece with another fiber or other colours, I’ll be doing that sideways. I like those big, fat rolags!

Longwool single, twist set

Longwool single, twist set

Sally here again: I agree with Rachel, it does make easy-to-spin batts, especially with the longwool blend I tried. I suspect this may be because, by sending the wool through sideways, I’m actually spinning on the fold with the long fibers. I was also able to maintain some of the crimpy locks, which would have been carded apart going through aligned. I think this is definitely a great way to do an art batt.

Test single, both standard carding method and sideways

Test single, both standard carding method and sideways

When I was spinning the batt that was half normal/half sideways, I noticed a definite difference in how the yarn felt while spinning, which I would attribute to a worsted vs. woolen preparation. The sideways portion looked like it was going to have more of a halo due to the fibers not being lined up. If I look very closely, they may be slightly fuzzier, but after washing and setting the twist on the single, there is really very little difference.

So what do you think, Rach, is this actually a thing? My take, it’s definitely not NOT a thing!

Rachel: Sal, I have to agree with you. Not a Thing. I wouldn’t advocate a sideways-only approach to drumcarding. If you want to spin rolags, yes go sideways. If you want to open up some compacted roving, go sideways. But sideways only? I’m not so sure about that.

What I would suggest is being careful about how much fiber you load onto your drumcarder. Don’t overload.


Spinning in the grease

3

Sally and I talk about fiber preparation a lot. Conversations usually start off with a confession.

Rachel: “Um I just bought more fleeces.”

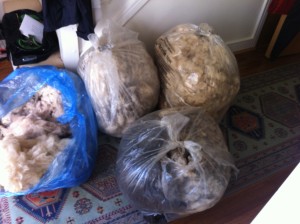
OMG! Where did these come from???

OMG! Where did these come from???

Sal: [laughs] “What are you going to do with them?”

Rachel: “Well right now, they’re in my closet.”

Then we discuss all the processes we could use to turn the raw fleece into The Ultimate Yarn. There’s scouring, combing, carding, dyeing and blending. Then there are infinite techniques–have you heard of the Fermented Suint Method for scouring fleece? Do you card your fleece or comb it? Do you put your fiber into the drumcarder sideways?

Last fall, after buying a few more Shetland fleeces I was so excited to try them out on the wheel that I pulled off some locks and started spinning. No fiber prep at all.

Spinning in the grease isn’t something I usually do, but a lot of spinners do. These are the people who look at you funny when you start talking about scouring fleece and the other fifteen steps you’re going to take before you spin any yarn.

What I learned was spinners who advocate spinning in the grease have a point. One is, if you have a beautiful fleece with nice crimpy locks, it’s a shame to process that out. It’s fine just to tease the locks out a little with your fingers and start to spin. I would recommend, however, picking through the fleece first and removing the dags (poo) and larger bits of vegetable matter. You don’t want that.

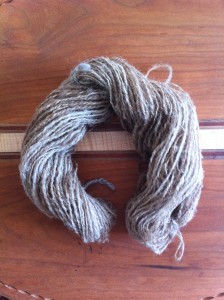
Here’s some Shetland spun in the grease. The yarn plumped up nicely after washing.

Shetland spun in the grease

Shetland spun in the grease


Shetland after washing

Shetland after washing

Here’s some Zwartables I spun in the same way.

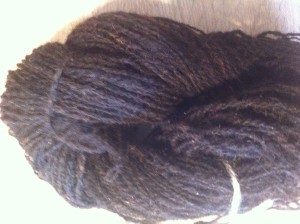
Zwartables spun in the grease

Zwartables spun in the grease

Zwartables fleece

Zwartables fleece

Yes it is a bit smelly and you should clean your wheel afterwards. Really the final result is the same as if you’d spent days scouring and carding and combing and all the rest.

Safety Note. You do need to be careful handling raw fleece. Pregnant women should not handle raw fleece. Be aware that raw fleece is likely to have sheep excrement on it–so avoid handling that with bare hands. Choose from the sections of the fleece that’s not near the animal’s rear end. Give your hands a thorough scrub when you’re finished. Then wash them again!