Get Carded Sideways

1

In one of the rabbit-warrens of the internet I stumbled across this blog blurb by Stephanie Pearl-McPhee (aka the Yarn Harlot) about sending fiber through your drum carder sideways. I immediately alerted Rachel, that this might be a thing. We had to put it to the test.

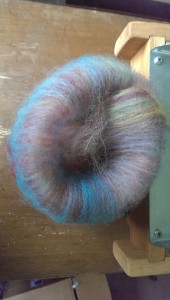
I started with a Corriedale batt that I’d already sent through the carder normally:

Corriedale batt

Corriedale batt

I split it in half and sent one half through again sideways:

What! That orientation is wrong!

What! That orientation is wrong!

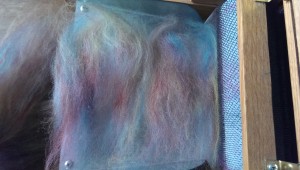
This is the result. The sideways batt feels thicker and fluffier. I should also note that the fiber piled up in the middle of the drum instead of being spread out evenly.

Left, standard carding, right, sideways carding

Left, standard carding, right, sideways carding

As a different test, I sent an assortment of different staple lengths and fibers through. Longwool, and very crimpy short wool. I didn’t pick the crimpy short wool apart.

Sideways potpourri. This makes it scientific.

Sideways potpourri. This makes it scientific.

Here’s the resulting batt. Then I spun it all up.

Assorted wools batt

Assorted wools batt

Rachel here: Excuse me while I butt into Sal’s post. First of all can I just echo the WTFness of this sideways drumcarding development. Imagine me sort of open mouthed and wondering wha??? and ??? And thinking, well if the Yarn Harlot AND Judith McKenzie say this is The Done Thing, well….

Like Sal, I had to try this sideways drum carding myself. Sal has already described what happens–smaller, fluffier batts. That’s what I found too. Instead of thick and sometimes compacted batts you get fluffy rolags, like the ones you would make on hand cards–but bigger.

These were very easy to spin, like rolags. There was none of that peeling apart and fussing around with a big batt. It was all the good aspects of a hand carded rolag, only bigger and no sore wrists.

Some of the fiber I used was polwarth/silk roving that’s been in my stash for awhile. It opened up nicely when carded sideways and was a breeze to spin.

Lastly I put some scoured fleece (just washed, undyed, still a bit of a mess) through sideways. Here I didn’t see a huge difference putting unprocessed fleece through sideways. The batts were about the same. Having said that, once I get to the stage where I’m going to blend some of this fleece with another fiber or other colours, I’ll be doing that sideways. I like those big, fat rolags!

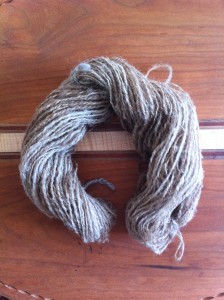
Longwool single, twist set

Longwool single, twist set

Sally here again: I agree with Rachel, it does make easy-to-spin batts, especially with the longwool blend I tried. I suspect this may be because, by sending the wool through sideways, I’m actually spinning on the fold with the long fibers. I was also able to maintain some of the crimpy locks, which would have been carded apart going through aligned. I think this is definitely a great way to do an art batt.

Test single, both standard carding method and sideways

Test single, both standard carding method and sideways

When I was spinning the batt that was half normal/half sideways, I noticed a definite difference in how the yarn felt while spinning, which I would attribute to a worsted vs. woolen preparation. The sideways portion looked like it was going to have more of a halo due to the fibers not being lined up. If I look very closely, they may be slightly fuzzier, but after washing and setting the twist on the single, there is really very little difference.

So what do you think, Rach, is this actually a thing? My take, it’s definitely not NOT a thing!

Rachel: Sal, I have to agree with you. Not a Thing. I wouldn’t advocate a sideways-only approach to drumcarding. If you want to spin rolags, yes go sideways. If you want to open up some compacted roving, go sideways. But sideways only? I’m not so sure about that.

What I would suggest is being careful about how much fiber you load onto your drumcarder. Don’t overload.
 

Spinning in the grease

3

Sally and I talk about fiber preparation a lot. Conversations usually start off with a confession.

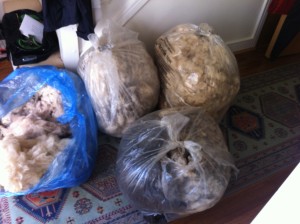
Rachel: “Um I just bought more fleeces.”

OMG! Where did these come from???

OMG! Where did these come from???

Sal: [laughs] “What are you going to do with them?”

Rachel: “Well right now, they’re in my closet.”

Then we discuss all the processes we could use to turn the raw fleece into The Ultimate Yarn. There’s scouring, combing, carding, dyeing and blending. Then there are infinite techniques–have you heard of the Fermented Suint Method for scouring fleece? Do you card your fleece or comb it? Do you put your fiber into the drumcarder sideways?

Last fall, after buying a few more Shetland fleeces I was so excited to try them out on the wheel that I pulled off some locks and started spinning. No fiber prep at all.

Spinning in the grease isn’t something I usually do, but a lot of spinners do. These are the people who look at you funny when you start talking about scouring fleece and the other fifteen steps you’re going to take before you spin any yarn.

What I learned was spinners who advocate spinning in the grease have a point. One is, if you have a beautiful fleece with nice crimpy locks, it’s a shame to process that out. It’s fine just to tease the locks out a little with your fingers and start to spin. I would recommend, however, picking through the fleece first and removing the dags (poo) and larger bits of vegetable matter. You don’t want that.

Here’s some Shetland spun in the grease. The yarn plumped up nicely after washing.

Shetland spun in the grease

Shetland spun in the grease


Shetland after washing

Shetland after washing

Here’s some Zwartables I spun in the same way.

Zwartables spun in the grease

Zwartables spun in the grease

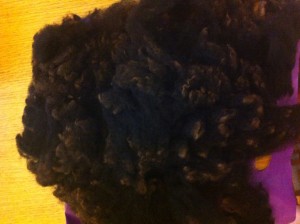
Zwartables fleece

Zwartables fleece

Yes it is a bit smelly and you should clean your wheel afterwards. Really the final result is the same as if you’d spent days scouring and carding and combing and all the rest.

Safety Note. You do need to be careful handling raw fleece. Pregnant women should not handle raw fleece. Be aware that raw fleece is likely to have sheep excrement on it–so avoid handling that with bare hands. Choose from the sections of the fleece that’s not near the animal’s rear end. Give your hands a thorough scrub when you’re finished. Then wash them again!

Saori-style weaving on the rigid heddle loom

3
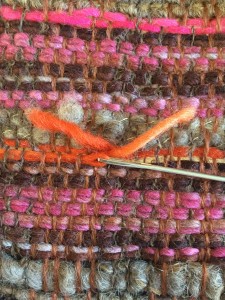
fork, scissors, tapestry needle

fork, scissors, tapestry needle

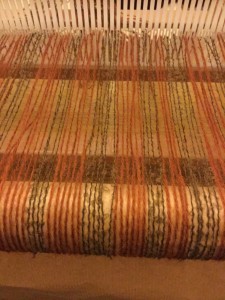
While I still have loads of yarn piling up and access to the guild’s Ashford knitter’s loom I’m putting both to good use. On Friday I threaded the loom with almost five meters worth of warp and set forth on another weaving experiment.

I won’t call this Saori weaving–rather Saori-style. It’s hitting a lot of the right themes for me–using up stash yarn, making use of the Ashford loom, thinking about color combinations (in this case pink, orange and brown) and learning new techniques. Saori weaving is also a perfect canvas for art yarn– you know all that fanciful stuff we love to make, but sometimes struggle to use.

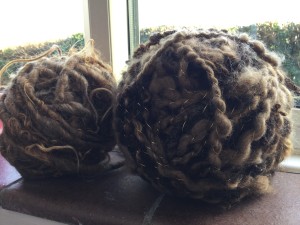
art yarn

art yarn

Saori-style weaving is ideal for those of us with rigid heddle looms. It’s a plain weave, experimental, free-style approach to weaving pioneered in Japan. (The Saori website has all the history.) Saori emphasises finger manipulation techniques, color, texture and self-expression. I’ve seen it likened to painting with yarn.

I threaded (warped) the loom with some commercial mohair and boucle yarn from Texere. Loading five meters’ worth took awhile, but I’m hoping the length of fabric will give me something useable for a garment at the end.

warp

warp

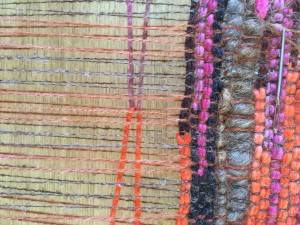
For the weft yarns I’m using a mix of handspun and blue-faced Leicester pencil roving which I dyed. The roving is lovely and soft–well-suited for weaving. What attracted me to Saori-style weaving was the clasped warp technique (useful video here) which would allow me to make a zig-zag weave.

clasped weft

clasped weft

And as the “plan” for this project crystallised I realised it would be a perfect time to use this handspun that’s been in my stash for three years or so waiting for a project.

Using a fork as a beater and a tapestry needle to weaving in extra color here and there the fabric is shaping up. I’ve alternated the colors on either side of the fabric–pink and orange first of the left and then on the right, swapping the brown over. Then I’ve used the brown tailspun art yarn for some additional interest.

filling in

filling in

One of the preconceptions I’ve had to jettison is the idea of pattern. There are some themes in terms of color and texture in the piece so far, but no pattern. How is that going to translate into a garment? My guess is that while I would like to make a jacket out of this piece, I might have to challenge that idea and make something else!

Resort Wear for the Rest of Us

3

Spring comes early in Western Oregon, but every year it seems like it’s never soon enough. About the time that fashion house resort wear comes out, we are all here dreaming of just a little sunshine.

Alas, I will not be traveling to St. Kitts this month. But really, not alas, I’m perfectly happy right where I am, albeit a little vitamin D-deficient. Rachel jokes that summer wear in England consists of an assortment of sweaters, [Rachel: I’m not joking.] and similarly, resort wear in Oregon would look about the same. But I like the idea of resort wear, in that it conjures up images of warm sand, and water, and blindingly blue, blue sky.

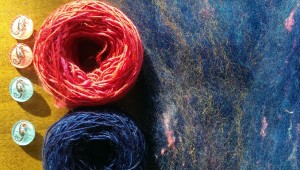
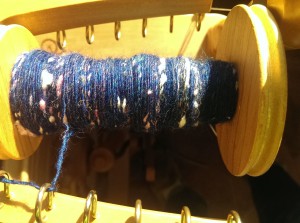
Sunny Sky batt; singles; seahorse buttons

Sunny Sky batt; singles; seahorse buttons

Spinning up Sunny Sky batt

Spinning up Sunny Sky batt

One of the things about living in a wet climate is that there is a certain amount of practicality involved in dressing, especially since no one really bothers with an umbrella. Another thing is that, in the winter, day after day after day, everything around you is a washed-out grey. I’m not a fan of seasonal fashion trends for trends’ sake, but I do think garments-as-optimism has merit, so these resortwear lines have me thinking: if we all had a few sunshine-and-beaches inspired garments and accessories, we might be able to fake tan our way into spring.

To that end, here are some patterns up in the queue:

Léger pattern by Espace Tricot

Léger pattern by Espace Tricot

Turnstone Pullover by Alexis Winslow

Turnstone Pullover by Alexis Winslow

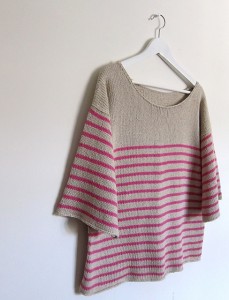
Nautical Jumper by Claire Montgomerie [Rachel's favorite]

Nautical Jumper by Claire Montgomerie [Rachel’s favorite]

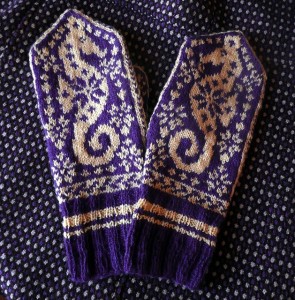
Selbu Sea Horse Mittens by Tori Seierstad

Selbu Sea Horse Mittens by Tori Seierstad

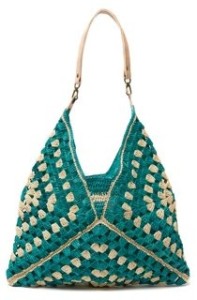
Crocheted tote

Crocheted tote

So even though I’m not jetting off with my bikini and caftan, I can still stuff my beach tote with a towel (not a bad idea, really), sunglasses (good for five minutes at a time) and a good book (Powell’s!), put on a classic boat neck sweater, and keep my hands warm and dry inside some beach-motif mittens. Sunshine is a state of mind.

Plain weave & pick up sticks on the rigid heddle loom

0

The stormy weather and holiday break gave me the chance to do some weaving. Finally.

I’ve taken possession (temporarily) of my guild’s 30 cm Ashford knitter’s loom. I had all these crazy ideas about making wider fabric and then cutting and sewing it into a vest like this one from Purl Soho: Quilted Vest. Whether I take the plunge and cut my fabric and sew it into a garment will depend on how brave I’m feeling.

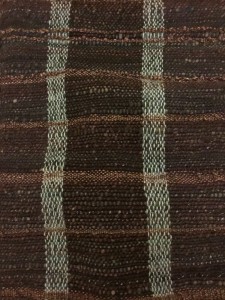
Freestyling stash buster plain weave

Freestyling stash buster plain weave

For this project, I used commercial yarn for the warp and a variety of handspun from my stash in the weft. It’s either Ryeland or BFL and there is some silk in there too. There is also some yarn I spun from a luscious combination of camel/seacell/faux cashmere from HilltopCloud

Honestly there was no real plan for warping. I decided how long I needed the warp to be and how wide and then made do with the yarn I had. I used a navy silk/wool, alpaca (turquoise) and some black super wash–all picked for sturdiness.

Similarly there was no plan for weaving–except I wanted to use as much of my yarn as possible! (There’s still a little left.) The only somewhat fancy technique I used was to make little loops by randomly picking up the weft with a long knitting needle, packing the weft with the reed and then pulling out the needle.

If I’m brave this cloth could become a fancy vest. If I play it safe, it will be a cosy wrap.

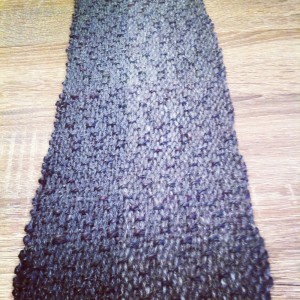
I wove my second project on my own 15″ Cricket loom. I used hand spun suri alpaca for the warp and some of the left over camel/silk for the weft. This technique is called faux twill, which is described by Jeen in the rigid heddle looms group on Ravelry. I’ve been wearing this project as a scarf.

Faux twill and fabulous

Faux twill and fabulous

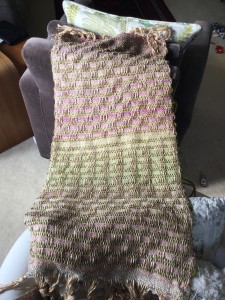
The third project was also woven on my Cricket loom. I used commercial yarns from my stash. The warp is a champagne chenille and the weft is Noro silk/cotton sock yarn and Brown Sheep chunky in a mossy green. Nice right?

Honeycomb

Honeycomb

I used a pick up stick to achieve this honeycomb pattern described in Jane Patrick’s The Weaver’s Idea Book, published by Interweave. This book is invaluable for RHL newbies like me who want to push themselves and try out many different patterns and techniques. Indeed the rigid heddle loom group on Ravelry has a thread devoted to those weavers working their way through the book. Check it out!

Learning: I want to try out the guild’s four-shaft table loom!

Color Resolutions 2015

2

It’s a few days into 2015, and I’ve found a couple of things that I want to do this year…maybe I will also finish last year’s projects, but who knows?

Pasture

Pasture

The first one I’ve actually started, based on the idea of this Sky-a-Day scarf. I’m calling it my “Grass is Always Greener” project. Using my drop spindle and hand cards, I’m going to color-blend and spin about 3yds of fiber each day, based on the color of the pasture out in front of our house. I’m hoping that not only will this make me better with the hand cards and the drop spindle (it should), but also show me just when it goes from being drab and winter-y around here to being so green that it hurts your eyes. And then in the summer when it starts to get brown again from the lack of rain, because every year these things sneak up on me. At the end of the year I’m going to chain-ply my singles into the continuous color order, and knit something.

Color blending on hand cards

Color blending on hand cards

Rolags

Rolags


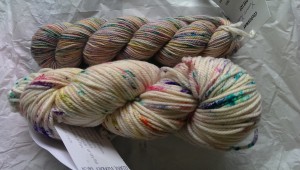
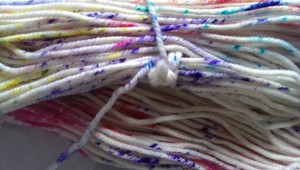
The other project I want to try is based on these yarns I found at one of Portland’s finest LYS, which are both (I believe) sprinkle-dyed, but to an extreme. After my weeks and weeks of messing around with kool-aid dying, I’ve finally become interested in dying yarn, and not just locks or roving.

Commercial sprinkle-dyed yarns

Commercial sprinkle-dyed yarns

Sprinkle-dyed yarn, detail

Sprinkle-dyed yarn, detail

Here is a link to sprinkle-dying from Lotus Knits. It’s in three parts and very informative. Stay tuned in 2015 for progress reports!