Nuno felting part one: rub n’ roll

2

Nuno felting is one of those techniques I’ve always admired and wanted to try, but never got my act together to do. A couple of months back I bought Felt Fabric Designs by Sheila Smith and again my interest in nuno felting was piqued.

I was particularly interested in some of the techniques Smith shows “laminating” fabrics using felt and also upcycling thrift store scarves and fabrics into felted patchworks.

But I haven’t tried any of those techniques yet. Usually I dive in and try techniques even if they’re a bit complicated, but this time I tried some of the simpler nuno felting processes.

After a rummage in my closet I found a scarf I’ve never worn. It’s an open weave and 100% silk–ripe for nuno! Here it is on the table before felting. It’s on a strip of bubble wrap. I’ve spread light layers of Wensleydale roving and silk fibers on top.

100% silk open weave scarf readied for nuno

100% silk open weave scarf readied for nuno

The next step was to cover with an old net curtain, wet down with cool water, smooth some olive oil soap over the net curtain and begin to rub!

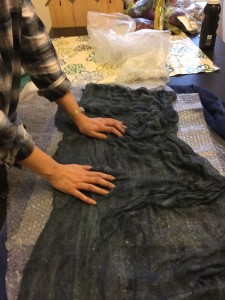
My good friend and avid felter Gaynor was on the scene to offer advice and lend her fingers for rubbing!

Gaynor flipped the fiber-covered side face down onto the bubble wrap to give it a little extra rub

Gaynor flipped the fiber-covered side face down onto the bubble wrap to give it a little extra rub

The bubble wrap provides the friction to felt the fibers into the silk scarf. Rubbing the fabric and fiber through the net curtain starts the felting process. Once you can peel the netting off without the fibers sticking to it, you remove the netting, place another layer on top then roll it up and begin to roll.

Gaynor’s tip for rolling the fabric in the bubble wrap was to roll the whole thing in a towel and roll it and then roll it some more. We didn’t keep an accurate count but I’d guess we rolled it a few hundred times in each direction?

What do I mean by rolling it in each direction? Well, once you roll your piece of fabric a few hundred times, unroll the bubble wrap bundle and re-roll it from the opposite direction and start the whole process again. It’s good to have a friend to help with the rolling if your arms get tired or you get a bit of finger ache.

Once you’re satisfied the fiber has mingled (or stuck) to your fabric give it a rinse in very hot water. Wad it up in a ball and throw it into the sink a few times. Then rinse with cold water. Take a look at your fabric. Have the fibers you’ve applied felted into it as much as if you would like? If not, give it a few more rolls in the bubble wrap and then the repeat the hot/cold rinses and throwing process.

Gaynor and I found that with this scarf, silk felted really well but the Wensleydale took a lot of persuading. If you’re after a shiny or even metallic effect go for more silk, less wool. Once the fabric is dry give it an iron, which brings out the silk’s shine.

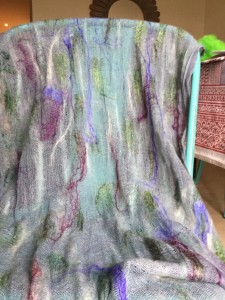
Here’s my final product. I love how this technique has turned a drab unworn scarf into something I’m now wearing all the time. Interested in some amazing nuno felting? Check out the Sheep Cabana Pinterest board.
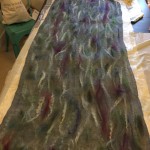
Finished scarf: drab to fab!

Finished scarf: drab to fab!


Dyeing with Candy

5

Somewhere in between my Guild’s Kool-aid dye challenge and my obsession over sprinkle-dyed yarn, I woke up in the middle of the night and thought “Maybe I can dye yarn with actual candy sprinkles.”

On the face of it, it’s not that crazy of an idea: it’s the same food grade acid dyes that are in the different packets of Kool-aid, along with some extra sugar, etc., that can be washed out in the rinse. After some test runs, I’m happy to report that, yes, you can dye yarn and roving with candy, and get some pretty cool results. There are some caveats here: some candies work great, some work not-at-all, and some are just not worth the trouble. It’s going to be cheaper and more controllable if you just use your favorite acid dye, but if you’re looking for something to do with candy besides eat it, this is a thing, and a pretty interesting thing at that. This would also be a great Valentine’s gift for the knitter/spinner in your life who has everything. (That’s a joke, they obviously need more fiber.)

The candy aisle

The candy aisle

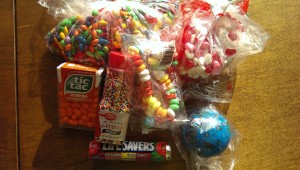
I went to my local supermarket and shopped in their bulk candy aisle, which is extensive, and bought things I thought would be cool/effective in dyeing: jawbreakers, candy bracelets, red hots hearts, candy sprinkles, Lifesavers, tic-tacs, a bag of candy-coated, chocolate-covered sunflower seeds (yes, that did go horribly wrong. Sort of.) I didn’t buy any jelly beans (expensive!) or anything gummi (washing out gelatin) or anything else chocolate.

Jawbreaker, tic-tacs and sprinkles

Jawbreaker, tic-tacs and sprinkles

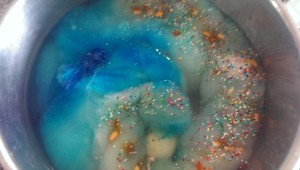
I started out with 2oz of superwash Merino in a just-simmering water bath with a splash of vinegar, and added a jawbreaker, some tic-tacs, and some sprinkles, and I had pretty good results. There was too much fiber for the amount of dye, and the jawbreaker left some weird candy pieces even after the rinse.

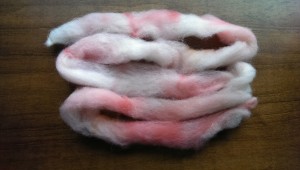
Washed and dried

Washed and dried

The Lifesavers were a disappointing bust. One takeaway is that translucent candy doesn’t require a lot of dye, and it just dissipates in the water without doing much of anything. Likewise the Nerds, the candy bracelets, the lemon heads, the colored sugar sprinkles, all didn’t contain enough dye to do anything. So too with the gobstoppers, the small version of the jawbreakers.

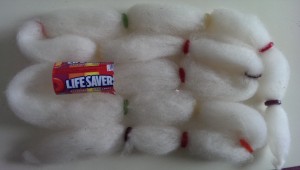
Lifesavers and 1oz Shetland roving

Lifesavers and 1oz Shetland roving

Lifesavers. Meh.

Lifesavers. Meh.

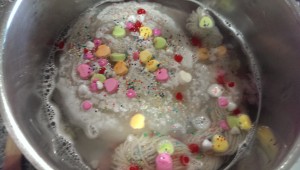
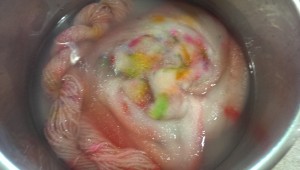
Surprisingly, the sweethearts candies performed like bath fizzies, and had a lot more dye in them than one would have thought. This is when I learned the real secret of candy-dyeing: it’s got to take a certain amount of time for the candy to dissolve in order for it to have deep color penetration, and it’s got to be in direct contact with the fiber. Just floating around in the water will result in washed out colors.

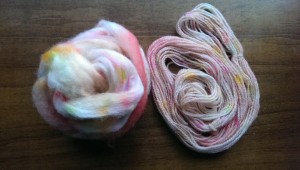
1oz Shetland roving, 1oz Llanwegnog handspun with Sweethearts, red hots and sprinkles

1oz Shetland roving, 1oz Llanwegnog handspun with Sweethearts, red hots and sprinkles

Melting and dyeing

Melting and dyeing

Rinsed and dried

Rinsed and dried

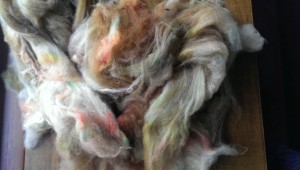
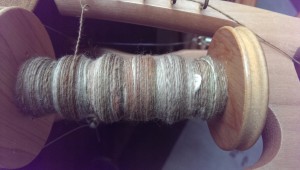
Because I had to know, I did dye some more superwash Merino with the candy chocolate sunflower seeds. Several things: I wouldn’t do this with anything but superwash, because I had to rinse it in hot dish-soapy water five times before it was reasonably chocolate-free. I inadvertently dumped the whole bag into the dye pot, and it resulted in a mostly chocolate brown colorway. When I let it cool there was hardened grease on the surface. I’m assuming it’s the palm kernel oil or what-have-you, but it was like skimming the fat off a pot roast. Also, there were sunflower seeds everywhere. (I think I was thinking, “less chocolate, less mess.”) BUT. Spinning this stuff up, it feels like cashmere. The fat content must have coated the fibers, because it’s simply a dream to spin. And it looks a lot like chocolate. I can’t not recommend this, especially if you have superwash sitting around not doing anything.

Superwash Merino dyed with candy-coated chocolates

Superwash Merino dyed with candy-coated chocolates

Chocolately handspun

Chocolately handspun

For a Valentine’s project, or a kid’s project, or just because you’re curious like I am, definitely go try dyeing up some fiber with candy.

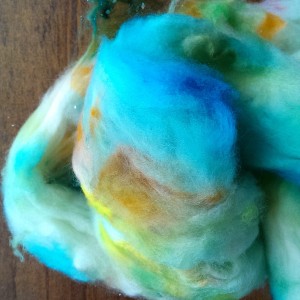
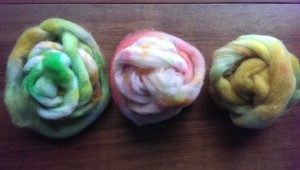
Additional candy-dyed rovings, washed and dried

Additional candy-dyed rovings, washed and dried