Natural dyeing with cotton

5


left to right: onion skins, madder, indigo

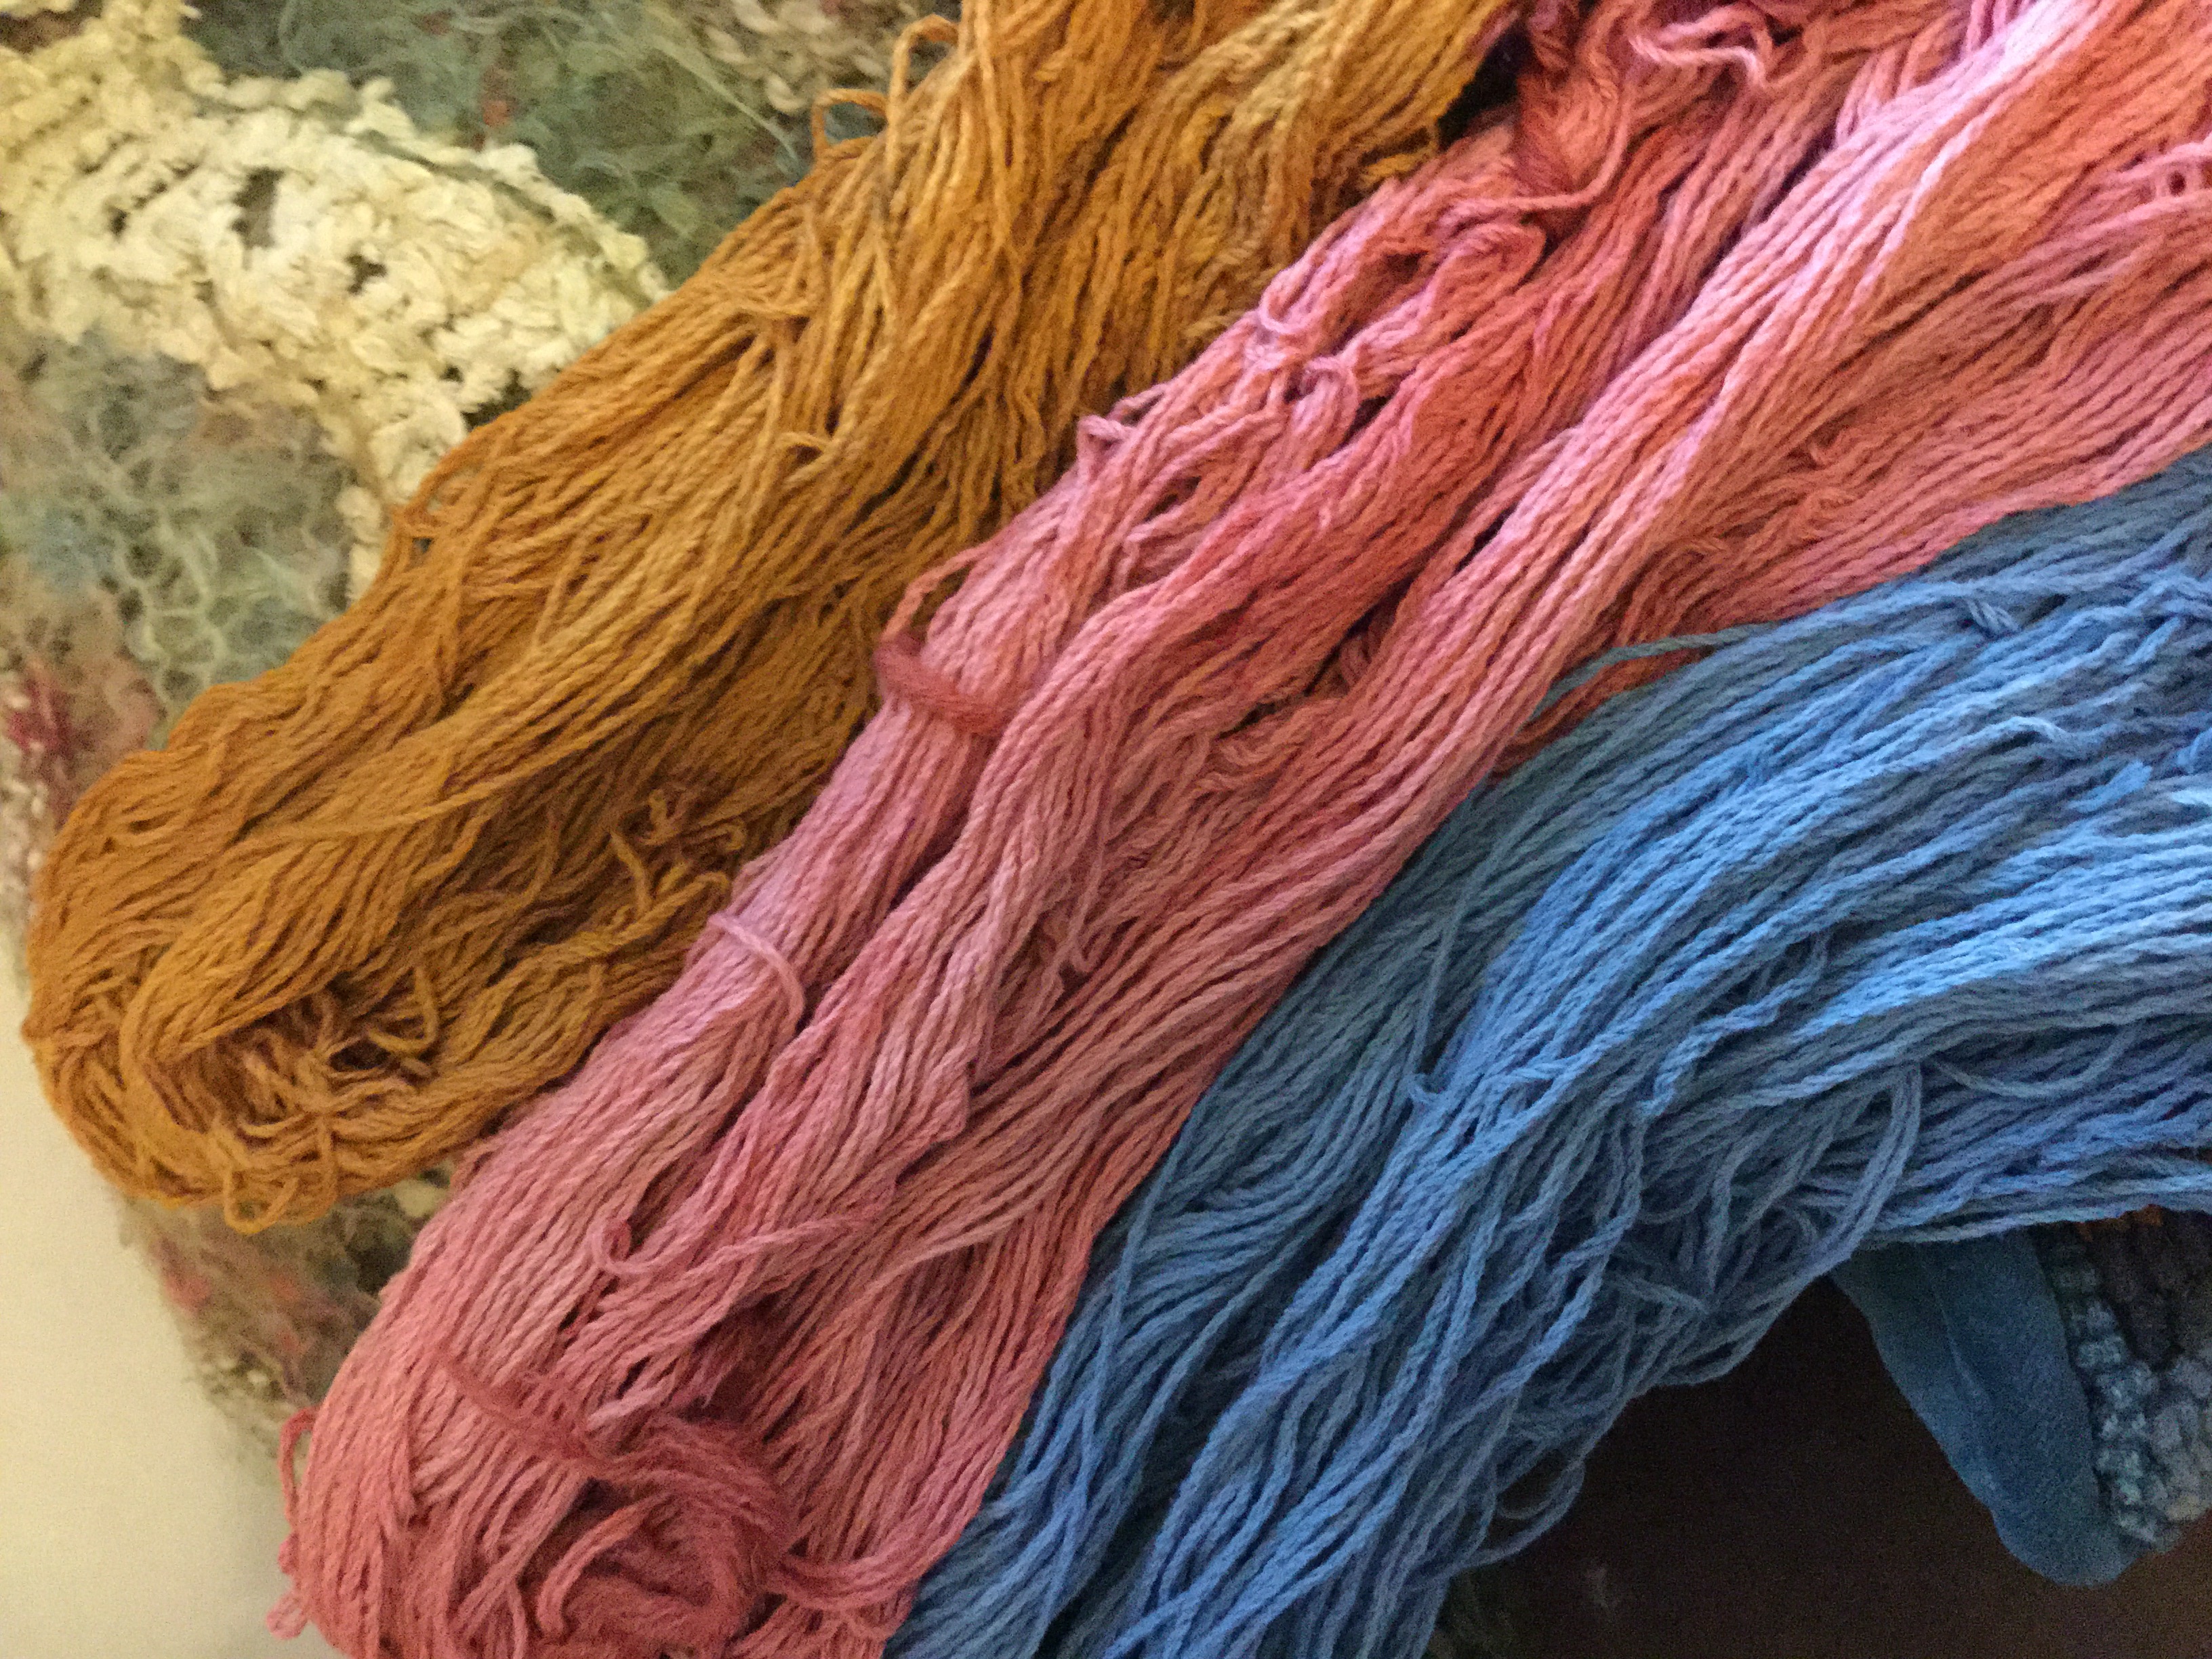
left to right: onion skins, madder, indigo on organic cotton yarn

It’s funny what can get you off and running on a project. Dyeing cotton really wasn’t on my to-do list until I read an article in the Winter 2015 Spin Off where Dye-lishus premordanted cotton sliver was tested and reviewed. My first thought was, what’s the fuss with cotton that would make premordanted sliver desirable? Would it make dyeing easier?

One of the things the Dye-lishus premordanted cotton sliver apparently can do, which home mordanting can’t, is allow the fiber to take acid dyes, which are made for dyeing protein fiber (wool, silk, etc). Dye-lishus’s USP is: you can dye this fiber with anything–acid dye, food colouring, procion dyes–and it will stick.

However, my interest in mordanting my own cotton was stronger than my desire to try out the Dye-lishus fiber. Another day perhaps.

A quick internet search informed me that mordanting cotton for natural dyeing is a two- to three-step process, depending on the kind of cotton used. It’s not complicated. It’s not particularly labor intensive. It’s just one or two more steps than mordanting wool.

There are some important things you should know before mordanting and naturally dyeing cotton.

* Cotton is mordanted with tannic acid, then aluminium acetate. Those are different mordants than the ones used for wool. Both are available from natural dye suppliers.

* Depending on what kind of cotton you’re going to dye, you may want to scour the yarn or sliver. I washed my yarn in very hot water with soda crystals. If you’re using organic cotton, don’t bother with this step.

As with all aspects of natural dyeing–on cotton, wool or otherwise–there are many recipes. I used the simplest one I could find, which happened to be on the Wild Colours site. It has lots of information on natural dyes and mordants.

I used 10 percent of weight of goods (WOG). To mordant 100 grams of fiber and yarn, I used 10 grams of tannic acid and 10 grams of aluminium acetate. It’s worth getting a digital scale to weigh the mordants. Put a clean yogurt pot on the scale, zero it, then tip in your mordant.

Soak your fiber/yarn for a good hour before adding it to a dye pot in which you have dissolved 10 grams of tannic acid. You want there to be enough hot water to cover the fiber and give it a bit of room. No need to heat the pot, just leave it until you’re ready for the next step. I left mine overnight.

Repeat the process, but this time dissolve 10 grams of aluminium acetate and then add your wetted down fiber. Again, you need hot water to dissolve the aluminium acetate, but you don’t need to heat the pot. I left mine to soak overnight in a bucket.

When ready to dye the fiber, make sure to rinse it well to get out any mordant that hasn’t attached to the fiber. Do it now or it makes the fiber a bit chalky after dyeing. Otherwise make sure to rinse your fiber well after dyeing.

I dyed with madder and onion skins, because that’s what I had to hand. I soaked the madder root in hot water overnight. I used 50 percent WOG of madder. Onion skins are very generous in terms of dye yield. I used a few handfuls and that was plenty.

IMG_0410

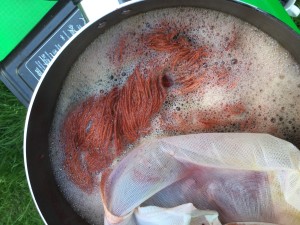
cotton yarn, madder dye bath

Give the madder about an hour to simmer. I strained the root into a jelly bag, which I then returned to the dye pot. It saves you having to pick out little bits of madder from the fiber and makes sure you’re getting your money’s worth from the dyestuff. I fished out the onionskins with a slotted spoon put them in the compost.

Once the fiber was in the dye pots I left them to simmer for about an hour. I then removed them from the heat and left them to cool.

Dye baths made with natural dye stuffs do not exhaust the way acid dye baths do. That means there will appear to be a lot of color left in the dye pot. With acid dyes, you know the dye bath is exhausted when the water is clear. That doesn’t happen with most natural dye stuffs.

madder on cotton sliver

madder on cotton sliver

IMG_0416

top: cotton sliver, bottom: cotton yarn with onion skins

Rinse your fiber well and leave to dry.

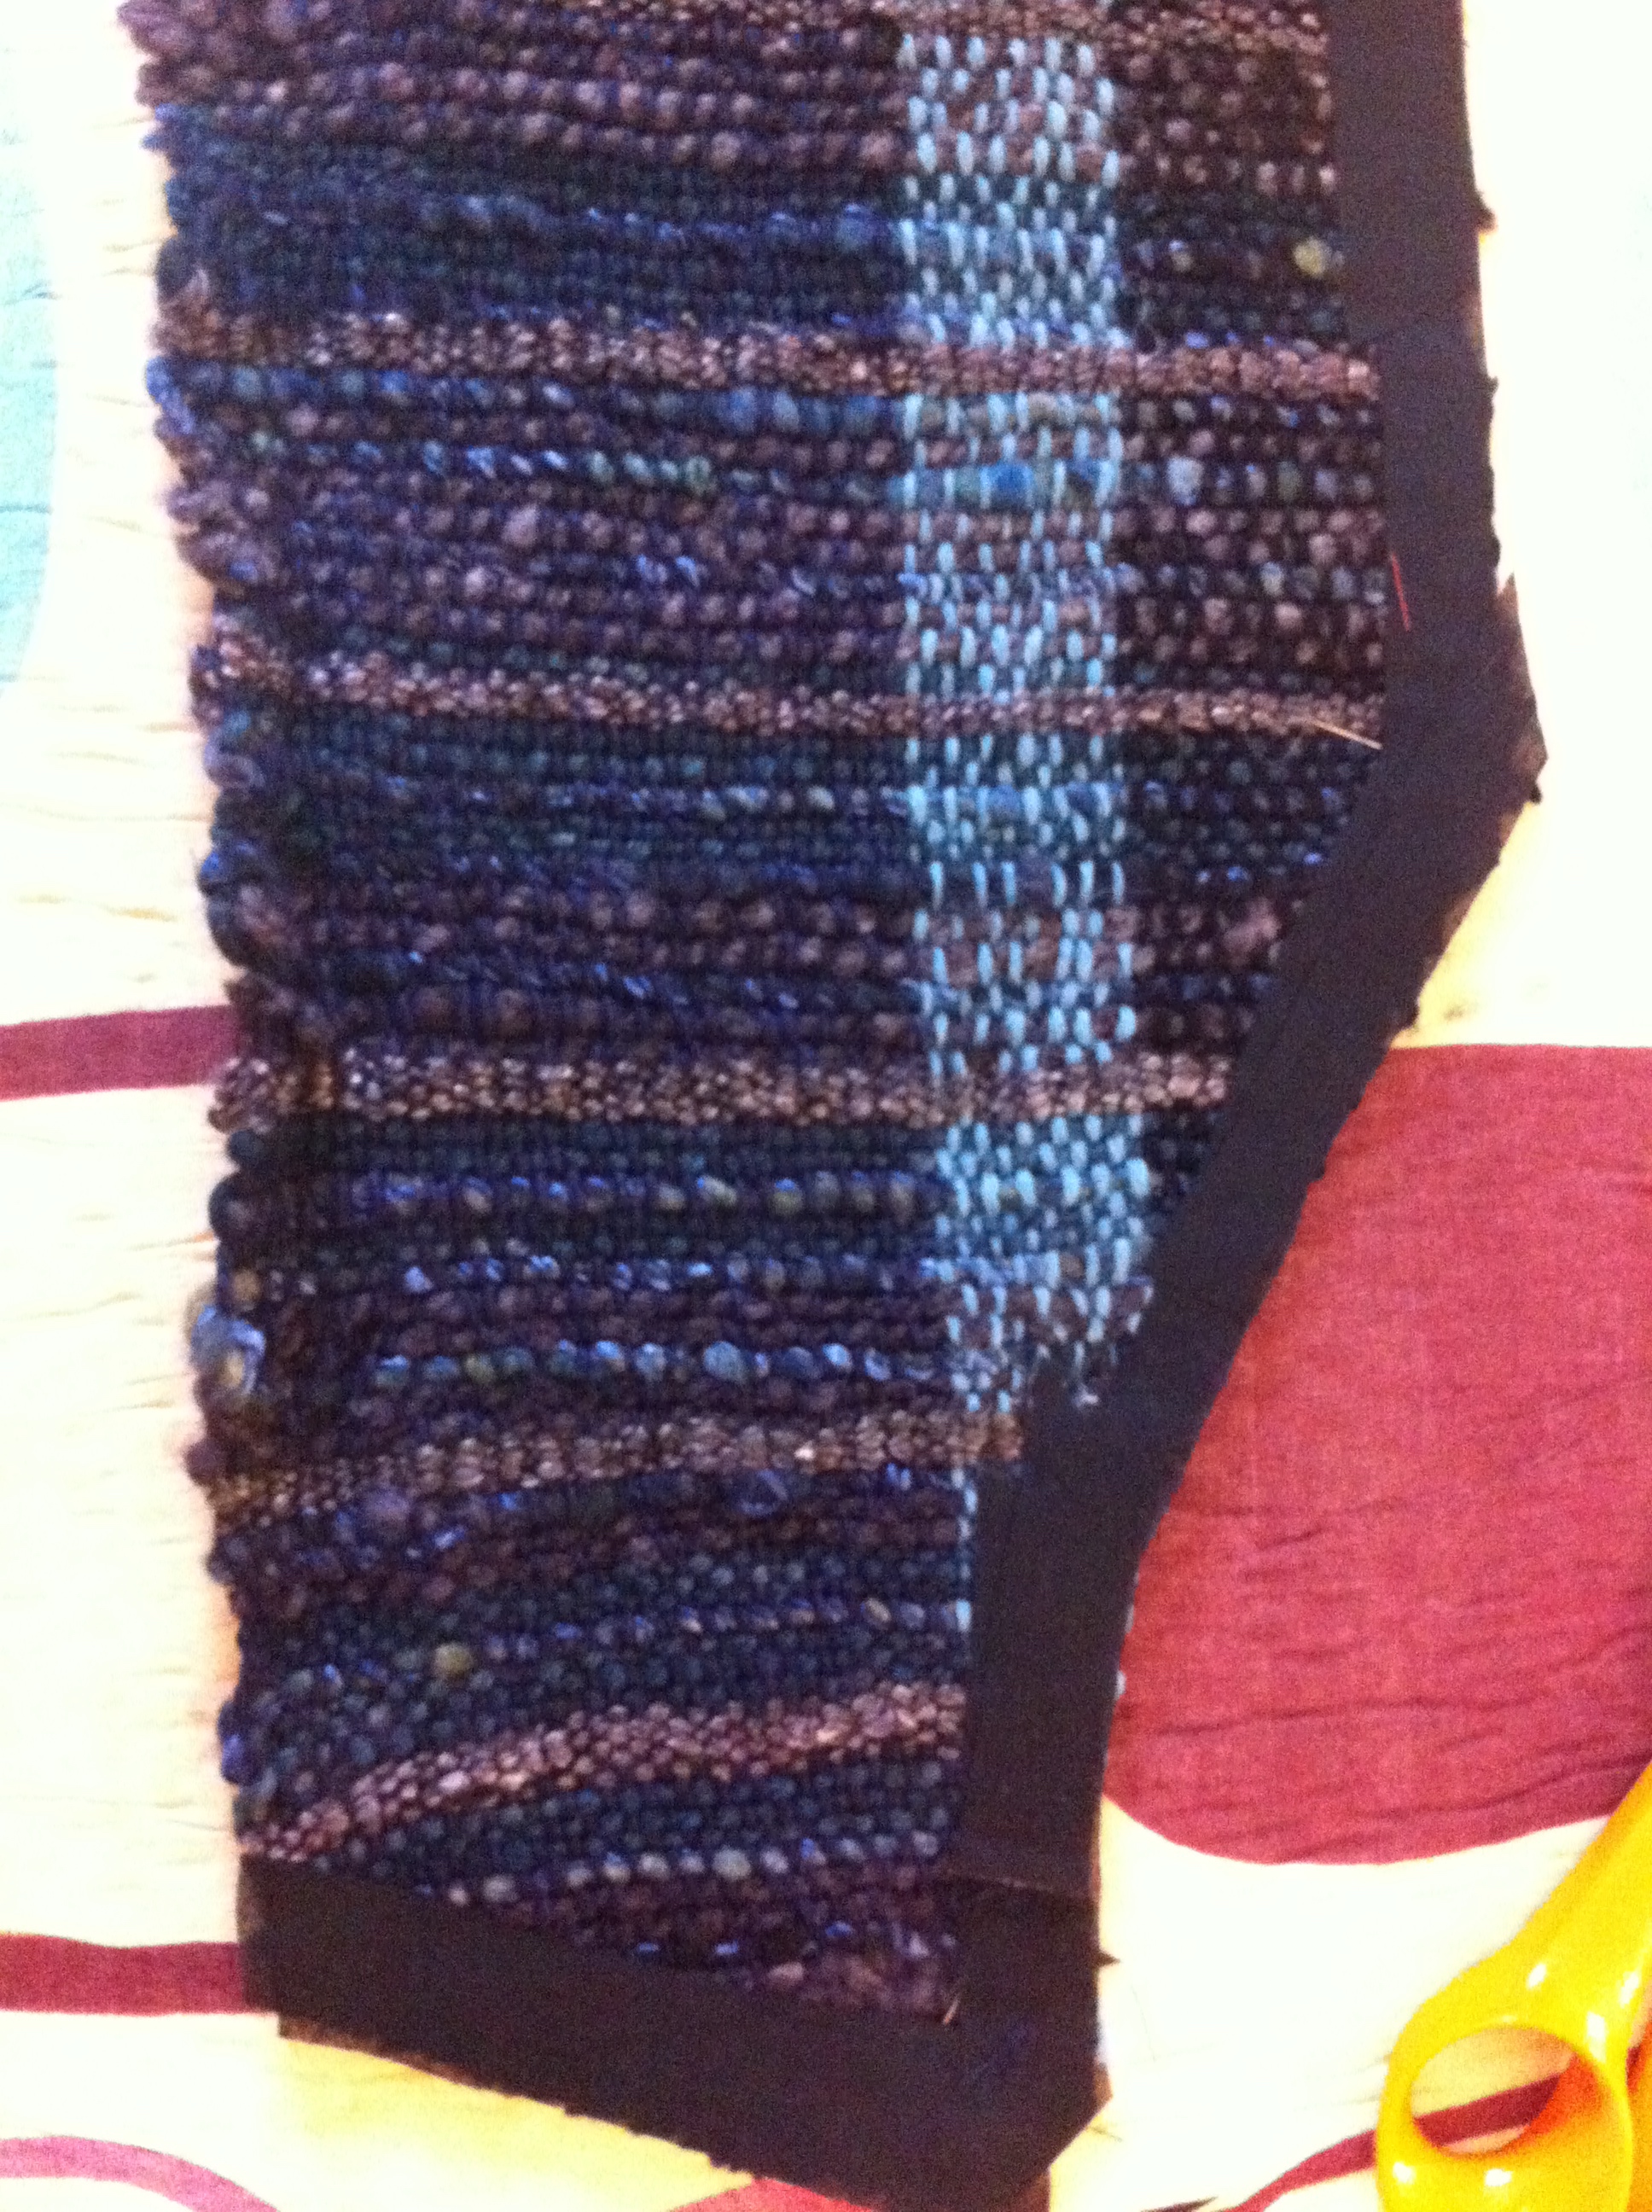
Last, but not remotely least, cotton can be dyed naturally without any mordanting or pretreatment whatsoever. Just make an indigo vat, following Sal’s fabulous fruit vat instructions. Indigo is a substantive dye–like walnuts and lichen–and does not require any mordanting process. Just look at it. Beautiful!

IMG_0421

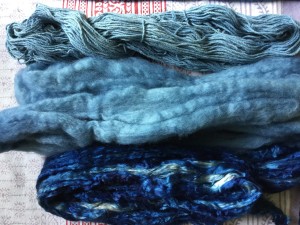
Indigo on cotton yarn (top), wool (middle), sea cell (bottom)

Many ways with warps on a rigid heddle loom

2

Getting creative with warp yarns is a great way to make the most out of your rigid heddle loom. Using different coloured and textured yarns in the warp, ordering those yarns in a certain way or not at all will yield different, beautiful results without having to worry too much about pattern.

plain weave plaid

plain weave plaid

Let’s start with texture and colour. In this sample, I used two smooth yarns and two handspun boucle yarns in the warp. From right to left–  black, magenta, then the lighter

boucle and the darker one. For the weft I used the four yarns in the same order to create this nubbly plaid-like sample. Simple to weave, but lots of potential as a cloth. I could easily weave something similar and turn it into a Chanel-style jacket.

Randomly placed many-coloured warp

Randomly placed many-coloured warp

Next up is a piece I wove

recently entirely out of handspun. The plan was to make the warp yarns the feature. I randomly wound the three colours of yarn—pink, purple, green— onto the warping board. On the weft I used a single colour—a grey mohair and wool handspun with a few dollops of green and yellow as a feature. What I like about how this piece turned out is the strong warp colours slightly muted by the greyish weft. Also the slight unevenness of the handspun give the whole piece a subtle speckled effect.

Choosing handspun or many colours of yarn in the warp is one way to use colour and texture in the warp to great effect. A variation on this theme is the multi-coloured warp. Instead of using a few different coloured yarns in the warp, wind on a neutral coloured warp, carefully remove it and then put it the dye pot and apply colour.

Dyed warp

Dyed warp

In this sample, I used a commercial silk warp thread and dyed it with gold, purple, green and a little pink. Woven with a camel/silk handspun, with some saori-style accents, the warp still comes through, but this time with different colour pools.

Dyed warp, Saori-style accents

Dyed warp, Saori-style accents

You could take this technique further and go for an ikat-style weave by tie dyeing the warp or even painting a design onto it, then threading the warp onto the loom. Another approach is to take some self-striping or variegated sock yarn and wind your warp so that the colours sit together. There’s a great description of that technique here.

log cabin weave

log cabin weave

Log cabin weave is a rigid heddle loom classic. It’s simple, just alternating blocks of light and dark yarns (LDLDLDLD DLDLDLDL etc) in the warp and then weaving the same way. More about log cabin in my November post.

Using multi-coloured handspun or variegated sock yarns that have less contrast also create a nice effect. Check out this blog post on this variation on log cabin weave. I’ve also seen log cabin done with some saori-style embellishments that look fantastic.

One last technique that emphasizes warp is using the variable dent rigid heddle reed. It’s a reed that allows you to mix up the dent sizes in the reed to then use different weights of yarn. I haven’t tried out this tool myself, but apparently one of the effects you can achieve is a ribbed fabric.

All these techniques bring a lot of interest and texture without having to mess around with pick up sticks. Don’t get me wrong, pick up sticks are great, but don’t think you need to use them to get the most out of your rigid heddle loom.

Some resources for rigid heddle weaving:

Ravelry’s rigid heddle weaving group

Schacht spindle blog

Weavezine

Turning handwoven fabric into a garment

12
Handwoven awaiting transformation

Handwoven awaiting transformation

Rigid heddle looms may not be fancy or complicated, but do not be deceived. You’re not going to weave acres of jacquard, but don’t think placemats, table runners, scarves and hand towels are your only options on a rigid heddle loom.

Two years ago when I bought my little loom I had no idea that with some experimentation, practice and patience I’d be able to make a garment from fabric I’d created. For one thing, the idea of cutting my handwoven cloth terrified me. Also as relatively inexperienced seamstress, I wasn’t confident I could create a wearable garment.

I took the small amount of fabric I’d woven on a 20″ (50 cm) Ashford Knitter’s Loom up to Clacton-on-Sea for a lesson in sewing with handwoven with Sarah Howard. Sarah, along with Elisabeth Kendrick, is the author of Get Weaving, which I blogged about earlier this year.

Sarah helped me find a pattern that would work with the 175cm of fabric I had. We used a commercial paper pattern to get an idea of size and shape and then made some modifications for fit and the fabric.

The next step was to make a paper pattern to use to then sew up a calico to see how the garment looked. I used some denim for the calico. It allowed me to see where changes were required (in the armpits!). Once that was done, I went a way with instructions to test out the pattern on store-bought fabric. Sarah says it’s important to do a trial run before diving into your handwoven. Lots of issues can be sorted out on the sample piece. For example, I found I needed to change the shape of the side pieces slightly. Making a sample made me think about bias binding and lining too.

sample garment

sample garment

My sample looked pretty good, but I realised I would have to do the pockets a bit differently on the final piece–ie with biased binding and the fabric backed by iron-on woven interfacing. I also decided that gold/black lining would not look good with the handwoven and went for a solid blue silk.

Here’s a couple things to keep in mind when you’re placing your pattern on your handwoven:

– Make sure all the pieces fit. Measure the length of fabric without the fringe.

– Think about the best use of your fabric’s selvedges and hemmed ends to reduce the potential for fraying and binding.

– Make a note of the direction of warp and weft in your fabric. How does that influence how you place your pattern on your fabric? You probably want all your pieces going with the warp.

My layout looked like this:

layout

layout

I was careful to place the pockets to match up with the stripes on the two front pieces.

The next step was to cut out the pieces.Once I did, I carefully applied strips of iron-on woven interfacing to the fabric to prevent fraying. Then I zig-zag stitched over that.

I sewed together the fabric pieces as well as the lining. I didn’t sew in the lining, but bound the piece together all at once with bias-binding tape. I made it myself, which wasn’t difficult, but it was time consuming. However, store-bought bias tape is pretty poor so I do recommend taking the time to make it yourself.

Et voila! Garment!

finished garment!

finished garment!

A few things to keep in mind when sewing with handwoven.

– Remember your woven fabric may be quite thick. How is that going to impact your seams? Will your garment work well with chunky seams?

– Use iron-on woven interface to prevent fraying. It also makes it easier to sew.

– Go slow! Once you machine sew handwoven fabric, it’s really hard if not impossible to pick out without destroying the fabric.

– Handwoven is stretchy. Think about how that might cause difficulties when sewing up or when putting in a lining.

applying iron-on woven interface

applying iron-on woven interface

Nuno felting part one: rub n’ roll

2

Nuno felting is one of those techniques I’ve always admired and wanted to try, but never got my act together to do. A couple of months back I bought Felt Fabric Designs by Sheila Smith and again my interest in nuno felting was piqued.

I was particularly interested in some of the techniques Smith shows “laminating” fabrics using felt and also upcycling thrift store scarves and fabrics into felted patchworks.

But I haven’t tried any of those techniques yet. Usually I dive in and try techniques even if they’re a bit complicated, but this time I tried some of the simpler nuno felting processes.

After a rummage in my closet I found a scarf I’ve never worn. It’s an open weave and 100% silk–ripe for nuno! Here it is on the table before felting. It’s on a strip of bubble wrap. I’ve spread light layers of Wensleydale roving and silk fibers on top.

100% silk open weave scarf readied for nuno

100% silk open weave scarf readied for nuno

The next step was to cover with an old net curtain, wet down with cool water, smooth some olive oil soap over the net curtain and begin to rub!

My good friend and avid felter Gaynor was on the scene to offer advice and lend her fingers for rubbing!

Gaynor flipped the fiber-covered side face down onto the bubble wrap to give it a little extra rub

Gaynor flipped the fiber-covered side face down onto the bubble wrap to give it a little extra rub

The bubble wrap provides the friction to felt the fibers into the silk scarf. Rubbing the fabric and fiber through the net curtain starts the felting process. Once you can peel the netting off without the fibers sticking to it, you remove the netting, place another layer on top then roll it up and begin to roll.

Gaynor’s tip for rolling the fabric in the bubble wrap was to roll the whole thing in a towel and roll it and then roll it some more. We didn’t keep an accurate count but I’d guess we rolled it a few hundred times in each direction?

What do I mean by rolling it in each direction? Well, once you roll your piece of fabric a few hundred times, unroll the bubble wrap bundle and re-roll it from the opposite direction and start the whole process again. It’s good to have a friend to help with the rolling if your arms get tired or you get a bit of finger ache.

Once you’re satisfied the fiber has mingled (or stuck) to your fabric give it a rinse in very hot water. Wad it up in a ball and throw it into the sink a few times. Then rinse with cold water. Take a look at your fabric. Have the fibers you’ve applied felted into it as much as if you would like? If not, give it a few more rolls in the bubble wrap and then the repeat the hot/cold rinses and throwing process.

Gaynor and I found that with this scarf, silk felted really well but the Wensleydale took a lot of persuading. If you’re after a shiny or even metallic effect go for more silk, less wool. Once the fabric is dry give it an iron, which brings out the silk’s shine.

Here’s my final product. I love how this technique has turned a drab unworn scarf into something I’m now wearing all the time. Interested in some amazing nuno felting? Check out the Sheep Cabana Pinterest board.

Finished scarf: drab to fab!

Finished scarf: drab to fab!