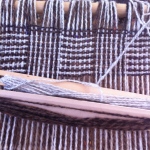
Saori-style weaving on the rigid heddle loom

3
fork, scissors, tapestry needle

fork, scissors, tapestry needle

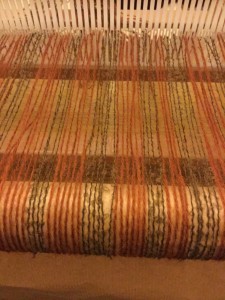
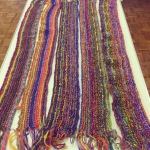
While I still have loads of yarn piling up and access to the guild’s Ashford knitter’s loom I’m putting both to good use. On Friday I threaded the loom with almost five meters worth of warp and set forth on another weaving experiment.

I won’t call this Saori weaving–rather Saori-style. It’s hitting a lot of the right themes for me–using up stash yarn, making use of the Ashford loom, thinking about color combinations (in this case pink, orange and brown) and learning new techniques. Saori weaving is also a perfect canvas for art yarn– you know all that fanciful stuff we love to make, but sometimes struggle to use.

art yarn

art yarn

Saori-style weaving is ideal for those of us with rigid heddle looms. It’s a plain weave, experimental, free-style approach to weaving pioneered in Japan. (The Saori website has all the history.) Saori emphasises finger manipulation techniques, color, texture and self-expression. I’ve seen it likened to painting with yarn.

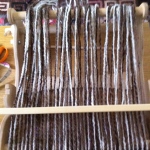
I threaded (warped) the loom with some commercial mohair and boucle yarn from Texere. Loading five meters’ worth took awhile, but I’m hoping the length of fabric will give me something useable for a garment at the end.

warp

warp

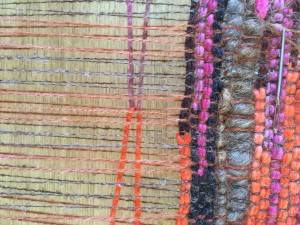
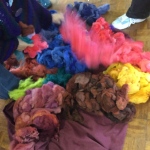
For the weft yarns I’m using a mix of handspun and blue-faced Leicester pencil roving which I dyed. The roving is lovely and soft–well-suited for weaving. What attracted me to Saori-style weaving was the clasped warp technique (useful video here) which would allow me to make a zig-zag weave.

clasped weft

clasped weft

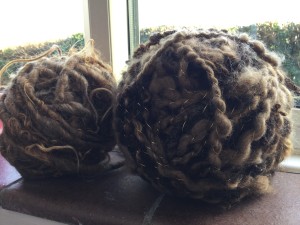
And as the “plan” for this project crystallised I realised it would be a perfect time to use this handspun that’s been in my stash for three years or so waiting for a project.

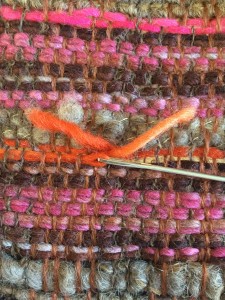
Using a fork as a beater and a tapestry needle to weaving in extra color here and there the fabric is shaping up. I’ve alternated the colors on either side of the fabric–pink and orange first of the left and then on the right, swapping the brown over. Then I’ve used the brown tailspun art yarn for some additional interest.

filling in

filling in

One of the preconceptions I’ve had to jettison is the idea of pattern. There are some themes in terms of color and texture in the piece so far, but no pattern. How is that going to translate into a garment? My guess is that while I would like to make a jacket out of this piece, I might have to challenge that idea and make something else!

Plain weave & pick up sticks on the rigid heddle loom

0

The stormy weather and holiday break gave me the chance to do some weaving. Finally.

I’ve taken possession (temporarily) of my guild’s 30 cm Ashford knitter’s loom. I had all these crazy ideas about making wider fabric and then cutting and sewing it into a vest like this one from Purl Soho: Quilted Vest. Whether I take the plunge and cut my fabric and sew it into a garment will depend on how brave I’m feeling.

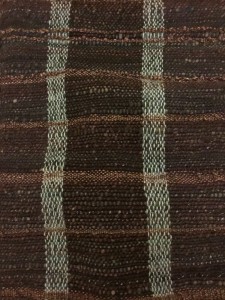
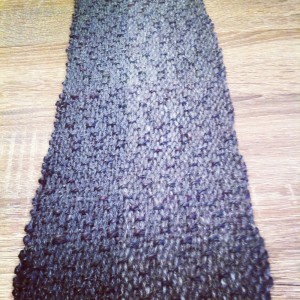
Freestyling stash buster plain weave

Freestyling stash buster plain weave

For this project, I used commercial yarn for the warp and a variety of handspun from my stash in the weft. It’s either Ryeland or BFL and there is some silk in there too. There is also some yarn I spun from a luscious combination of camel/seacell/faux cashmere from HilltopCloud

Honestly there was no real plan for warping. I decided how long I needed the warp to be and how wide and then made do with the yarn I had. I used a navy silk/wool, alpaca (turquoise) and some black super wash–all picked for sturdiness.

Similarly there was no plan for weaving–except I wanted to use as much of my yarn as possible! (There’s still a little left.) The only somewhat fancy technique I used was to make little loops by randomly picking up the weft with a long knitting needle, packing the weft with the reed and then pulling out the needle.

If I’m brave this cloth could become a fancy vest. If I play it safe, it will be a cosy wrap.

I wove my second project on my own 15″ Cricket loom. I used hand spun suri alpaca for the warp and some of the left over camel/silk for the weft. This technique is called faux twill, which is described by Jeen in the rigid heddle looms group on Ravelry. I’ve been wearing this project as a scarf.

Faux twill and fabulous

Faux twill and fabulous

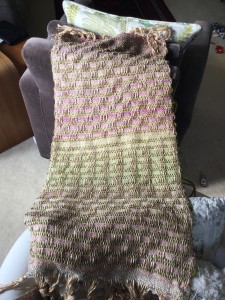
The third project was also woven on my Cricket loom. I used commercial yarns from my stash. The warp is a champagne chenille and the weft is Noro silk/cotton sock yarn and Brown Sheep chunky in a mossy green. Nice right?

Honeycomb

Honeycomb

I used a pick up stick to achieve this honeycomb pattern described in Jane Patrick’s The Weaver’s Idea Book, published by Interweave. This book is invaluable for RHL newbies like me who want to push themselves and try out many different patterns and techniques. Indeed the rigid heddle loom group on Ravelry has a thread devoted to those weavers working their way through the book. Check it out!

Learning: I want to try out the guild’s four-shaft table loom!

Color Resolutions 2015

2

It’s a few days into 2015, and I’ve found a couple of things that I want to do this year…maybe I will also finish last year’s projects, but who knows?

Pasture

Pasture

The first one I’ve actually started, based on the idea of this Sky-a-Day scarf. I’m calling it my “Grass is Always Greener” project. Using my drop spindle and hand cards, I’m going to color-blend and spin about 3yds of fiber each day, based on the color of the pasture out in front of our house. I’m hoping that not only will this make me better with the hand cards and the drop spindle (it should), but also show me just when it goes from being drab and winter-y around here to being so green that it hurts your eyes. And then in the summer when it starts to get brown again from the lack of rain, because every year these things sneak up on me. At the end of the year I’m going to chain-ply my singles into the continuous color order, and knit something.

Color blending on hand cards

Color blending on hand cards

Rolags

Rolags


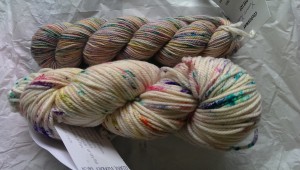
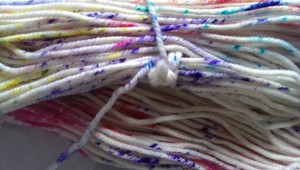
The other project I want to try is based on these yarns I found at one of Portland’s finest LYS, which are both (I believe) sprinkle-dyed, but to an extreme. After my weeks and weeks of messing around with kool-aid dying, I’ve finally become interested in dying yarn, and not just locks or roving.

Commercial sprinkle-dyed yarns

Commercial sprinkle-dyed yarns

Sprinkle-dyed yarn, detail

Sprinkle-dyed yarn, detail

Here is a link to sprinkle-dying from Lotus Knits. It’s in three parts and very informative. Stay tuned in 2015 for progress reports!

Get Weaving in 2015

2

It’s worth repeating that there are lots of benefits of joining a weaving, spinning and dyeing guild and that rigid heddle looms are simple yet powerful tools.

During the Guild’s fleece to scarf challenge in November I got to know two of my fellow guild members better–Sarah Howard and Elisabeth Kendrick. Sarah and Elisabeth are accomplished weavers, knitters, spinners and sewers. They have a few books out (Creative Weaving, is one) and Get Weaving is the latest.

Sarah and Elisabeth have inspired many over the years–including me–by showing there’s a lot more you can do with a rigid heddle loom than make scarves or table runners. Their new book demonstrates how to make garments from fabric handwoven on small looms (mostly 20 inch width).

I’ve picked out a few favourites.

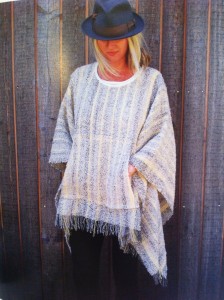
I love this poncho. It’s made from several panels of fabric sewn together and as Sal pointed out, it has a pocket!

poncho

poncho

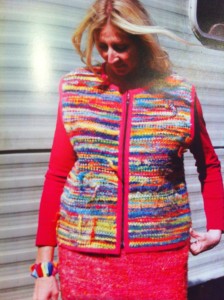
This bodywarmer is made from fabric woven with roving (ie unspun wool). What a great idea. This kind of garment is definitely a project I want to try.

Body warmer

Body warmer

And I love this jacket. It’s made from strips of rags. Just beautiful.

rag jacket

rag jacket

There’s lots more in the book–trousers, shorts, skirts and blouses. All made from fabric woven on the rigid heddle loom!


How to make a White Christmas wreath

2
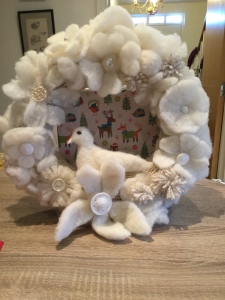
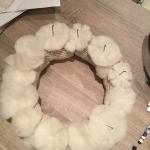
White Christmas Wreath

White Christmas Wreath

The holidays always sneak up on me despite the ample reminders from shops who start stocking their shelves with Christmas Fayre in September. My guild–The Mid-Essex Guild of Weavers, Spinners & Dyers–gave us two months’ warning (maybe more) about this Christmas ornament competition for the December meeting. Still I put the finishing touches on my entry–the White Christmas wreath–in the car before bringing it in to the hall.

The White Christmas wreath is made from materials that anyone who does sewing, knitting and spinning will probably have around the house–felt, buttons, a couple of beads, yarn, stuffing (wool or acrylic) and maybe a pipe cleaner or two if you’re feeling extravagant.

Like so many of my other projects I’d mapped out the what and how mentally. The first step was making some felt for the leaves and flowers. I used the wet felt method described in Complete Feltmaking by Gillian Harris. I used some white fleece I had to hand and some white iridescent angelica fiber. The felt I made was on the thin side and I did needle felt it in places to reinforce. Making the felt was the most time consuming part of the project.

felt--made from llanwenog fleece and angelina fiber.

felt–made from llanwenog fleece and angelina fiber.

The next step was to make a knitted tube that would act as the base. I used my Addi circular knitting machine and some white handspun yarn. Using the machine knitting the tube took about five minutes.

Making a ring on the Addi machine

Making a ring on the Addi machine

I then stuffed the tube with so neppy bits of wool I have in abundance–meaning the bits of wool left over from the combing/carding process. I sewed the ends together, et voila, a ring.

Flowers and embellishments came next.

adding flowers and leaves

adding flowers and leaves

As you can see from the photo I’ve opted for flowers and leaves which I cut freehand. I’ve sewed and glued on buttons and needle felted leaves and flowers into place. Lastly in a fit of inspiration I needle felted a dove to nestle above the poinsettia-shaped flower.

Oh, and I won the competition!

First trophy I've ever won for anything!

First trophy I’ve ever won for anything!

Fleece to scarf challenge–with the Mid-Essex Guild

3
newbury coat

The first sheep to coat challenge, 1811

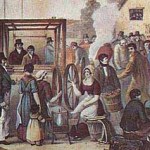
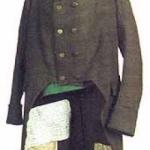
In 1811 John Coxeter a mill owner in Newbury, Berkshire (UK) boasted that so improved was his machinery he could certainly start with a fleece and make a coat in a day. On June 25, 1811 the first sheep to coat challenge was completed. It produced what is known today as the Newbury Coat. The garment (pictured below) still exists and is displayed at Coughton Court in Warwickshire– a testament wool’s sturdiness! Since the Newbury Coat, sheep to garment challenges have become annual events at at county shows, fiber festivals and guilds.

Mostly it’s all in good fun, but there are some who take it all a bit more seriously. The Guinness world record time for a sheep to sweater challenge–4 hours 51 minutes– was set back in 2004 by  Australia’s Merriwa Jumbucks at Merriwa, New South Wales. Last year Norwegian spinners and knitters attempted to break the record on live television, but fell a few stitches short. Those Aussies are hard to beat.

The Newbury Coat

The Newbury Coat

Last Saturday my guild–The Mid-Essex Guild of Weavers, Spinners and Dyers ran a slimmed down version of the sheep to sweater challenge.One of the guild members supplied and dyed the fleece from her flock of Southdowns. We broke in to teams of five and started with uncarded, dyed fleece to create two scarves per team in about 3 1/2 hours. It’s not as easy as it sounds. Half-way through the challenge we could have used a visit from a massage therapist!

IMG_0018

And we’re off!

There was a bit of inter-team trash talking…. well not really. Mainly we were sounding out strategy–such as how much yarn we needed to cast on 120 sts onto 8mm needles, should we be carding or spinning straight from the pile of fleece and should we ply from a center-pull ball or navajo ply? Luckily I was on a team with a bit of experience. One of my team mates had done a test run at home–something that never occurred to me!–and had a rough idea of how much yarn we needed to start knitting.

Once we had spun and plied enough yarn to cast on, the knitters dove in and did their thing. I mostly did spinning, but at the end knitted about five rows and cast off. Lo and behold we had finished two scarves. Talk about crafting on the fly. Phew!!

... three & 1/2 hours later Scarves!!

… three & 1/2 hours later Scarves!!

A Field Guide to Ponchos

2

Ponchos are everywhere right now. Here in Oregon it’s still warm enough to be poncho weather. I’m sure we will move on to bitterly damp soon enough, but in the meantime I’ve been daydreaming about knitting up a good poncho. Rachel has even said to me, “Sal, there is no good reason for you not to have a poncho.”

So I’ve been looking in my back issues of Vogue Knitting, and on Ravelry, and it’s true, there are a million poncho patterns out there. OR ARE THERE?

When I was a very small child in the 70’s, my mom and I had matching ponchos, that were handwoven! for us by a family friend of my grandmother’s. They were bluish, with mauve-y pink plaid, and I believe mohair because of the general hairy-ness of them. Then my cat got sick on my poncho, and that was the end of that. Cats are the worst.

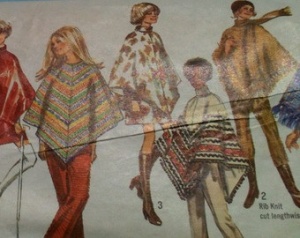
So your basic vintage poncho is a bias-draped afghan with a hole cut in the center:

Afghan ponchos

Afghan ponchos

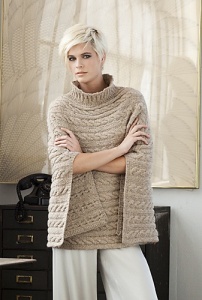
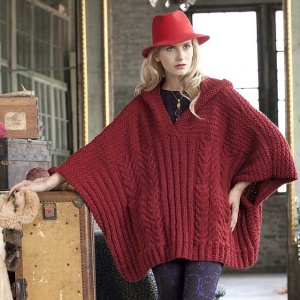
Now let’s look at the modern take on this.

VK Winter 2011/12

VK Winter 2011/12


VK Holiday 2010

VK Holiday 2010

VK Holiday 2011

VK Holiday 2011

VK Winter 2011/12

VK Winter 2011/12

Hey modern poncho, I get you. You’re a blanket that’s been folded in half with a neck hole added in. BIAS DRAPING IS SO LAST CENTURY !

But there are also some articles of clothing that are masquerading as ponchos:

VK Spring/Summer 2011

VK Spring/Summer 2011

Nope. This is a caftan. Note the deep v-neck: this is not a repurposed blanket.

VK Winter2011/12

VK Winter2011/12

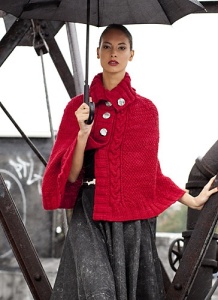
Tres chic! But not a poncho. The button-up front indicates that this is a cape.

Pickles pattern

Pickles pattern

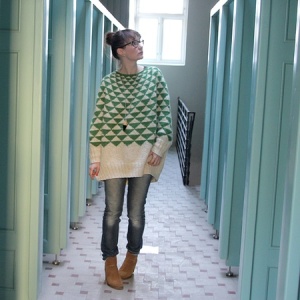
Rachel sent me this pattern. I love the geometric detail, but this is the worst offender as far as non-ponchos go: those sleeves someone added in mean this is clearly, NOT A PONCHO. This is unfortunately a very weird dolman sleeved…sweater. I have issues with sleeve fit in knitted garments. Ponchos bypass this by having no sleeves.

I hope this helps.

Log cabin lessons: exploring the rigid heddle loom

2
Finished log cabin scarf

Finished log cabin scarf

Impulse buying rigid heddle looms is just one of the things that happens at Sheep Cabana.

Last summer,I was out in Cambria, Calif., and stopped in at Ball & Skein. The store is chockablock with gorgeous fiber that I could barely resist, but I did. Instead I walked out with a 15″ Schacht Cricket rigid heddle loom, which I brought back with me to the UK.

I have used the loom a few times and have been muddling along with it–not making any serious improvement to my weaving skills. Then I came across a new book Woven Scarves by Jane Patrick and Stephanie Flynn Sokolov and published by Interweave. Full of beautiful projects and easy-to-follow instructions I felt more confident to try this log cabin scarf.

The plan was to spin some of my newly acquired and stashed heritage- and rare-breed fleece to create this beautiful log cabin weave. The log cabin pattern, I thought, would be great to show off the rare and heritage-breeds’ natural colours. One of the great features of Woven Scarves is there is a scale (actual size) photo of the commercial yarn used in the sample scarves alongside the instructions.

Shetland and North Ronaldsay handspun

Shetland and North Ronaldsay handspun

When I went to spin 200 yards each of Shetland Moorit (chocolate brown) and North Ronaldsay (white, specks of grey), I kept the book to hand and referred back to the pictures every so often to check the yarn thickness. I did blend some darker Shetland roving with the Moorit that had flecks of dyed silk in it. It gives a subtle effect in the finished object–just little bits of color.

The instructions for this project recommended using the indirect warping method. This requires a warping board, which I made out of some pvc piping. Honestly, I should have just bought a warping board. No matter.

warping

warping

Warping the loom was probably the trickiest part of this project for me. There was some considerable faffing with the warping board as I figured out how to use it.

Once I got the loom warped it was smooth sailing. Log cabin weave is a simple block plain weave. The pattern comes from the way the loom is warped (for example, light, dark, light, dark, then dark, light, dark, light, etc) and then woven alternating dark, then light, until switching to light then dark. There’s no call for pick up sticks or any of the other techniques you can use on a rigid heddle weaving.

weaving

weaving

However, it’s important to remember that before you go zooming off to weave yards and yards of fabric–you must hemstitch the beginning of the fabric and repeat the process at the end. It makes life a lot easier.

Next up in weaving: Attempting to sew a garment (or bag) out of handwoven fabric.