Knit your own adventure: swatching, gauge and EPS

6

When Tricia Holman visited my Guild to give a talk and workshop I didn’t think much of it. I knew Tricia carries on a knitting tradition begun by her aunt Elizabeth Zimmermann (EZ). What I couldn’t have known is how much my knitting would change as a result. 

Tricia visited the Guild in February with piles of beautiful and creatively constructed garments and hats to discuss how her aunt’s approach to knitting influenced her own designs. 

EZ, known as the grandmother of American knitting, is famous for her newsletters, a mathematical approach to knitting called Elizabeth’s Percentage System (EPS) and the “Surprise Jacket” patterns. 

Tricia noted that EZ’s knitting was deeply influenced by European traditions and that she was an advocate of Continental-style knitting (picking instead of throwing the yarn). EZ did not like purling and opted for knitting in the round or garter stitch patterns like the surprise jackets that have become a favourite with knitters around the world. That’s something else niece and aunt share. 

“I don’t like purling or sewing up. There are some who like it. What is so special about the surprise jacket is it’s really knitted origami,” said Tricia as she demonstrated how a single piece of knitted fabric could be folded into the surprise jacket. The guild members tittered in delight. 

Swatching is not for dummies

If EZ wasn’t a fan of purling or sewing up she certainly was a fan of swatching and test knits. If you’ve seen her Knitting Workshop DVD there are some Sasha dolls on the set sporting little sweaters and hats. EZ herself is surrounded by balls of yarn and swatches. 

That’s because for EZ gauge is everything. That and figuring out how to knit smarter—bending the knit to her vision instead of the other way around. Again her niece Tricia has taken her aunt’s what-if attitude. Through swatching and testing she has her own EZ-inspired designs. 

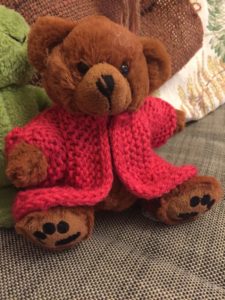
Tricia had many sizes and variations of the surprise jacket on show—from “very large nephew” size to tiny ones modelled by teddy bears. They showed the jacket’s flexibility. Just change the number of stitches or the gauge to change the size. 

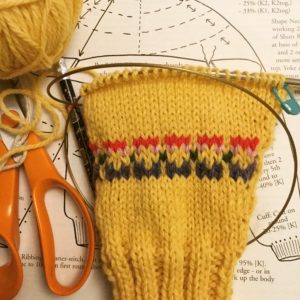
little bear jacket

At the workshop Tricia had us do a teddy bear-sized surprise jacket. I’ve knit a surprise jacket before and I still screwed it up. But if you’re only working on a mini version, then it doesn’t matter so much when you need to start over. Also, you can learn the technique before you jump in to start the real thing. 

Tricia’s other top tip was to make a swatch hat. Want to try out a new idea? Why not make a hat to see if it works. It’s a technique Tricia used for her own patterns including her Spiral Sweater.

Knitting for spinners

Tricia is a spinner and says, “I get lots of wool as a spinner and then you’re on your own with patterns. That’s where the Elizabeth Percentage System is great. I can’t answer how much wool you will need but if you’re a spinner you can always spin some more.”

The Percentage System is a calculation for sizing garments based on gauge and desired body circumference.  “EPS” consists of a simple mathematical formula to determine how many stitches to cast on for a sweater, based on chest circumference and the assumption that sleeves and body are usually proportionate no matter what yarn or gauge is used.

Tricia’s message to spinners who knit was, you don’t need to follow patterns slavishly or be put off by sewing up (or even purling!). With a little imagination and some simple math you can easily make yourself a sweater that fits. 

Choose your own knitting adventure 

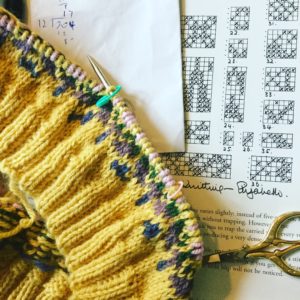
Cuff with peerie flowers

Many of EZ’s patterns are based on EPS and are sort of a choose your adventure approach to knitting. She gives you a map. You do the rest. It will all work out fine–if you swatch.

Knitting without a pattern had been out of the question for me, mainly because of lack of confidence, due to a longstanding laziness about swatching. I rarely swatched. I now realise that was dumb–especially for a spinner who knits. 

After a couple of hours with Tricia I was raring to go. I busted out my EZ’s Knitting Workshop DVD, my copy of the Opinionated Knitter and some yarn that had been lingering in my stash way too long.

casting on the body

I cast on the body, did a little leaf fair isle pattern (more stash yarn!). Now I’ve done the body and a sleeve. Once I get another sleeve knitted then it will be time to dive into the yoke knitting. I love yoke sweaters and am excited for this step. Still thinking about what kind of pattern to use. 

In anticipation of my next EPS knit, I’m spinning up some yarn for a Gansey. Now that I know I can choose my own knitting adventure based on the gauge of the yarn I’ve made, well the possibilities are endless! Yay. 
small

2

Start small. Start with a scrap of cloth, a drop spindle, a silk cocoon, a few yards of yarn or grams of wool. See what you can make.

Start compact, like a seed, and grow into something bigger. Maybe your project is a seed intended to be a dye garden.

Think small environmental impact. Take something worn and repurpose it. Make rag rugs or an upcycled yoga mat. Get inspired to mend in the Japanese boro style.

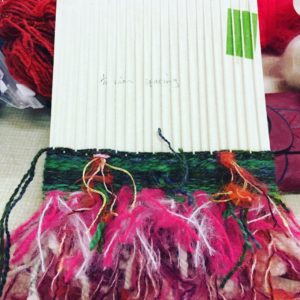
weaving on cardboard

Use small tools– a felting needle, a drop spindle or a postcard-sized piece of cardboard repurposed as a loom.

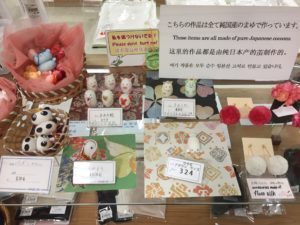
Silk cocoon ornaments, Kyoto

Unravel a silk cocoon. Knit a fair isle square and then another. Crochet a toy for your child. Knit a sweater for your favourite teddy bear. Make a pompom. A tassel.

We’ve started a pinterest board with ideas for small projects. Throughout 2018 we’ll be developing this idea and seeing how big it can get.

Super slow yarn: adventures with a wool picker

2

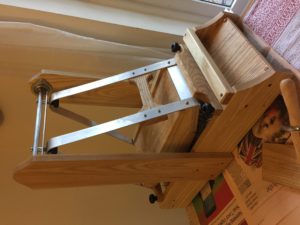
Classic Carder Wool Picker

When Sal and I first started spinning and using raw fleece we spent a lot of time–and I mean a lot–talking about fiber prep. A lot of this conversation revolved around la technique and getting the best results we could with the tools we had.

Recently I had the privilege to borrow my guild’s brand new wool picker. I was excited to use the picker and once I got going with it, I started thinking on the whole process of prepping fiber at home.

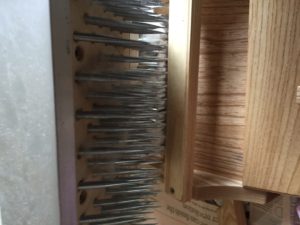
The wool picker is a new tool to me. It has big sharp spikes which tease apart the fiber. Push in a little bit of washed fleece in at the front and then push away the boat (that big swinging part with spikes on it). In a few seconds light bits of fluff comes out the other side.

Sometimes fleece can be quite tough to open up after its been washed. The picker gets out a lot of the dirt and VM and pries apart the locks making it ready to card. If  you get a chance to use a picker, do it. The effect is truly incredible. If you’re used to prising locks apart with combs or hand cards the wool picker is faster, easier and doesn’t leave you with sore wrists.

Caution: Big sharp spikes

Pick, comb, card

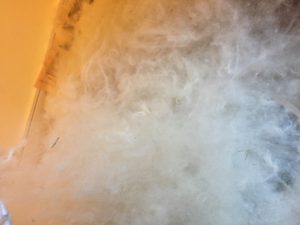
I put through a shetland fleece and the picker did a great job opening up the fleece and releasing dirt. Seriously this was one dirty fleece! It is also a quite fine fleece and once the picker did its stuff there were tons of nepps.

combed Shetland fleece

At first glance getting out the nepps (unless you want them) looks a daunting task. Out came my wool combs which helped me get out most of the nepps, but not all. I put the combed fleece through the drum carder. There were still nepps, but my light and fluffy batts were lovely to spin.

I also put some Suri alpaca fleece through the picker and the results were great. Suri is tough to process by hand and the picker made easy work of it. I can’t wait to spin a test skein.

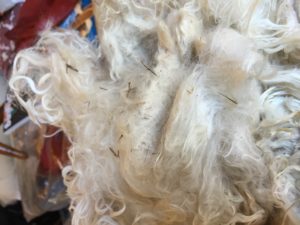
suri fleece before

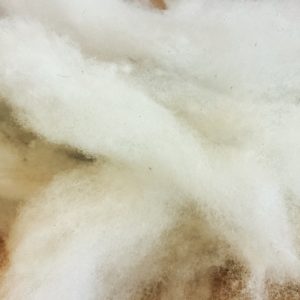
suri fleece after picking

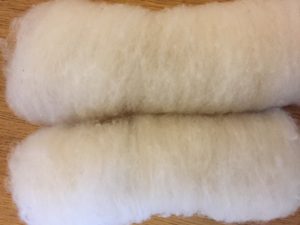
fluffy batts

Slow yarn

Processing raw fleece by hand is time consuming. I haven’t done a lot of big batches of fleece in awhile and had forgotten exactly how long it takes. It also can be a little intimidating when you see a massive pile of fluff that you then may need to go through several times–depending on how fine you want your yarn.

Bear in mind you are not a robot (obviously). Your two hands and some tools are not going to be able to replicate mill-made roving. There will be nepps. There will be a little VM. That’s all fine.

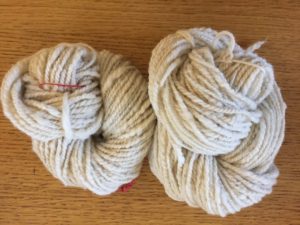
I carded some of the picked fleece into rolags, picked out some of the nepps and it spun nicely into a fat, fluffy yarn. You don’t need go crazy with fiber prep to get a nice, slow yarn.

fluffy shetland yarn

Surface Design with Natural Dyes

2

Rachel: “I found these cute block-printed throw pillows I want to make. How can I do that with natural dyes?”

I’m mostly a spinner and knitter, but in the natural dye classes that I attend at OCAC, there are a lot of people who focus on textiles. We’ve used a simple technique to get a lot of different results, and it’s really a lot of fun.

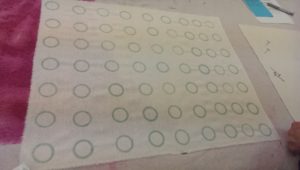
You will need the items you wish to print with: print blocks, stencils, potato stamps, paintbrushes, silkscreens, or anything else, and a few pieces of equipment: a blender, a steamer, an old bedsheet, and gum tragacanth. Gum tragacanth is a natural product that is most often used making fondant for cakes. Here it’s used as a “sticking” medium. What’s good about gum trag vs. other similar products is that it doesn’t interfere with or change the color of your dyestuff.

The technique: mix up some gum trag and water in a blender. Say, 1/4 C gum trag and twice a much water. You will hear and feel the mixture get thicker after about thirty seconds. If it’s too thick, add more water. If it still seems a little runny, let it sit for a bit, it thickens over time. Don’t mix more than you’ll need for your project at hand, because it only lasts about a day in the refrigerator. (Obviously it will be easier to judge once you’ve done it, but a little medium goes a long way.) You will want it thick enough to adhere to your stamps, but not so thick that you lose definition. If you’re silkscreening, you’ll want the thickness of silkscreen ink. Make some practice stamps before you commit to your fabric!

Mordant Printing

You can mix a mordant into your gum trag mixture. We used very small amounts of copper and iron, and a slightly less small amount of alum during our classes.

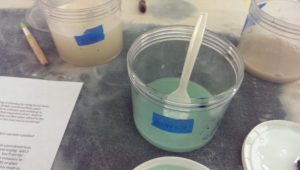
Gum trag with mordants

Gum trag with mordants

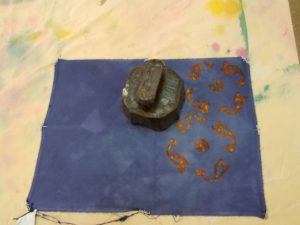
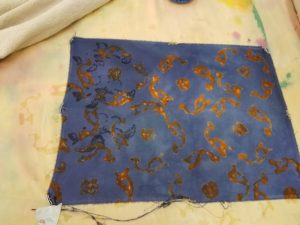
Here is a thread spool print with copper mordant:

2016-10-04-19-39-50

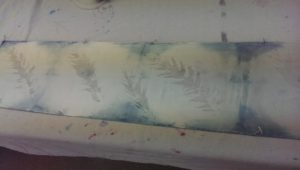
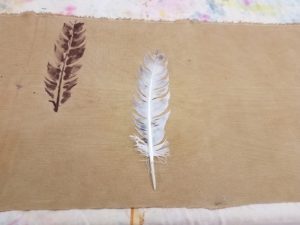
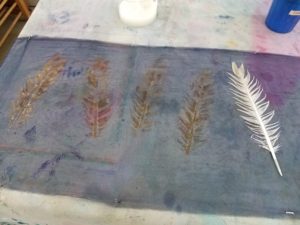
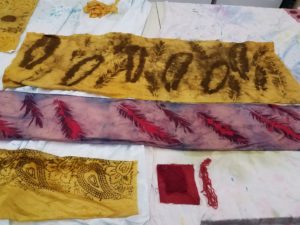
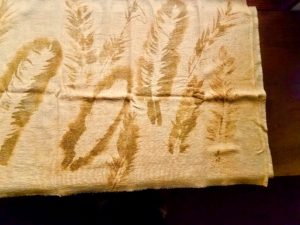
Here I’ve printed on a silk scarf previously dipped in indigo with alum, using a feather for my print:2016-10-04-19-59-47

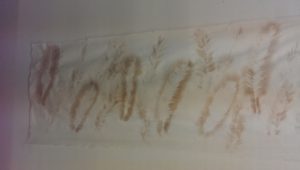
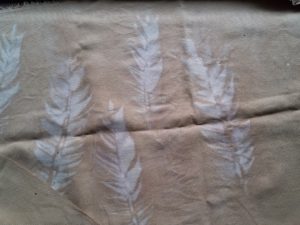
Here I’ve used an iron mordant on silk noil, again with feathers. I used an old paintbrush to apply the mordant mixture:

2016-10-04-19-40-51

Discharge Printing

You can mix and acid or a base into your medium to discharge color on an already dyed piece.

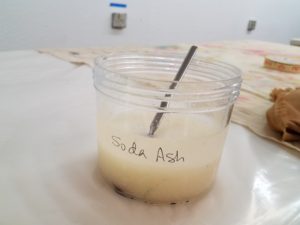
Gum trag with soda ash

Gum trag with soda ash

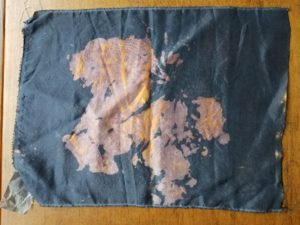
Here I tried using soda ash to shift the color on a pisolithus mushroom-dyed piece of silk:

2016-10-18-19-17-33

Here I’ve used tartaric acid to discharge the logwood dye on silk organza:

2016-10-18-20-22-27

You can do combinations of these techniques:

2016-10-18-20-22-36

Discharging with a print block

And printing with an iron mordant

And printing with an iron mordant

How to set your prints:

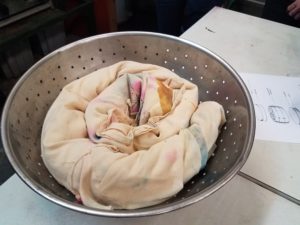
Lay out your dried fabric on an old cloth in a single layer, fold extra cloth over, and roll up, jelly roll style so that it will fit in your steamer basket. You want STEAM ONLY! Take care that the water is not getting into the bottom of the basket, and place a towel or piece of felt on top underneath the lid to keep condensed water from dripping back down. Make sure you’ve got steam going before placing your jelly roll in the steamer basket. Steam ten minutes, and remove carefully. Let cool until it’s comfortable to handle, then unroll.

Jelly roll in steamer basket

Jelly roll in steamer basket

Wash your steamed fabric in warm, soapy water to get the gum trag residue out. It still contains mordant, discharge or dye, and if the excess isn’t washed out it will go into your dye pot and change the result.

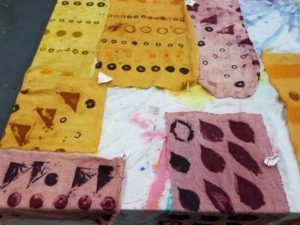
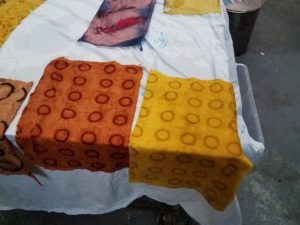
Here are some results after dyeing our prints. The yellow is from onion skins, the pink from Brazilwood, and the orange a combo of both.

2016-10-11-19-47-43

2016-10-11-19-33-30

Here are my feathers. You can see that the gum trag wasn’t washed out completely by the extra dark muddiness around the onion skin feathers.

2016-10-11-19-33-24

I decided to after-mordant the whole piece in alum, and not only did that get rid of the excess print fuzz, it changed the color of everything. It’s a bit 1970’s decor now, but I think it will still make a nice pillow:

2016-11-14-14-09-41

For the discharge printing, you don’t necessarily have to steam the piece before washing. Here’s a sample of logwood on silk that I discharged by painting the back of a leaf with gum trag and citric acid, and then simply washing when I liked the result. It made a nice multi-colored effect:

2016-11-14-14-07-15

I steamed my Ph-shifted fabric, and once I washed it out it ended up being merely discharged. I think I would have had better results if I’d washed it out as with the leaf print:

2016-11-14-14-10-18

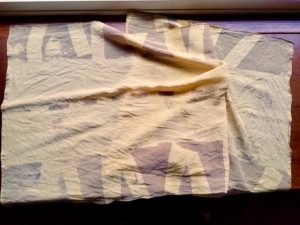
And here is a piece of silk crepe de chine that I silkscreened with alum and then dyed in Osage orange:

2016-11-14-14-16-07

So, to answer your question Rachel, you have a lot of options. You can make a mordant print on unmordanted fabric. You can make a (different) mordant print on mordanted fabric. I didn’t include any photos, but you can mix natural dye extracts with your gum trag and print directly that way, with color. You can discharge already-dyed fabric. And you can do combinations of these techniques. You’ll no doubt have noticed that all these examples are on silk, but many of my classmates used this same technique on cellulose fibers.

There is also the option of surface design using natural pigments, which I’ll cover in my next post.

Handmade gift ideas for men

6

The leaves are just starting to change colour and fall, but the Christmas puddings are on the shelves at the shops and it’s just a matter of time before the first pre-Christmas sales begin.

Over the past few years my sister, mother and I have been giving each other handmade gifts at Christmas. Mom makes wonderful hooked rugs and cushions and my sister has made us beautiful felted stockings, knitted scarves and sweaters. I’ve woven wraps for my mom and made yarn and soap for my sister.

This year I want to make a gift for everyone in my family–luckily we are a small group! The problem has been coming up with something different and useful for my dad and husband.

I did a search for DIY/handmade gifts for men and the options some of the ideas were hilarious–a bouquet of bacon, flavoured toothpicks and “restore an heirloom axe“. Also apparently beard oil is The Thing, but we are a beardless bunch.

Not all the ideas I saw were totally crazy and here are some that aren’t beard oil, bacon, scarves or hats.

Utility tote by Don Morin

Utility tote by Don Morin

Man bag: I was telling Sal about this tote bag my dad uses as a sort of briefcase. It is a freebie from a pharmaceutical company he was given for judging a science fair. It is ripe for replacement.

I found this utility tote pattern by Don Morin. It’s perfect, and as Sal says all I have to do is stencil some drug logos on it.

There are loads of free patterns for messenger bags out there both knitted, felted and sewn. How about upcycling some jeans or natural dyeing or printing on some organic hemp fabric then sewing it up into a bag? There are so many ways to use your fiber arts and sewing skills for a messenger bag.

Finlayson "sweater" (Thread Theory)

Finlayson “sweater” (Thread Theory)

Sweatshirt: I love this Finlayson Sweater from Thread Theory. I’m going to make this up for my husband. I’ve got some jersey fabric in my stash. There are some nice organic jerseys available now that could be naturally dyed. Or maybe you have some handwoven you could use. Here’s a link to our guide to using handwoven for sewing projects.

For further inspiration: Independent designers have some beautiful sewing patterns for men now. Check out Walden, Thread Theory, Hot Patterns and Merchant and Mills.

Man scrub: Men like a good scrub just as much as women. Last year I wove washclothes using Syne Mitchell’s Loop-pile washcloth pattern from her book Inventive Weaving on a Little Loom. I used cotton, but she has a hemp/aloo version which would be a great alternative to those plastic shower poufs. Once this one has outlived its usefulness you can throw it on the compost pile and make another one.

There are knit and crochet options. Here’s a shower mitt from yarnspirations which could be knitted in hemp or cotton. For crocheters, here’s a loofah.

Do you want to make homemade soap? You should. Look no further than Humblebee & Me. Loads of idea not just for soap, but things like DIY tiger balm, after shave and lip balm.  This woman is a genius.

Slippers: Slippers are a classic dad gift. There are so many patterns to choose from including: Martha Stewart’s, Drops’ felted and these gorgeous ones from Arne & Carlos.

There are some upcycling possibilities here. Why not use old sweaters,  felt them and sew them into slippers. You could sew a bit of old denim on the bottom to make them sturdier.

Dice bag: Do you have any gamers in your life? How about a dice bag? Here’s a knitted one–twelve – sided no less! You could run up one on the sewing machine maybe with Doctor Who fabric? Or Space Cats!!!

Mug cosy: Another classic. Again there are loads of patterns on Ravelry. But you could easily use woven fabric or even sew them with your favourite novelty fabric. Free patterns galore online.

Other ideas might be making a belt on an inkle loom or knitting a pair of socks.

One last idea which is not sewing/fiber arts related, but I think is a great idea for a Fathers Day present–homemade barbecue rub. My dad would definitely use this! Thanks Martha.

Last year Sal wrote a post on gifts for the fiberista. Lots of good ideas here.

Please let us know your ideas for making for men.

Sewing a simple garment with handwoven fabric

0

Whenever I show my mom one of my weaving projects she asks the same question: “is it a table runner?” The question sets my teeth on edge. Long and relatively narrow woven fabric could be mistaken for a table runner, but as my friend Sarah Howard has demonstrated many times over with a little imagination it can be so much more.

Saori weaving books show many of quick and creative ways to use handwoven to make simple garments. If you are looking for a tailored garment these aren’t for you. Take a look at what Sarah does.

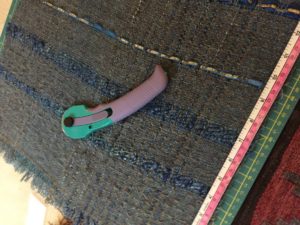
What I like about these saori projects is their simplicity. You don’t need to be a whizz with the sewing machine and you don’t even need a pattern. What you do need is a tape measure and a pair of scissors (or a rotary cutter) a ballpoint needle for your sewing machine and maybe some iron-on woven interfacing. Ballpoint needs are used for sewing jersey fabrics and work great on handwoven. Definitely use one.

IMG_2162

I wanted to make the draping collar vest in the Beginners’ Saori Clothing Design book. The book is very clear that these garments are designed for the average Japanese woman—5′ 2″ (157 cm) and 120 lbs (54 kg). The draping collar vest “pattern” calls for fabric 40 cm (15 3/4 in) wide x 172 cm (1.88 yards) long. That piece is then cut into three–2 x 54 cm, 1 x 64 cm– two pieces of equal length and one longer piece which becomes the collar.

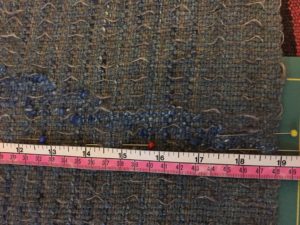
For my vest adjustments had to be made. I measured my back–from the neck to the top of my butt and from my shoulder to the top of my waist to get ballpark measurements for width and length. Keep in mind your woven fabric will shrink when you finish it. Whatever your measurements are, add on some more to account for shrinking.

I made my fabric about 50 cm (19 3/4 in) wide and ended up being 211 cm (2.3 yards). That was plenty. After washing the fabric by hand in hot water and a little soap I was ready to go.

First step was to figure out how long to make my pieces. I subtracted 172 (length of suggested fabric) from 211 (length of my fabric). That gave me 39 cm which I divided by three to get 13 cm. To increase the size of the original pattern, I added 13 cm to each piece, which gave me two pieces at 67 cm and one at 77 cm.

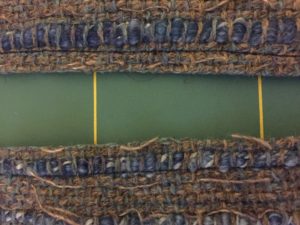
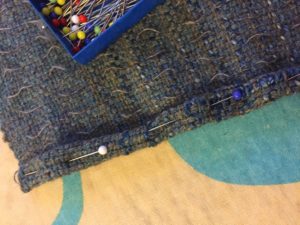
Now for the cutting. Saori weaving books suggests sewing two lines across the fabric and then cutting between the pieces. This is to minimise fraying. Remember the old saying measure twice, cut once? Definitely follow that rule when working with handwoven. In the photo below I’ve mapped out where I want to sew with a trail of pins.

pins in a line to follow for sewing.

pins in a line to follow for sewing.

I sewed to lines and then cut between them using a rotary cutter. Scissors are fine.

cutting between the lines

cutting between the lines

The next step is adding a hem on to the tops of all three pieces. I simply rolled the fabric over, pinned it and then sewed.

pinning and sewing the hems

pinning and sewing the hems

Once the hems are sewn, lay out the three pieces of fabric right side up. The longer piece is in the middle, lining them up at the bottom and overlapping them slightly. Pin into place.

lay out fabric right side up, sew on the right side

lay out fabric right side up, sew on the right side

On the right side, sew 5 cm from the shoulder to the arm hole, leave however much you want for an arm hole (about 25-30 cm) and then sew the rest of the seam. Repeat on the other side. Flip over and make a small hem on along the bottom (on the wrong side). I ironed on a small strip of interfacing and then did a zigzag over it.

Et voila!

Finished garment

Finished garment

IMG_2169

Carding by hand–la technique

3
Millet's Woman Carding Wool

Millet’s Woman Carding Wool

“The purpose of the carding process is to align, thoroughly, all the fibres and to spread them evenly across the carders. This process is essential for the production of a woollen thread and is often employed in preparation for a semi-woollen and semi-worsted yarn.”

—Eileen Chadwick, The Craft of Handspinning

Why use handcards when you can use a drumcarder? Handcards are easily portable and great for blending colours. They are also perfect to make rolags, which are, I believe, the best preparation for longdraw woollen spinning.

Gradient of natural colours. Carded by hand

Gradient of natural colours. Carded by hand

I like my handcards, especially for making rolags. Yes I could use my drumcarder, but for a recent project where I wanted to achieve a gradient effect for a woollen yarn, I stuck with my handcards. Rolags seemed like the way to go for a nice woollen yarn. Carding up rolags is not particularly time consuming once you get the hang of it. You will quickly get a feel for how many rolags you need to spin a bobbin of singles.

Here’s a short video of me demonstrating how I card.

I’m not saying this is the way. It’s the way I was taught by an experienced guild member and reflects the technique Chadwick described in her book.

A couple of tips for handcarding success:

  • Don’t overload your cards with fiber. Handcards aren’t designed to take big quantities. Go for 5-10 grams at a time.
  • Easy does it, don’t grind your cards together.
  • Don’t worry that all the fiber doesn’t transfer from one card to another. It’s not supposed to.
  • If your forearms get sore, you’re doing it wrong. Stroke one card gently over the other.
  • Check out Eileen Chadwick’s carding how to: pages 33-37 of The Craft of Handspinning.

    finished project!

    finished project!

Daffodils, St David’s day & Welsh cakes

3
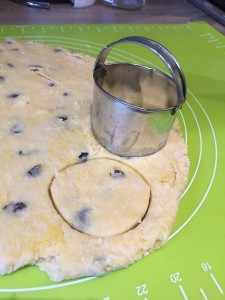
Welsh cakes

Welsh cakes

It’s St. David’s day, the day commemorating Wales’ patron saint. It’s a day for daffodils and making welsh cakes, which are a sort of scone/pancake hybrid and delicious.

Today I embarked on some St David’s day-inspired craft activities–dyeing with daffodils and heather–and made a batch of Welsh cakes. The cakes are all but eaten and I have some dye results to share.

I was inspired by an article in YarnMaker to use daffodils as dye stuff. The sample in the article was a lot more yellow than what I’ve been able to achieve. However, I’m sure if I used more flowers I would have gotten a stronger colour. Still I like this pale yellow.

imageHere in England the daffodils have been out for a few weeks and there are many more to come. Anyone who has waited all winter to get out and gather some fresh dye stuff, daffodils are a great place to start  I used 6-8 small blossoms for the dye stock and mordanted my Norfolk Horn yarn with alum and cream of tartar. The dye stock was a vivid yellow but it took quite some time for the colour to strike. I’m going to try this again with a greater quantity of flowers.

Daffodils, alum/cream of tartar mordant

Daffodils, alum/cream of tartar mordant

Winter-flowering heather is a hearty if tiny blossom that gives orange/brown to grey and brown/grey colours. It’s another option for those looking for fresh dye stuff in the winter months. Heather is associated more with Scotland than Wales, but I’ve used some handspun Llanwenog to keep the Welsh theme going.

Heather and a few mahonia berries

Heather and a few mahonia berries

I used a few handfuls of white heather blossoms in my dye pot and after awhile a orange/brown colour appeared.

The first sample (bottom) here is with the alum/cream of tartar mordant which to my eye has made a light rusty brown. (It’s not easy to see in the photo).

Top: heather, iron mod  Mid: heather, copper mod Bot: heather, alum/cream of tartar mordant

Top: heather, iron mod
Mid: heather, copper mod
Bot: heather, alum/cream of tartar mordant

The second sample (middle) was from the same dyepot to which I added copper sulphate as a modifier. To me this sample is somewhere between a yellow, a pale green and a brown, depending on the light and what colours it sits next to. It doesn’t look like much, but I love it’s subtlety.

The final sample (top) is again from the same dyepot with iron added as a modifier. I see a pale blue/grey. I love how these three sample look together. I can envision using this palette in a weaving project or perhaps a sweater or wrap.

Spring time is still a few weeks away, but more dyestuff is popping out of the hedgerows and flower beds everyday. It’s been warm here and I’ve seen gorse for a few weeks now and the first broom flowers have started to appear. Gorse gives a yellow and its smell is unbelievable–think pineapples and coconut. Broom should also give yellow with alum and a green with copper.

Warm weather means that sunny spots other flowers are growing. Keep your eyes open for calendula. There’s also leftovers to gather. I pocketed a few handfuls of Mahonia berries the other day. Allegedly they give some colour. There are also ivy berries and acorns.


Gift Ideas for the Fiberista

2

Rachel suggested we put together a list of fun or useful gifts for the fiber fanatics in your life. Which is funny, because every year before Rachel’s birthday or Christmas I get an email from her husband asking for gift suggestions. In Rachel’s case I’m at an advantage, because we talk about our fiber plans daily, but putting this list together I’m at a disadvantage because nothing on this list is on the list I made for Rachel’s husband! My spinning Guild also has it’s year-end gift exchange in a couple of weeks, so it seems like there’s always an opportunity to buy (or make!) a well-received gift.

Here are some useful tools:

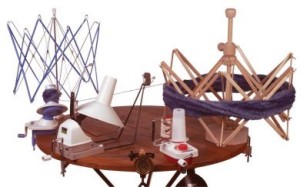
a ball winder

a ball winder with yardage counter

a yardage counter

a swift

Ball winders and swift

Ball winders and swift

a niddy noddy. Make a custom-sized one on the cheap out of PVC.

small scissors

measuring tape

a wraps-per-inch gauge

blocking pins

a diz:

Diz

a hackle

a blending board

a dog comb or flick carder for preparing fleece

a few extra bobbins for their spinning wheel. These are always welcome, but be sure you know what kind of wheel your friend has—different manufacturers make different sizes and they’re not always interchangeable.

soap nuts

spinning wheel oil! I’m always having to depend on my fellow Guild members when my wheel starts whining during meetings, because I don’t have a small travel tube of it.

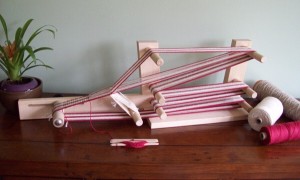
Does your friend weave? How about a travel loom, a pin loom or an inkle loom? There are plenty of instructions online on how to make a PVC inkle loom.

Inkle loom

Inkle loom

Does your friend only spin wool or alpaca roving? Maybe a gift of cotton, flax, an interesting synthetic fiber, or silk hankies. Rachel and I have found that spinning different types of fibers really helps with our overall technique. A tip: if you give silk hankies, include a bottle of talcum powder. It smooths over the rough places in your hands and makes mawata spinning a breeze.

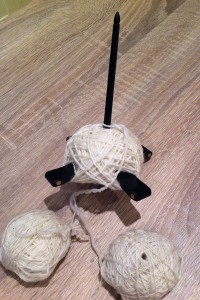
Does your friend have a drop spindle? A Turkish drop spindle? There are lots of beautiful hand-made spindles out there. Look on Etsy or search online for hand-crafted spindles.

Turkish spindle

Turkish spindle

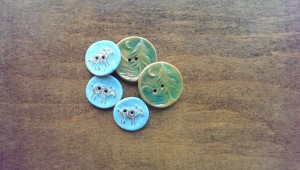
Notions. I love giving and receiving buttons. I find they inspire new projects, and you can usually find designs for anyone’s favorite interests. Etsy is also a great place to find handmade notions and shawl pins, by artists local to your area or from around the world.

Locally crafted ceramic buttons made by BeadFreaky that I found on Etsy

Locally crafted ceramic buttons made by beadfreaky that I found on Etsy

A salad spinner. These work great for getting the wet out of small batches of fiber. If you think your recipient will be confused, include a little unwashed fiber in the basket. Another tip: if your friend is in need of a salad spinner for, well, salad, definitely get her two! Thrift stores are a great place to find perfectly good second hand salad spinners for fiber processing.

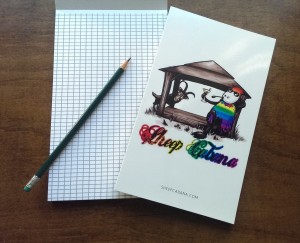
Knitter’s graph paper. Great for charting things or keeping track of where you are in a pattern (ahem, Rachel). We happen to have a handy-sized Sheep Cabana version available in our brand new Etsy shop:

Sheep Cabana Knitter's Graph Paper

Sheep Cabana Knitter’s Graph Paper

Books. We are a bit on the fence about books. I like ones that are reference books, stitch dictionaries, and other how-to types.

If your friend really likes making socks, the latest sock-pattern book might be up his alley. I would check out his library first. Your friend’s Ravelry queue or Pinterest boards are also good places to check for favorite designers and designs. Some designers on Ravelry also give the option to gift patterns electronically, which is great. Support your indie designers!

There are some novelty books out there which non-knitters tend to give knitters. Coffee table books, if you will. If you’re tempted by something like that, ask yourself how many faux-taxidermy meerkats or rustic-modern crochet ponchos your friend is going to make. If it’s a resounding “That many!” then go for it. But still: if your friend has an e-reader, consider the e-version of the book.

One last idea is project bags and small notions cases. Lots of people make these, probably people you already know in your Instagram feed.

If I’ve left anything off this list, it’s because it’s on Rachel’s surprise list. However, as far as gift giving goes, if in the long run your recipient would rather have something useful than be surprised, just ask them what they might want! I find that that’s often the most appreciated gift of all.


More hot tips for scouring fleece–without soap

2
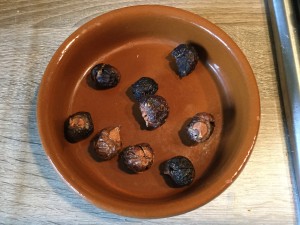
Soap nuts!

Soap nuts!

Have you heard of soap nuts? They’re the little glossy shells from the fruits of trees and shrubs of the Sapindus genus. They can be boiled in water to make a liquid soap or popped into a muslin bag and added to laundry. Even though they’re called soap nuts they’re not soap as is commonly known (lye plus fat). Soap nuts are lauded as a non-toxic and sustainable laundry alternative. Oh, and they’re a lot less expensive than commercial detergents.

So what does this have to do with scouring fleece? I started using soap nuts for my family’s laundry mainly because of their eco credentials, but also because they lack the heavy perfumes present in so many commercial detergents. Smelly detergents! Yuck! They worked incredibly well.

I also struggled to find an unscented, eco-friendly detergent to use on fleece and thought the fleece scouring solutions (like Power Scour) on the market to be on the expensive side. When it came to getting ready for a big fleece scouring session I thought, hey, why don’t I try the soap nut liquid on the fleece?

How did it go? Well, it worked.

I made up the soap nut solution–boil 50 grams of soap nuts in 2 litres of water for 10 minutes. Cool. Strain. (50g of soap nuts can make 12 litres soap.)

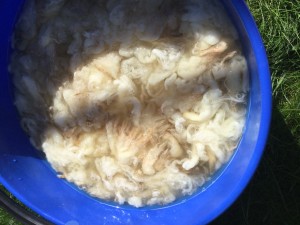
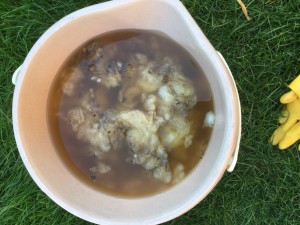
Bowmont fleece soaking in soap nut solution and hot water

Bowmont fleece soaking in soap nut solution and hot water

I filled a bucket with very hot water, gently added about 250 ml (roughly 1 cup) soap nut solution and then added my fleece. Immediately I could see the water turing that milky brown colour you get when washing fleece. I let it sit for awhile before draining it and spinning it out in the washing machine.

Yes, I put wet fleece in my washing machine on the spin cycle. It’s the same technique Sally mentioned in her post on scouring fleece. Your fleece won’t felt. If you’re worried about smell you can clean your machine with white vinegar and baking soda. I didn’t have a smell problem.

The next step was to rinse the fleece in hot water. I had a very greasy fleece (Bowmont) and it felt sticky when I took it out of the washing machine. To address this stickiness I added a good dose of white vinegar to the hot water rinse. I figured hey, it won’t hurt the fleece, right? My theory was the acidic vinegar would help reduce the stickiness.

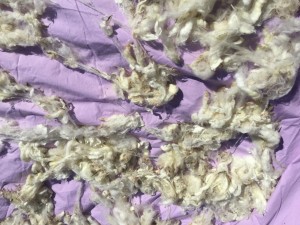
Bowmont fleece drying

Bowmont fleece drying

When I added the vinegar the fleece fizzed and bloomed, opening up nicely. I let it sit for awhile before spinning it out in the washing machine and spreading it out on a sheet in the garden to dry. There’s no vinegary smell on the fleece either.

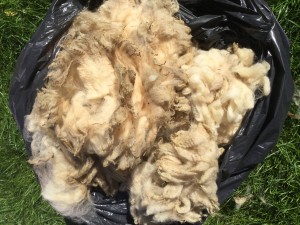
It occurred to me that I’d run this experiment on a relatively clean fleece–no muck, negligible VM. What about a muckier one? I found some fleece that needed a little more work, picked out the really gross stuff and soaked it in the soap nut solution and ran it through the same process in the washing machine and vinegar rinse.

Muckier fleece

Muckier fleece

This fleece is a 3/4 Southdown lamb and not nearly as greasy as the Bowmont. The soap nut and vinegar treatment worked really well.

Getting the dirt out! (3/4 Southdown fleece)

Getting the dirt out! (3/4 Southdown fleece)

You get through a lot of water when washing fleece. I didn’t want to pour it down the drain and instead used it to water the garden. That’s another benefit of using soap nuts. Yes the water is a bit greasy and mucky, but there isn’t anything harmful to plants or the wider environment in it.

There is another way to wash a fleece without soap–the fermented suint method. Basically the method is: soak your fleece in rainwater until the suint (sheep sweat) ferments creating a kind of soap. I have not tried this method, but I’ve spoken to a few people who swear by it. Although apparently it’s better for low-lanolin fleeces and it’s even smellier than scouring fleece with soap.


Autumn Leaves and Contact Dyeing

2
image

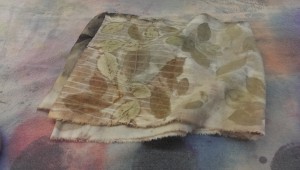
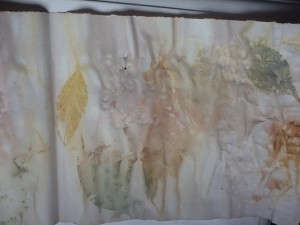
Instructor’s sample of leaf contact dyeing

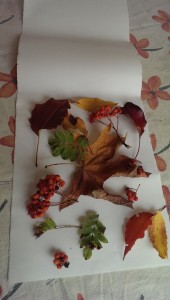
I had my first Natural Dyeing class at the Oregon College of Art and Craft last week. We started by walking the campus and collecting various autumn flora: fallen oak and maple leaves, pink-backed cherry leaves, fresh comfrey, spotted dying blackberry leaves, walnut hulls, tupelo, madrone and walnut leaves, Indian blood grass, and anything else that caught our eye. The ostensible purpose of this was to collect material to make our own contact dyed projects, but really it was to get us excited about natural dyeing. This time of year in the Pacific Northwest the ground is littered with dyestuffs, and the quick and easy method we learned yielded pattern as well as color.

image

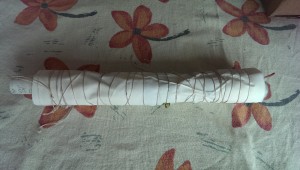
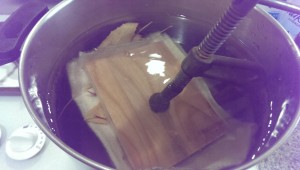
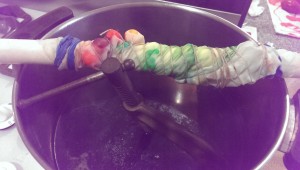
Once we collected our leaves, we laid them out onto fabric or paper, and either rolled up our fabric tightly around a stick (or for added color, around a rusty iron nail) or accordion folded and clamped for a shibori effect. These packets are then simmered in a water bath for an hour, and then removed and unwrapped.

image

image

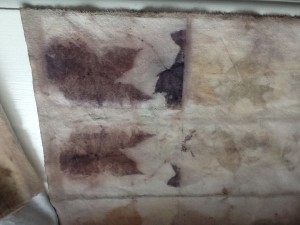
What I found most interesting about this technique is that there is really very little dye in individual leaves (for the most part tannic acids) but because of the wrapping or clamping, the color can’t migrate anywhere other than onto the fabric or paper. In other words, the opposite of leveling. In a lot of cases, the color transfer is more akin to printing— the fabric or paper is not really dyed per se, but stained or imprinted with the actual leaf color, giving pinks or greens which don’t exist as an actual dye. Our instructor cautioned us as much, saying that these colors will fade with washing or over time. That said, there definitely was dyeing of fabric around the periphery from the tannic acids, and also where the rusty nails provided an iron mordant.

Here is a leaf print where I had an iron plate clamped to the outside of my fabric packet:

image

Leaf print on silk noil with iron plate

And likewise wrapped around a large rusty nail:

image

Silk charmeuse leaf print wrapped around iron nail

Here is the difference of the dyestuffs on cellulose. For one, I didn’t get my packet wrapped tightly enough and the colors ran. For another, the yellows and greens remained printed while the tans of the tannic acids didn’t penetrate as much. I expect this to be a function of the density of the cellulose in paper form, and I would expect better tans on cotton yarn:

image

Wrapped leaf print on paper

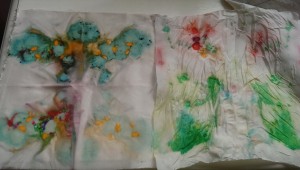
This technique also led me to revisit my forays into dyeing with candy. I’d encountered poor results with a lot of candies that contained very little dye. So I tried some candy contact dyeing:

image

image

The candy melted pretty quickly, so it was hard to keep the fabric tight, but the dye migrated onto the fabric rather than into the dye pot. I can see some candy-related shibori in my future!

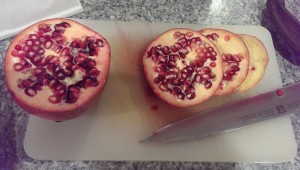
I’d also encountered  some inexpensive pomegranates at the grocery store last week, and per Rachel’s last post I bought them for some seasonal dyeing. Pomegranates contain ellegic acid, which are yellow tannins, so I thought this would be a quick way to see what sort of coloring I could get from them:

image

This is one slice of pomegranate:

image

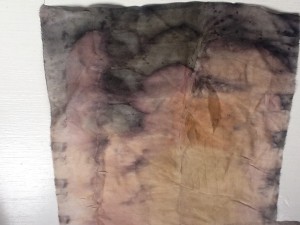
Folded and clamped pomegranate slice on silk charmeuse

And here is multiple slices and layers, with the rest of the pomegranate in the dye pot:

image

Folded and clamped pomegranate on silk noil, over some walnut hull spots

Tight wrapping and clamping is the key to good transfer, but whether you are preserving autumn leaves, testing dyestuff potential, or finding another use for seasonal candy, it’s such a quick and easy technique that it’s definitely worth trying.