But how much mordant do you *really* need?

2

This is THE question, isn’t it? I think a lot of people, myself included, just start with a formula they find somewhere but don’t take the time to test it against other options. The good news is, I’ve done a test for you. I’ve done a mordant strength test with aluminum acetate previously; this is a mordant strength test with potassium aluminum sulfate, aka, alum mordant for protein fibers.

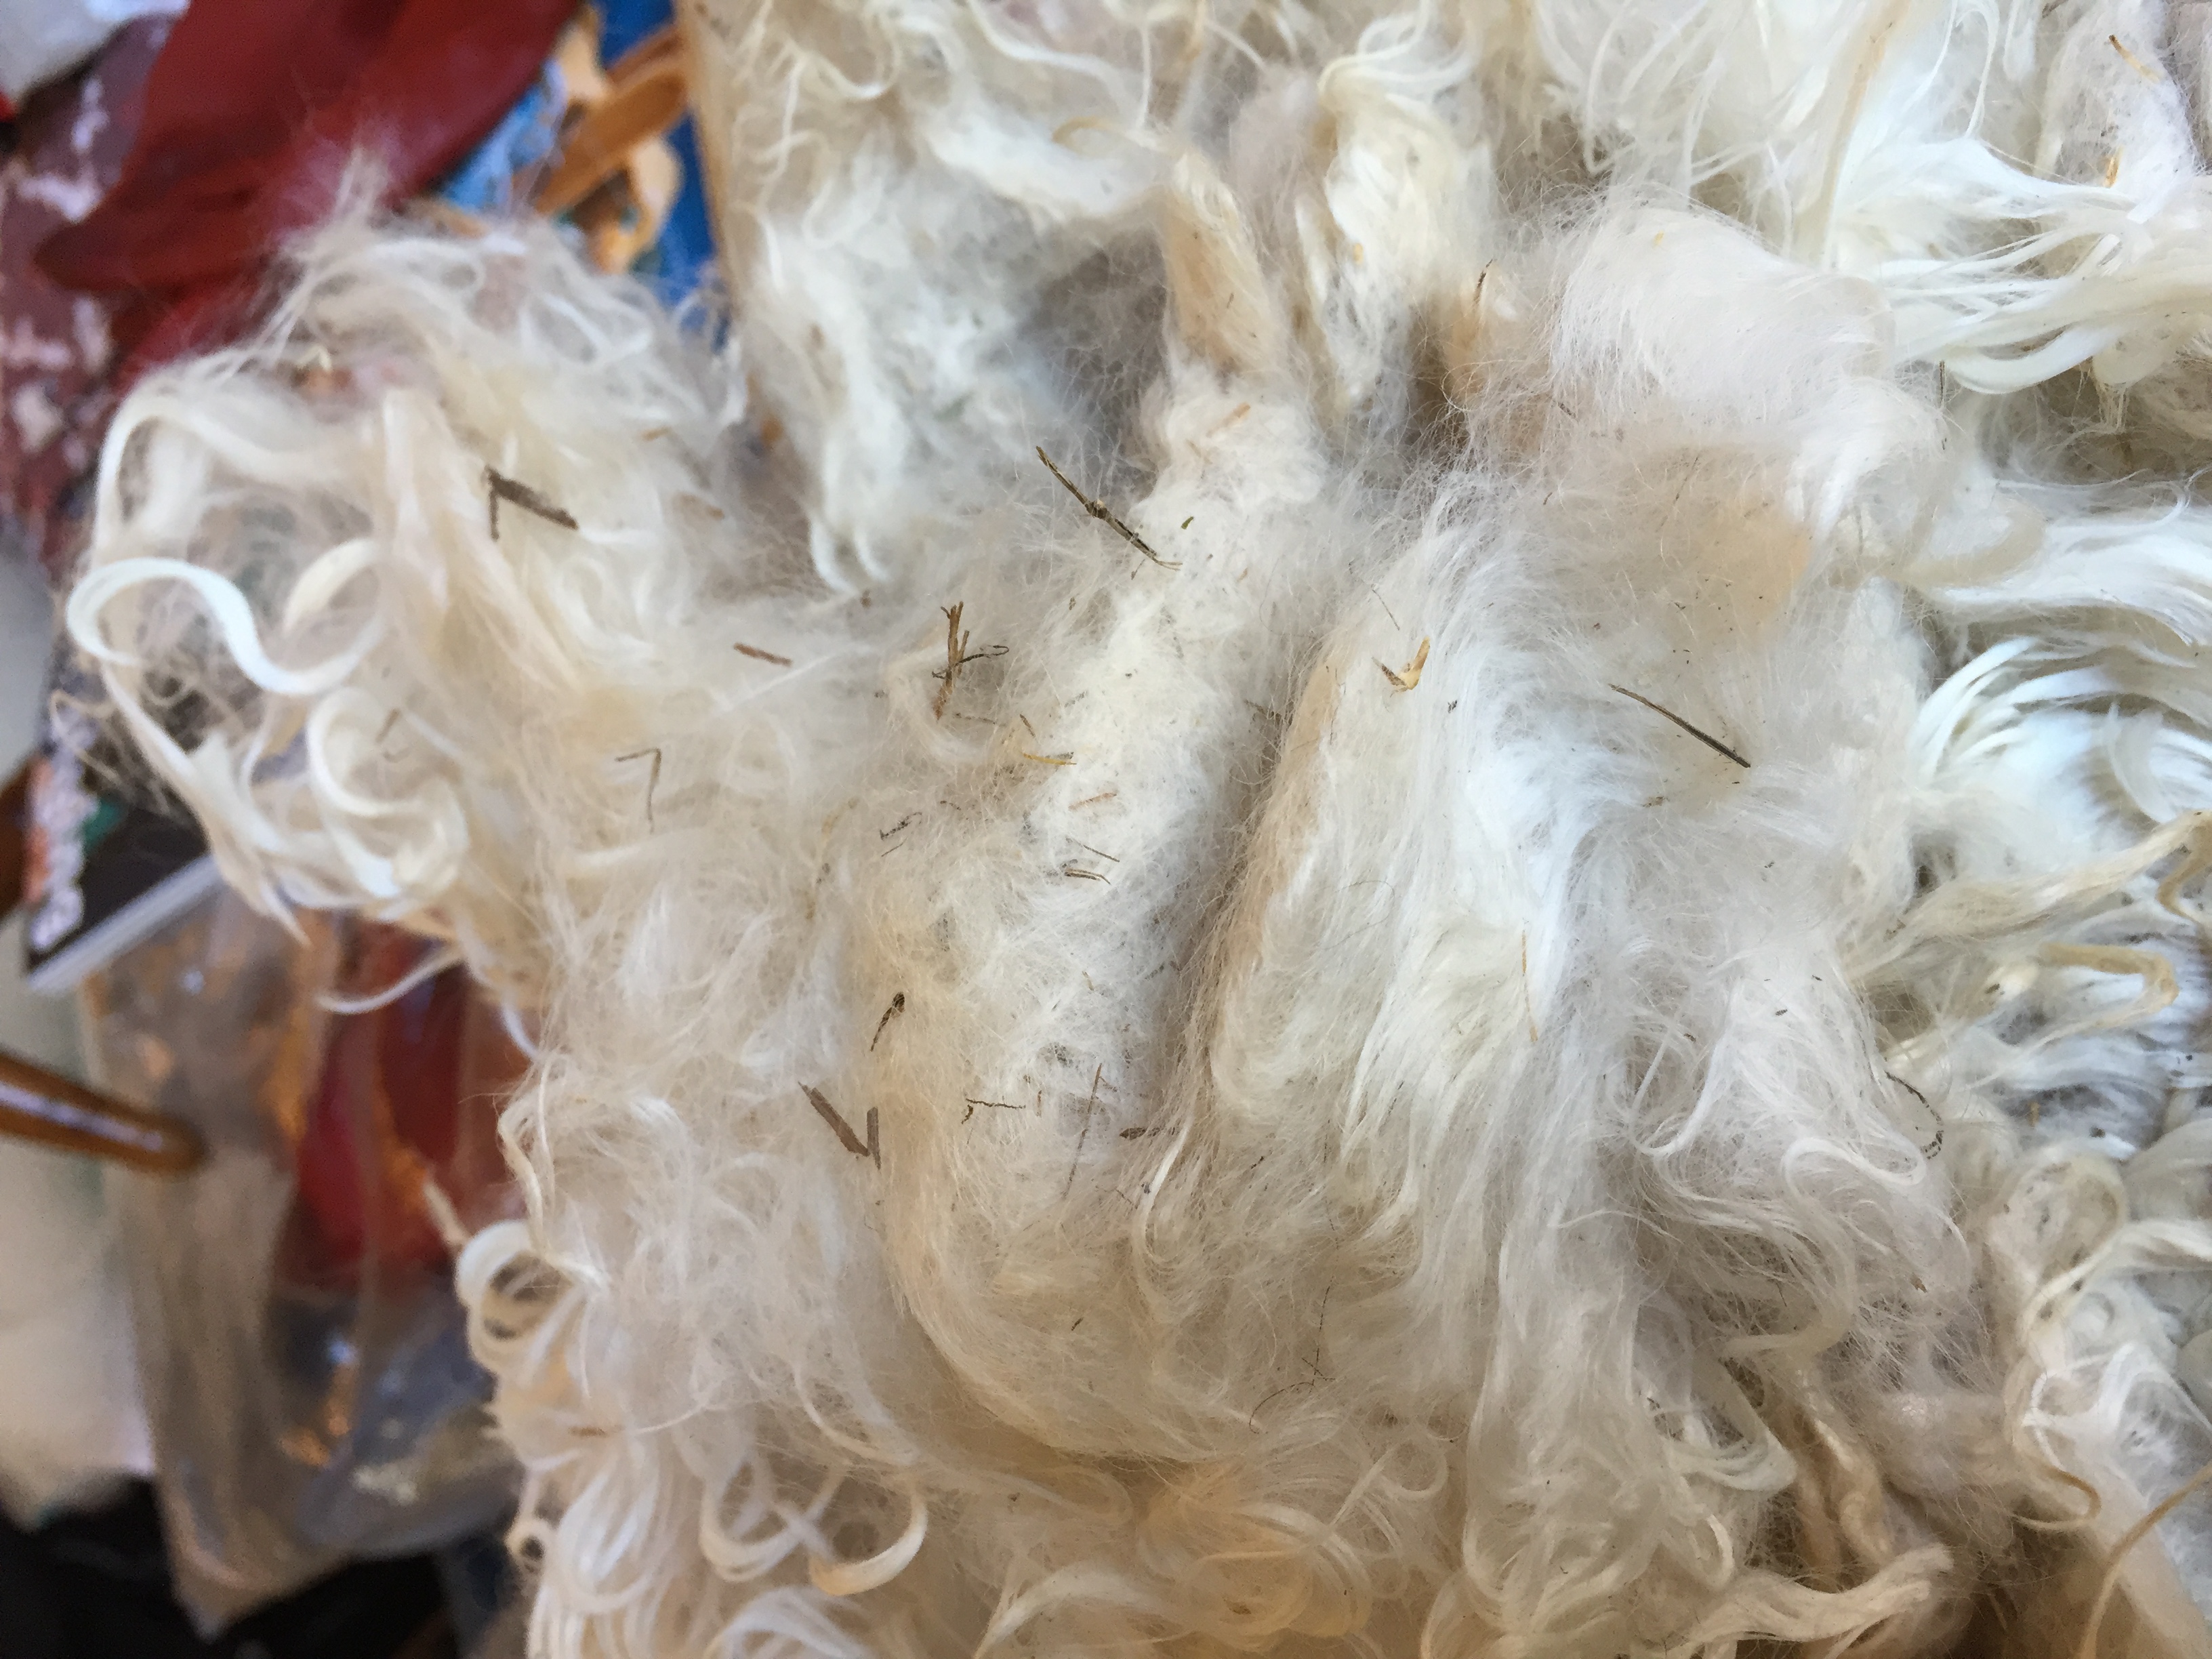
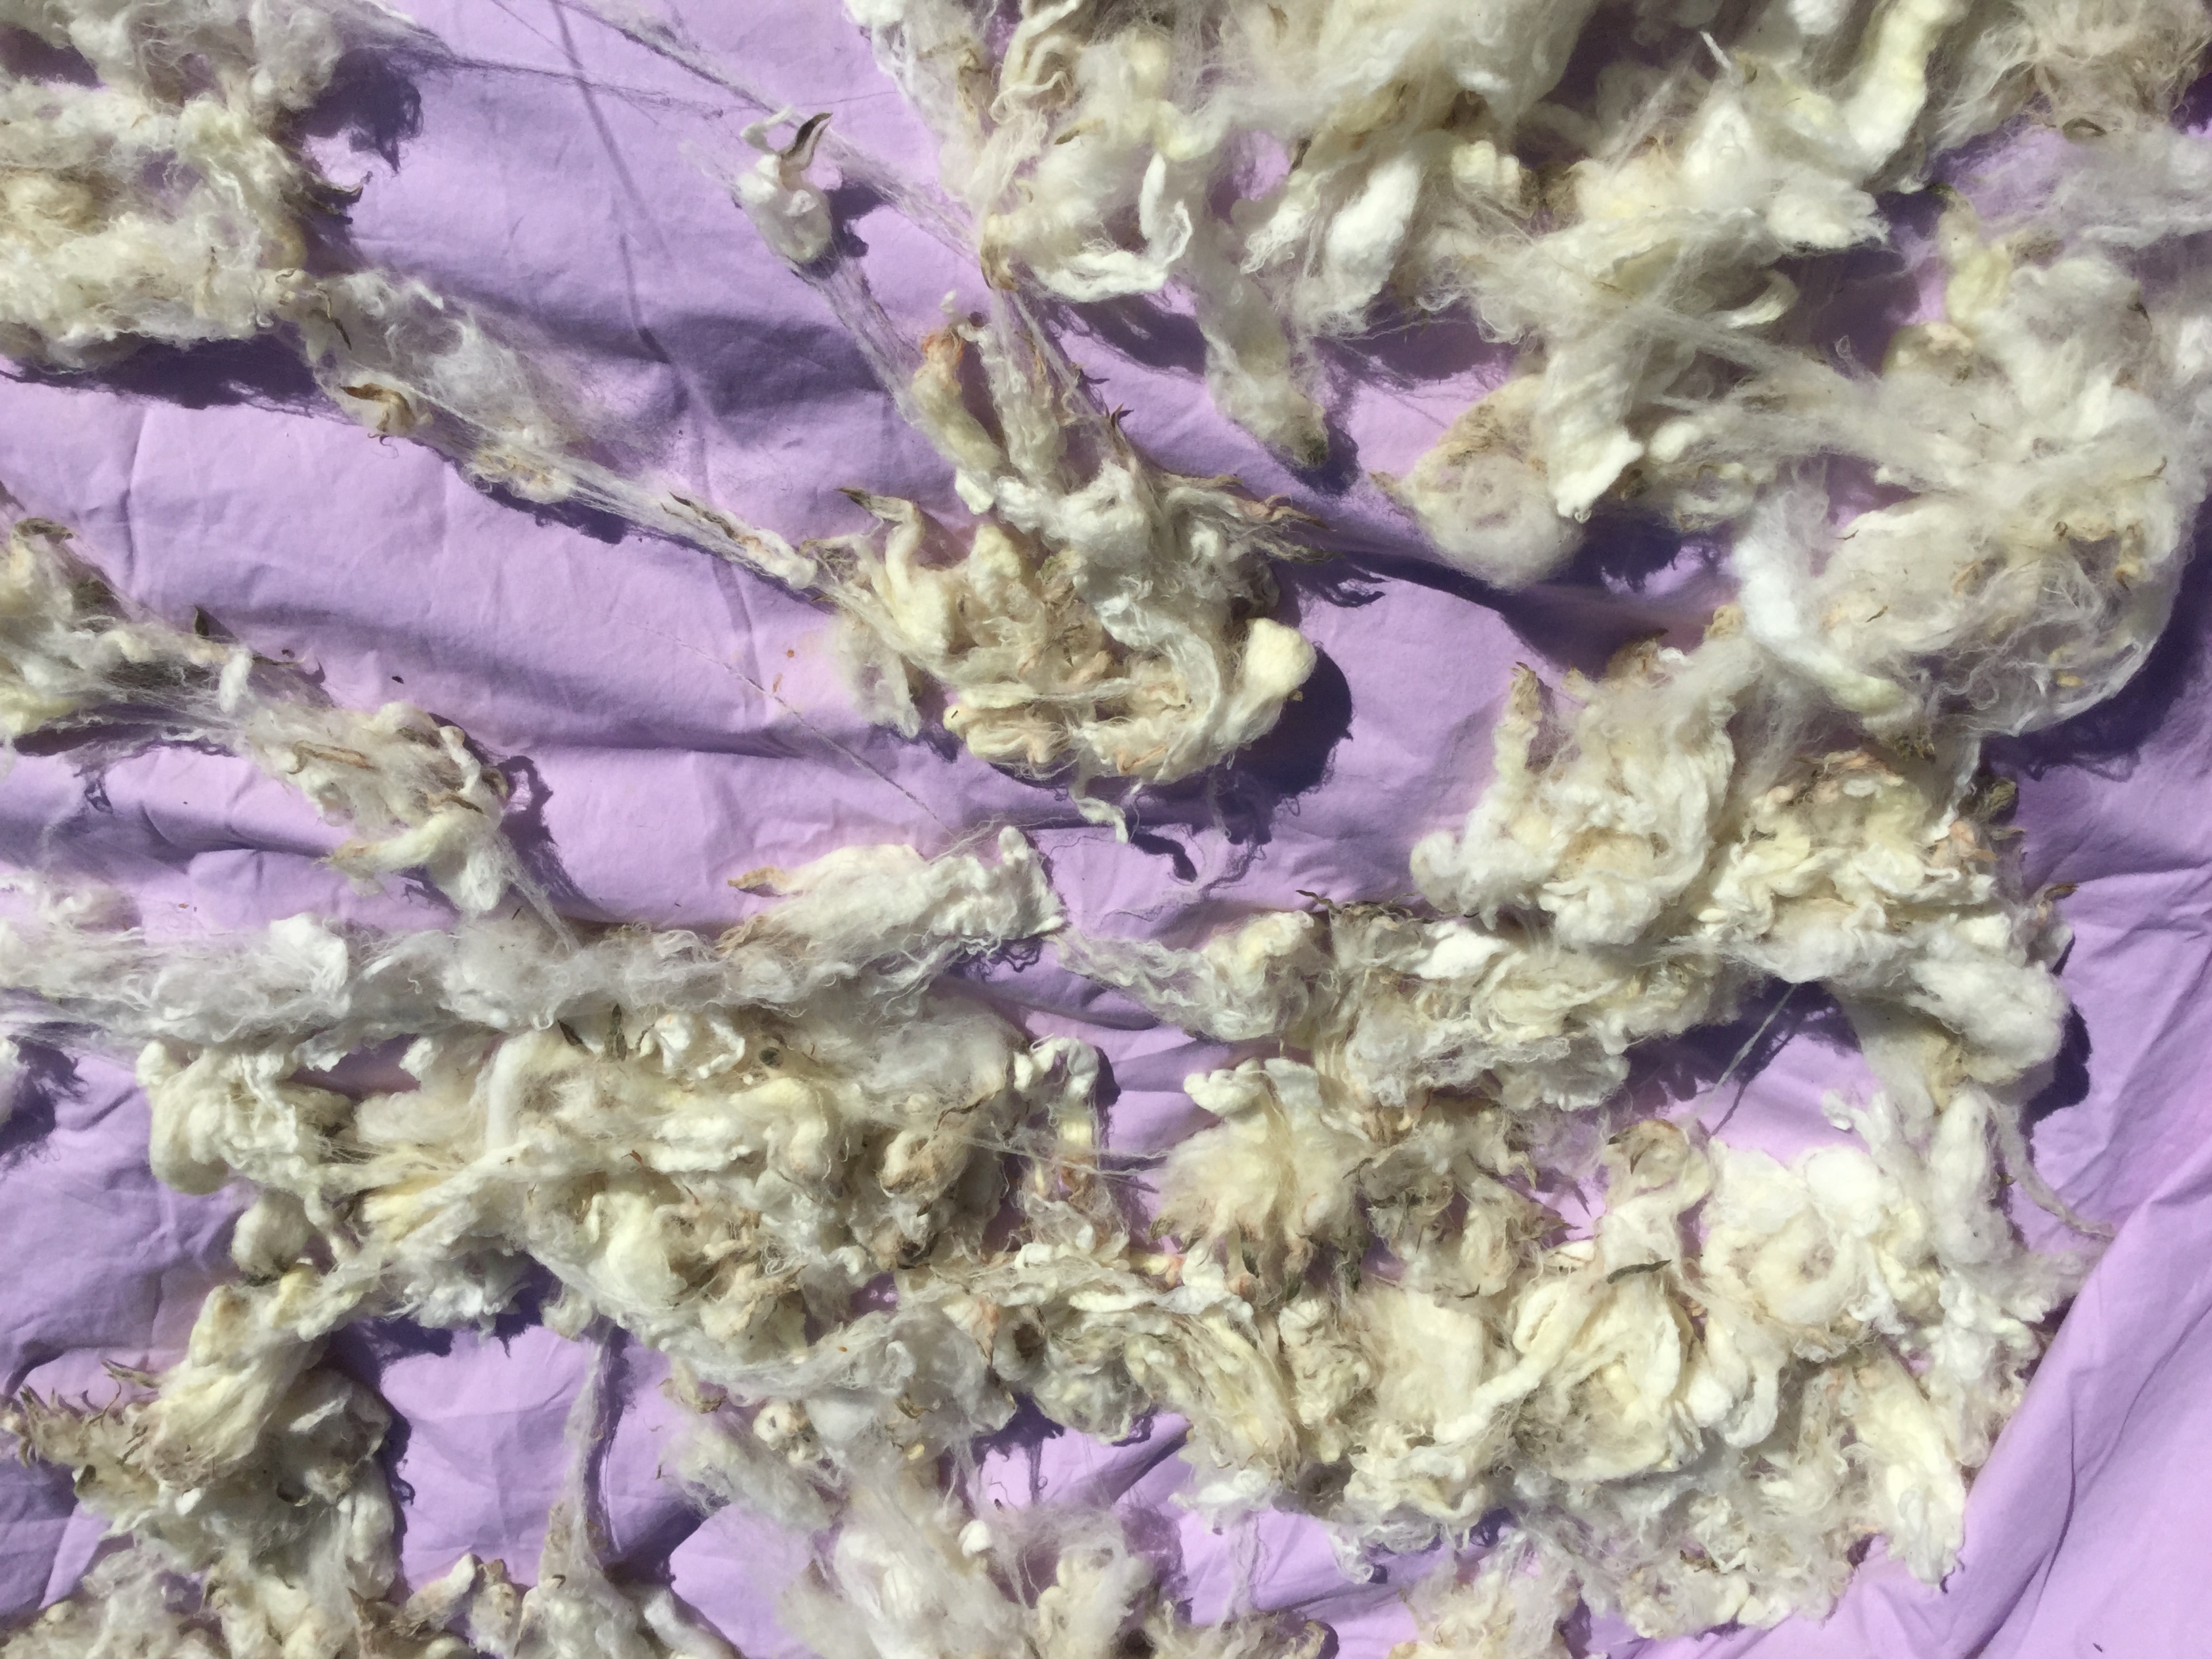
My underlying question in doing this experiment is how best to handle wool, alpaca and silk blend roving— how much heat, agitation, time and mordant gives the best result? And do I need to use cream of tartar (potassium bitartrate)? My preferred outcome will be good color uptake while still having a nice hand and easy spinability.

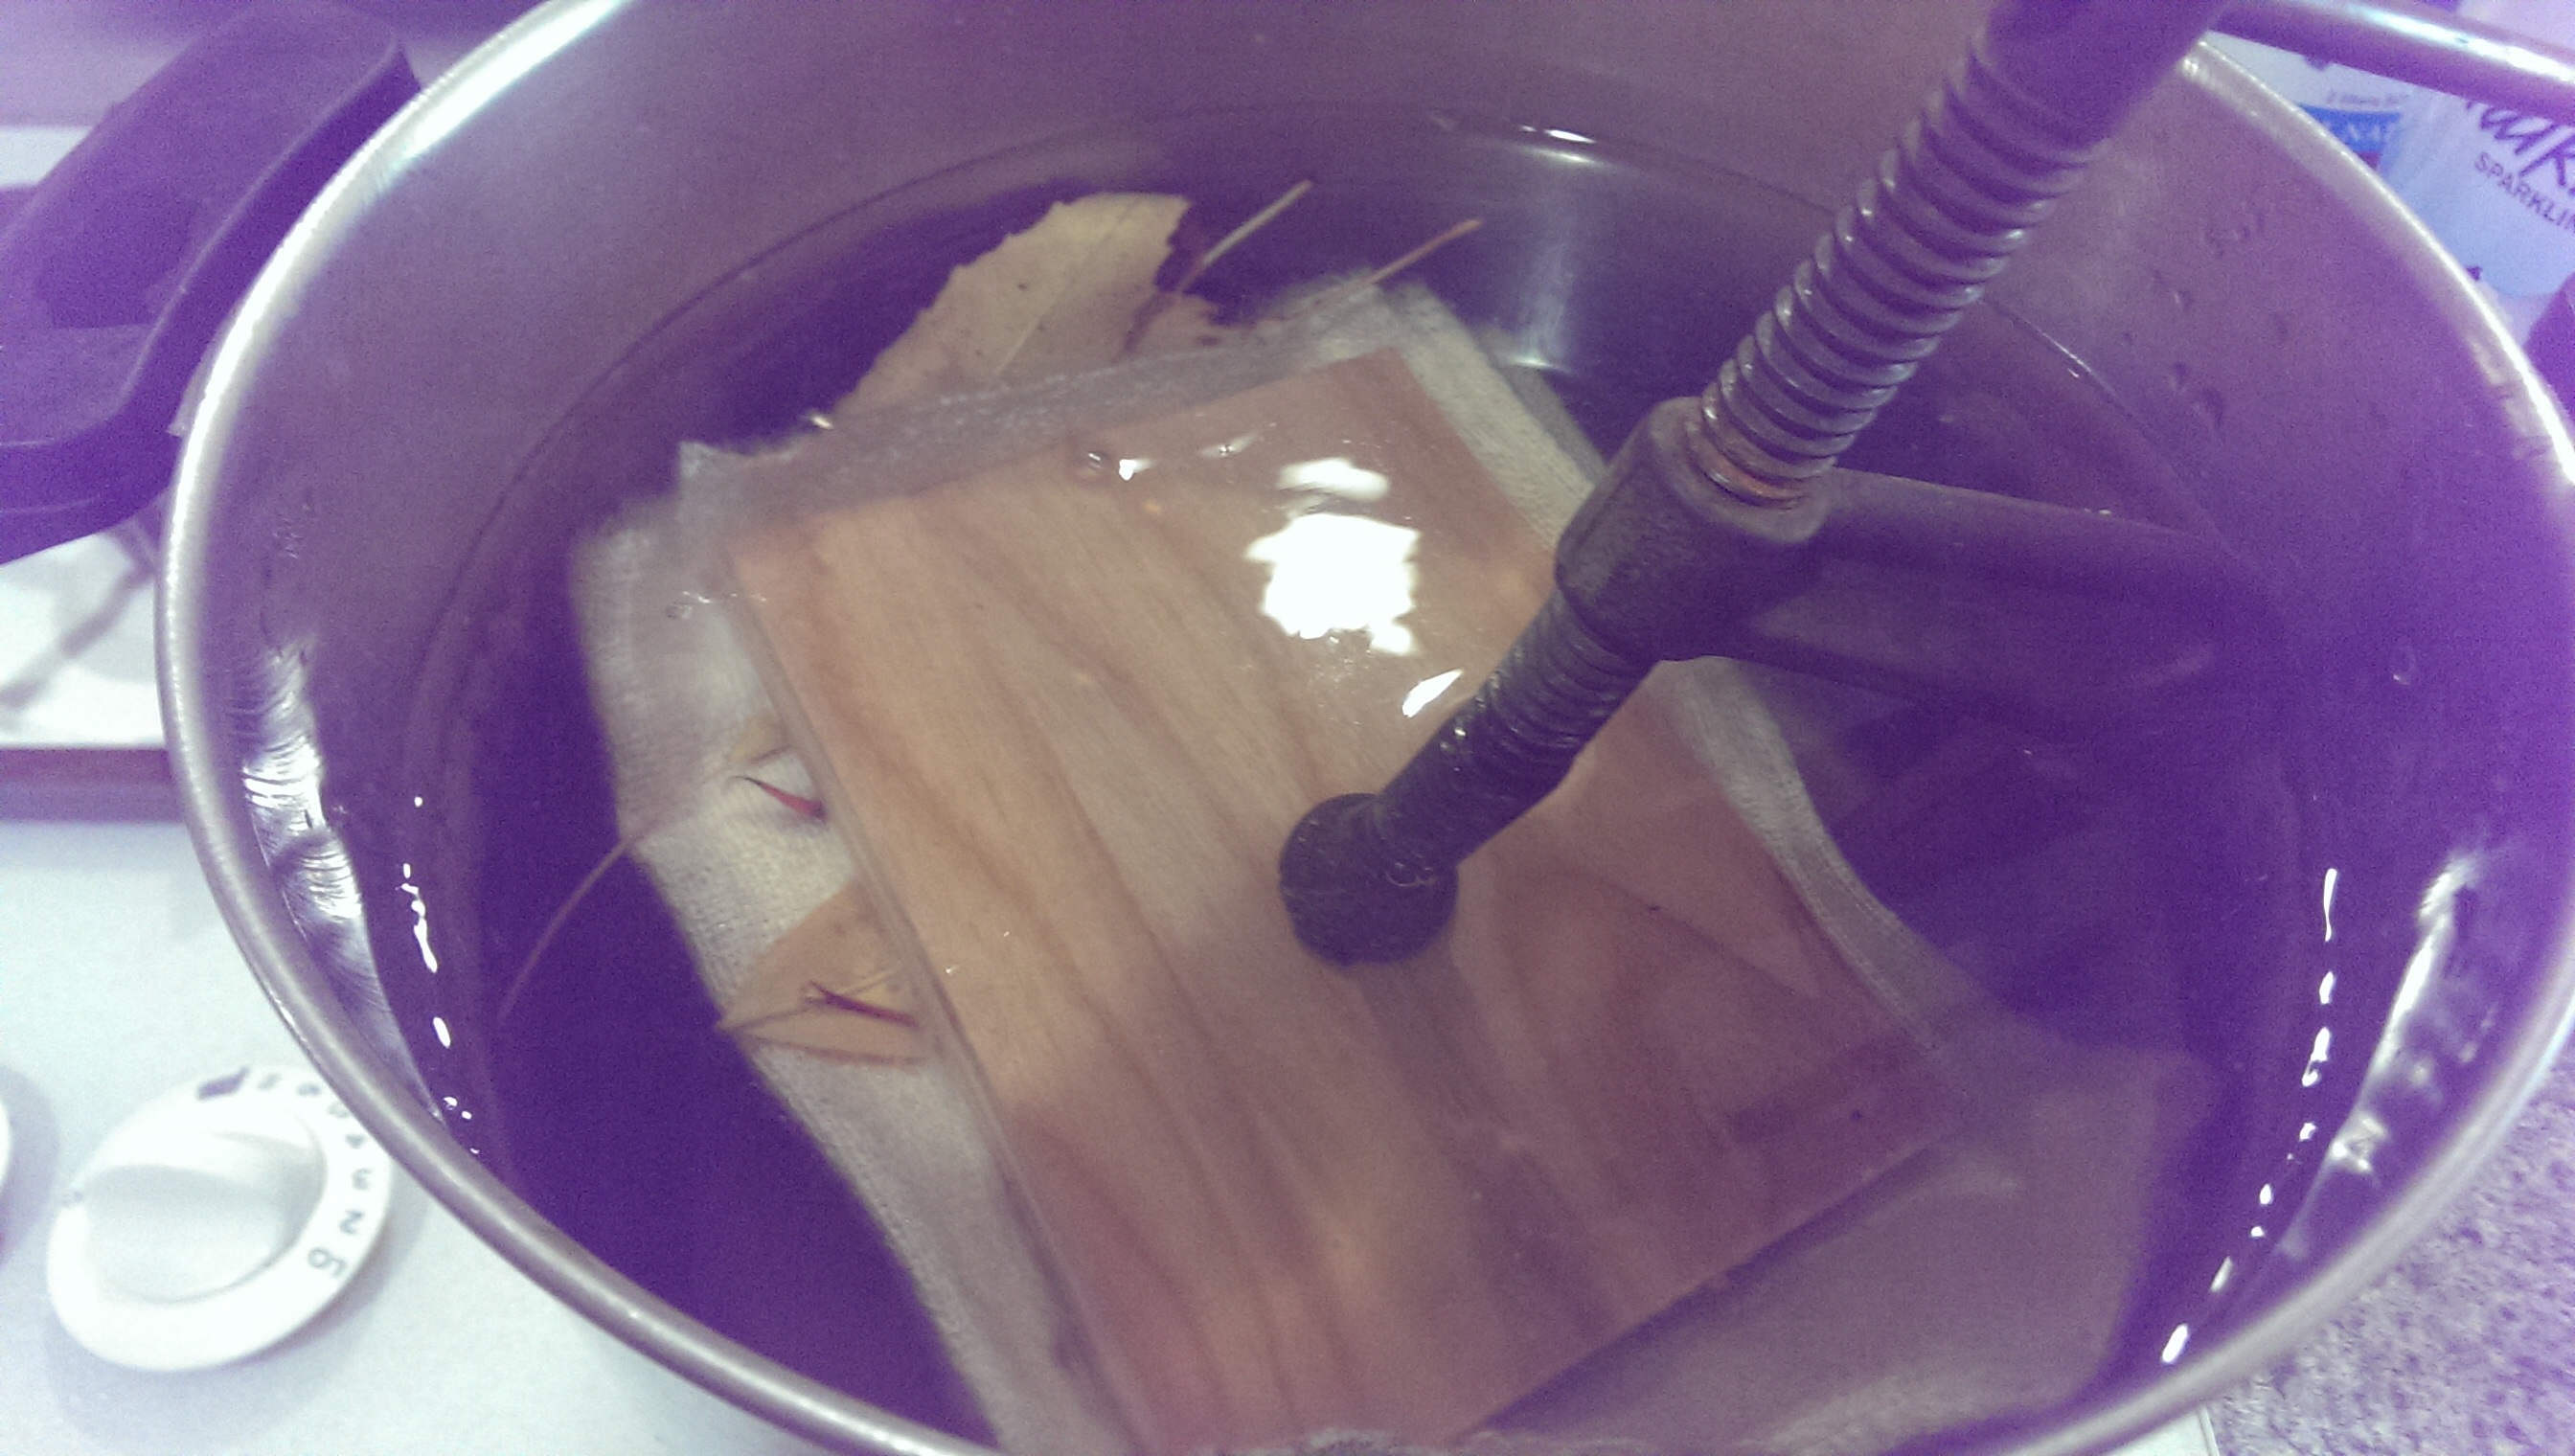
The first recipe I came across was from John and Margaret Cannon in Dye Plants and dyeing, which uses 18% WOF alum and 6% WOF cream of tartar. I started using it and had good results, but in my natural dye class we use 10-15% alum with no cream of tartar. I usually bring my mordant bath up to temperature (about 160-170F), turn off the heat, and let my fiber sit overnight. In class (where we generally use fabric samples, not yarn or roving) the fiber is at constant temperature for an hour (170F or so— not boiling, but steam coming off the water) and then removed and rinsed. The least amount of alum mordant I’ve seen used is from Jenny Dean, just 8%, but with 6% cream of tartar.

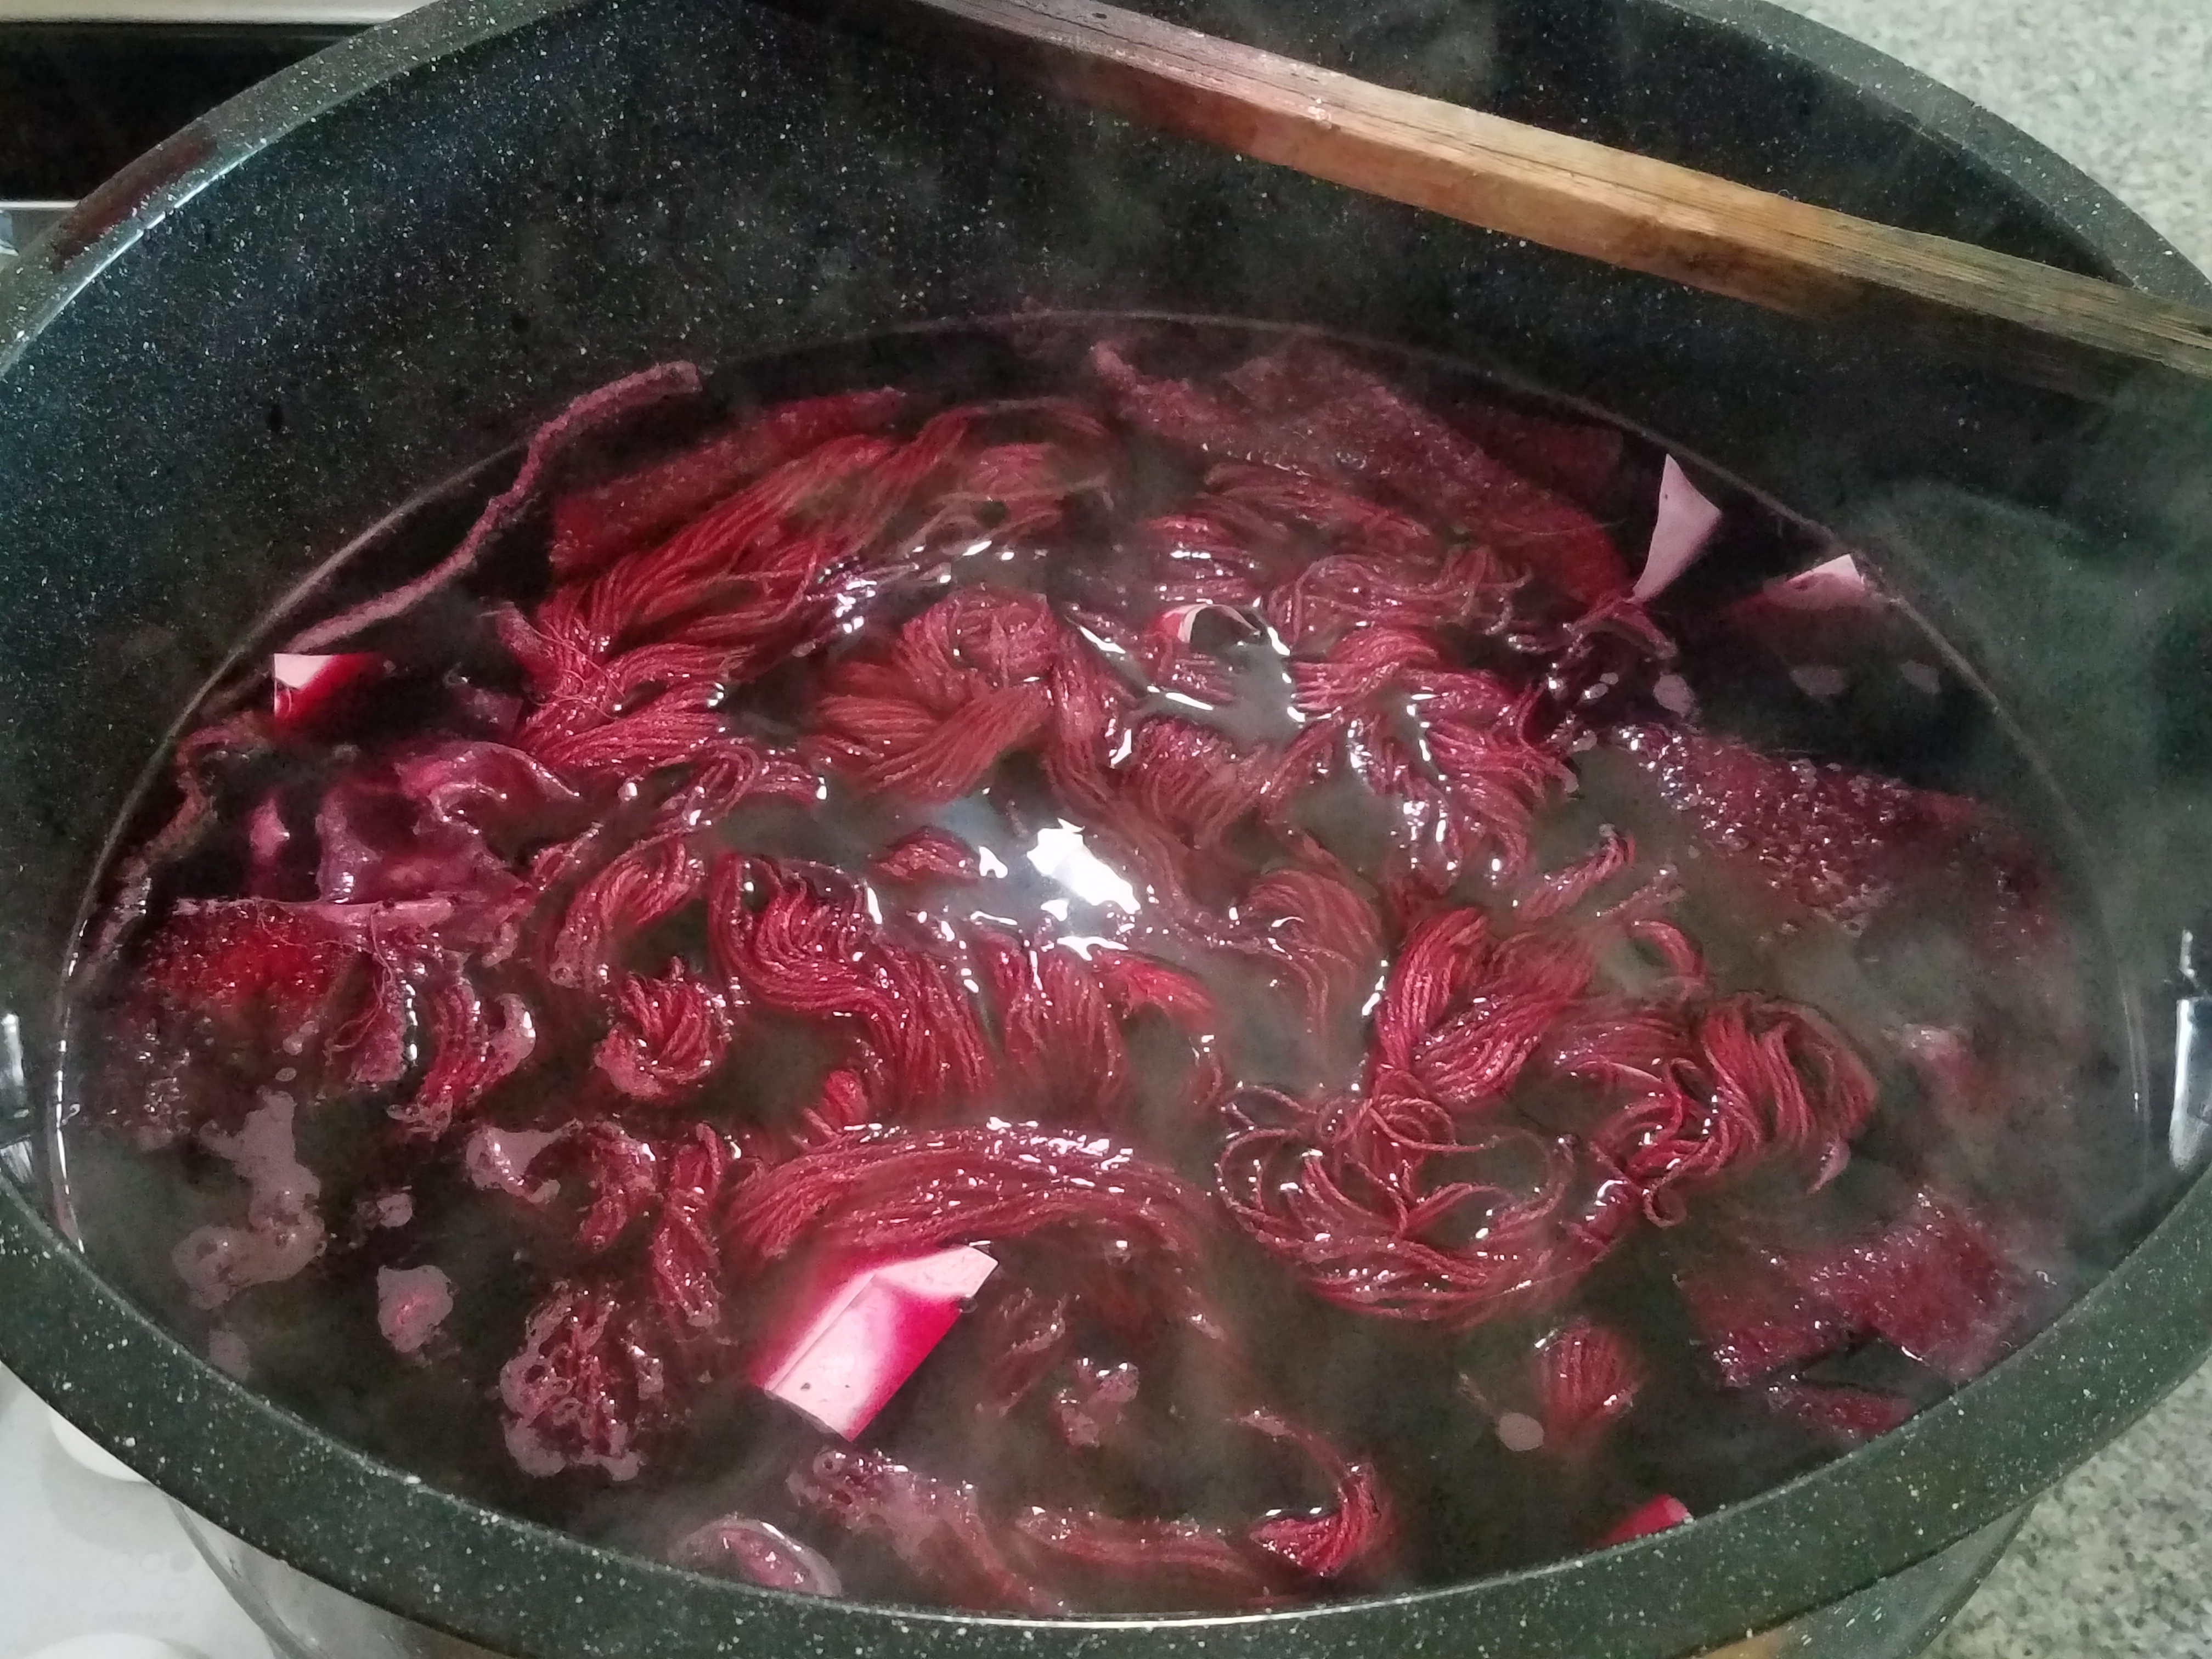
This experiment is my fairly best comparison of apples to apples to apples, starting at the low end of 8% alum, ending at the high end of 18%, and splitting the difference at 13%. All mordant strengths are tested with and without cream of tartar, and processed at heat (170F) for one hour, or brought up to heat and then turned off and let sit overnight, for a total of 12 different samples. Both wool, silk, wool/silk blends and a silk/plant fiber blend were sampled, in the form of fabric and also commercially prepared organic undyed yarn. All samples of the same mordant bath were processed together, and all samples were wetted out for at least an hour. In the end, ALL of the samples went into the SAME dyepot of 20% WOF cochineal, a good strong dyepot, with the hopes of disambiguation.

There were some interesting results!

Even before I mordanted anything, the visual difference between the alum with/alum without cream of tartar bath was obvious. With cream of tarar, the bath was clear. Without, it had a cloudy, milky look. This persisted after the fiber was removed from the mordant bath. The ph of each bath remained the same, about 3-4.

After I’d mordanted my samples, but before I’d dyed anything, I tested  the hand, or feel, of all my samples— the common complaint about increased alum strength is that is can make the fibers feel “sticky”. With all of my wool samples, regardless of alum%, those without the cream of tartar felt coarser. The yarn especially felt sticky without cream of tartar. On the silk noil samples, the samples WITH cream of tartar at 8% mordant strength had a more noticeable yellow cast . The hand of the silk noil and habotai were not discernibly different, but the silk-faced plant blend and the wool/silk were definitely smoother/nicer with the 6% cream of tartar.

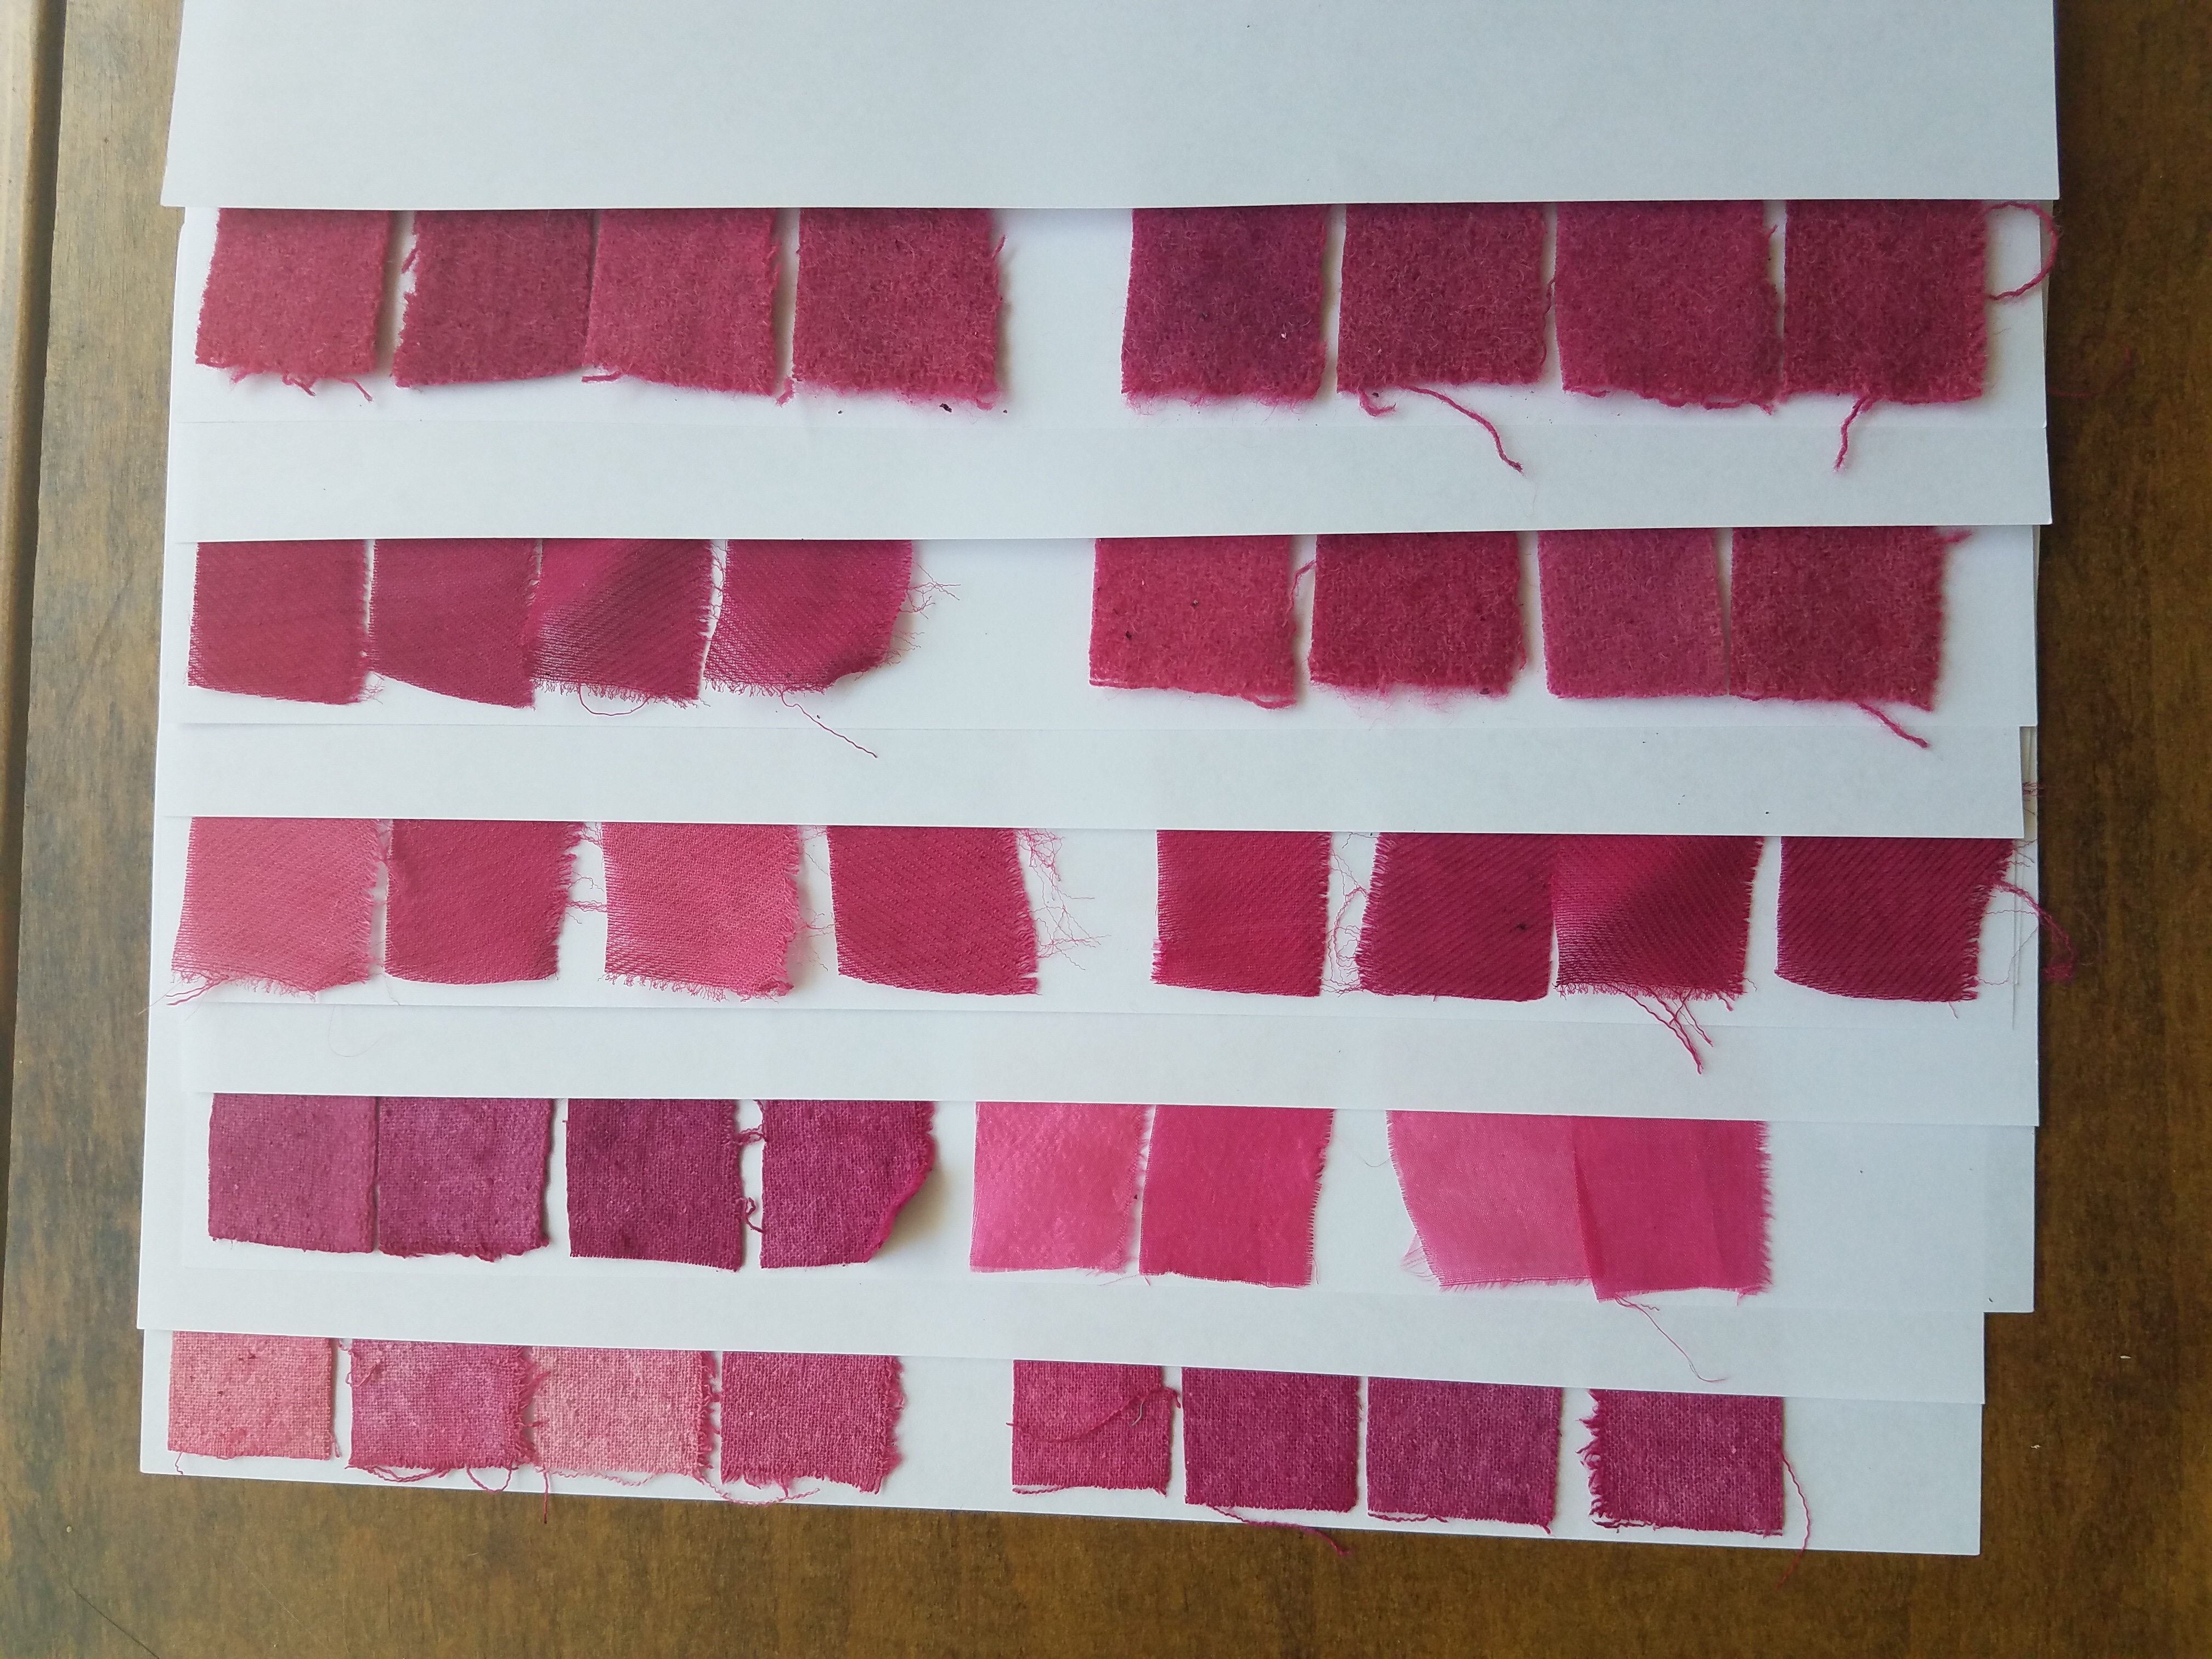
So what about the color? Take a look! These samples are all laid out in a 4×3 grid as follows:

8% 1hr, 8%/6% cream of tartar 1hr, 8% overnight, 8%/6% overnight

13% 1hr, 13%/6% 1hr, 13% overnight, 13%/6% overnight

18% 1hr, 18%/6% 1hr, 18% overnight, 18%/6% overnight

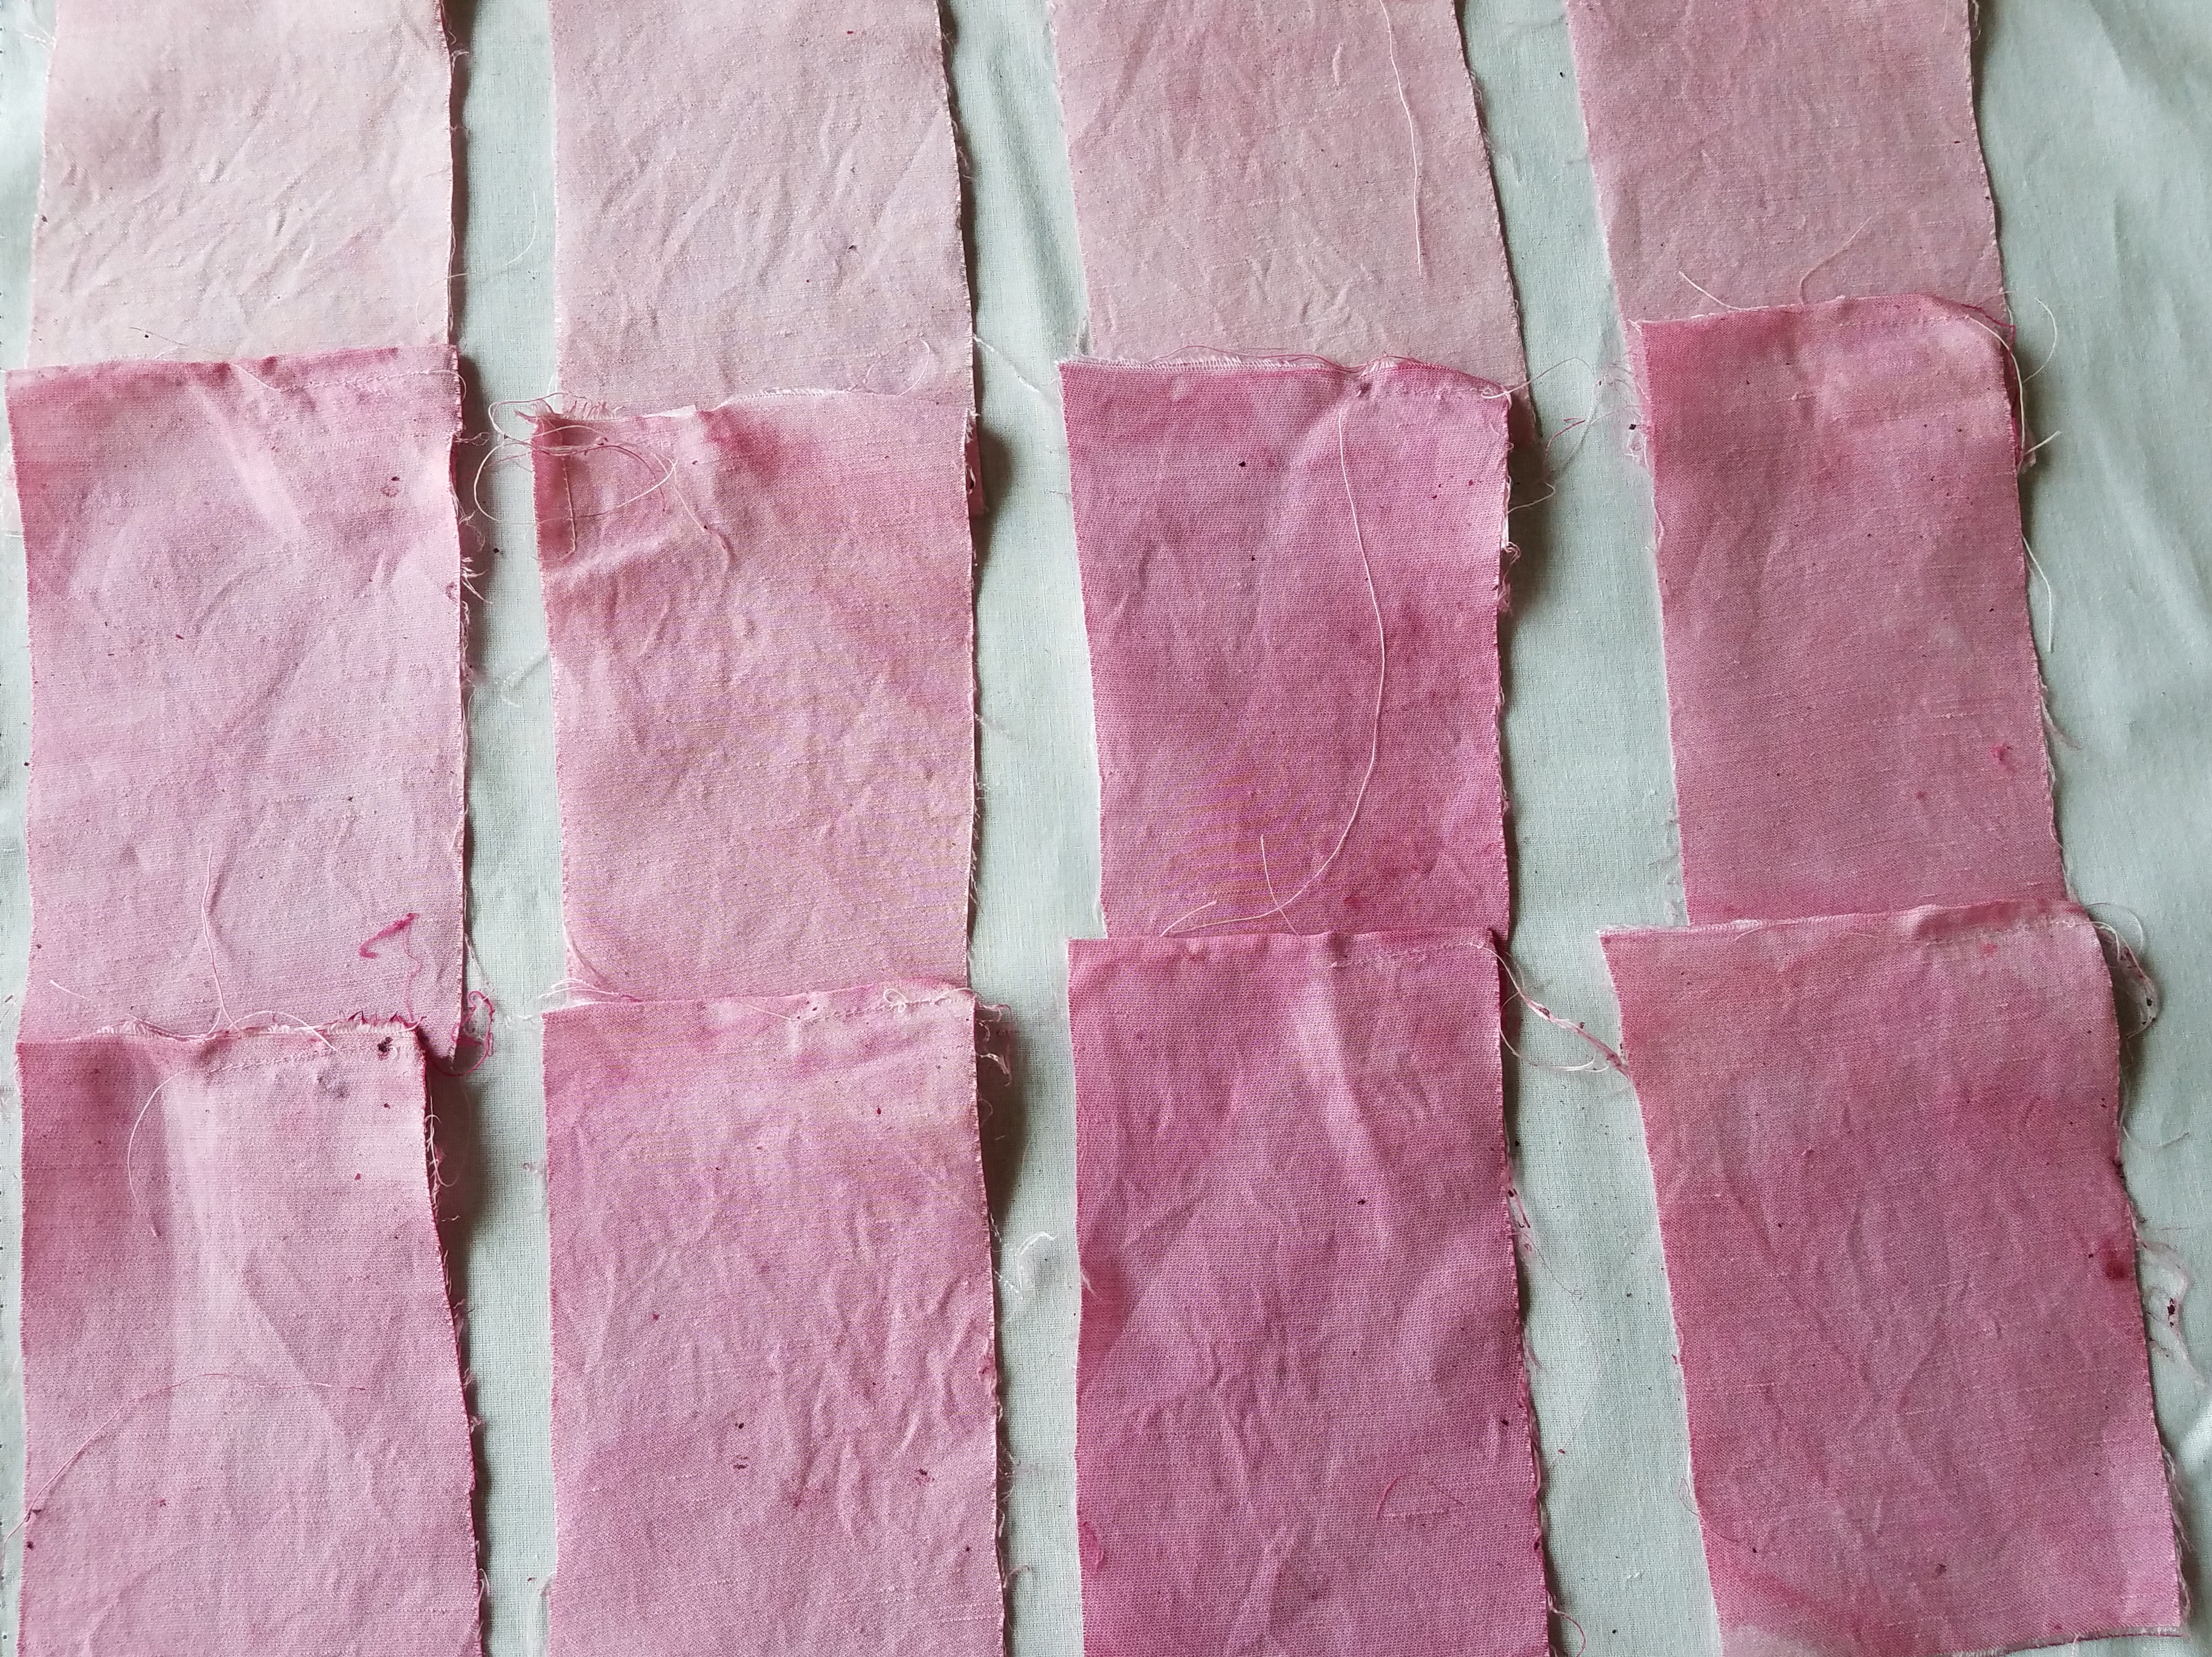
Silk/hemp blend— my “control”. In real life I’d use aluminum acetate to mordant this.

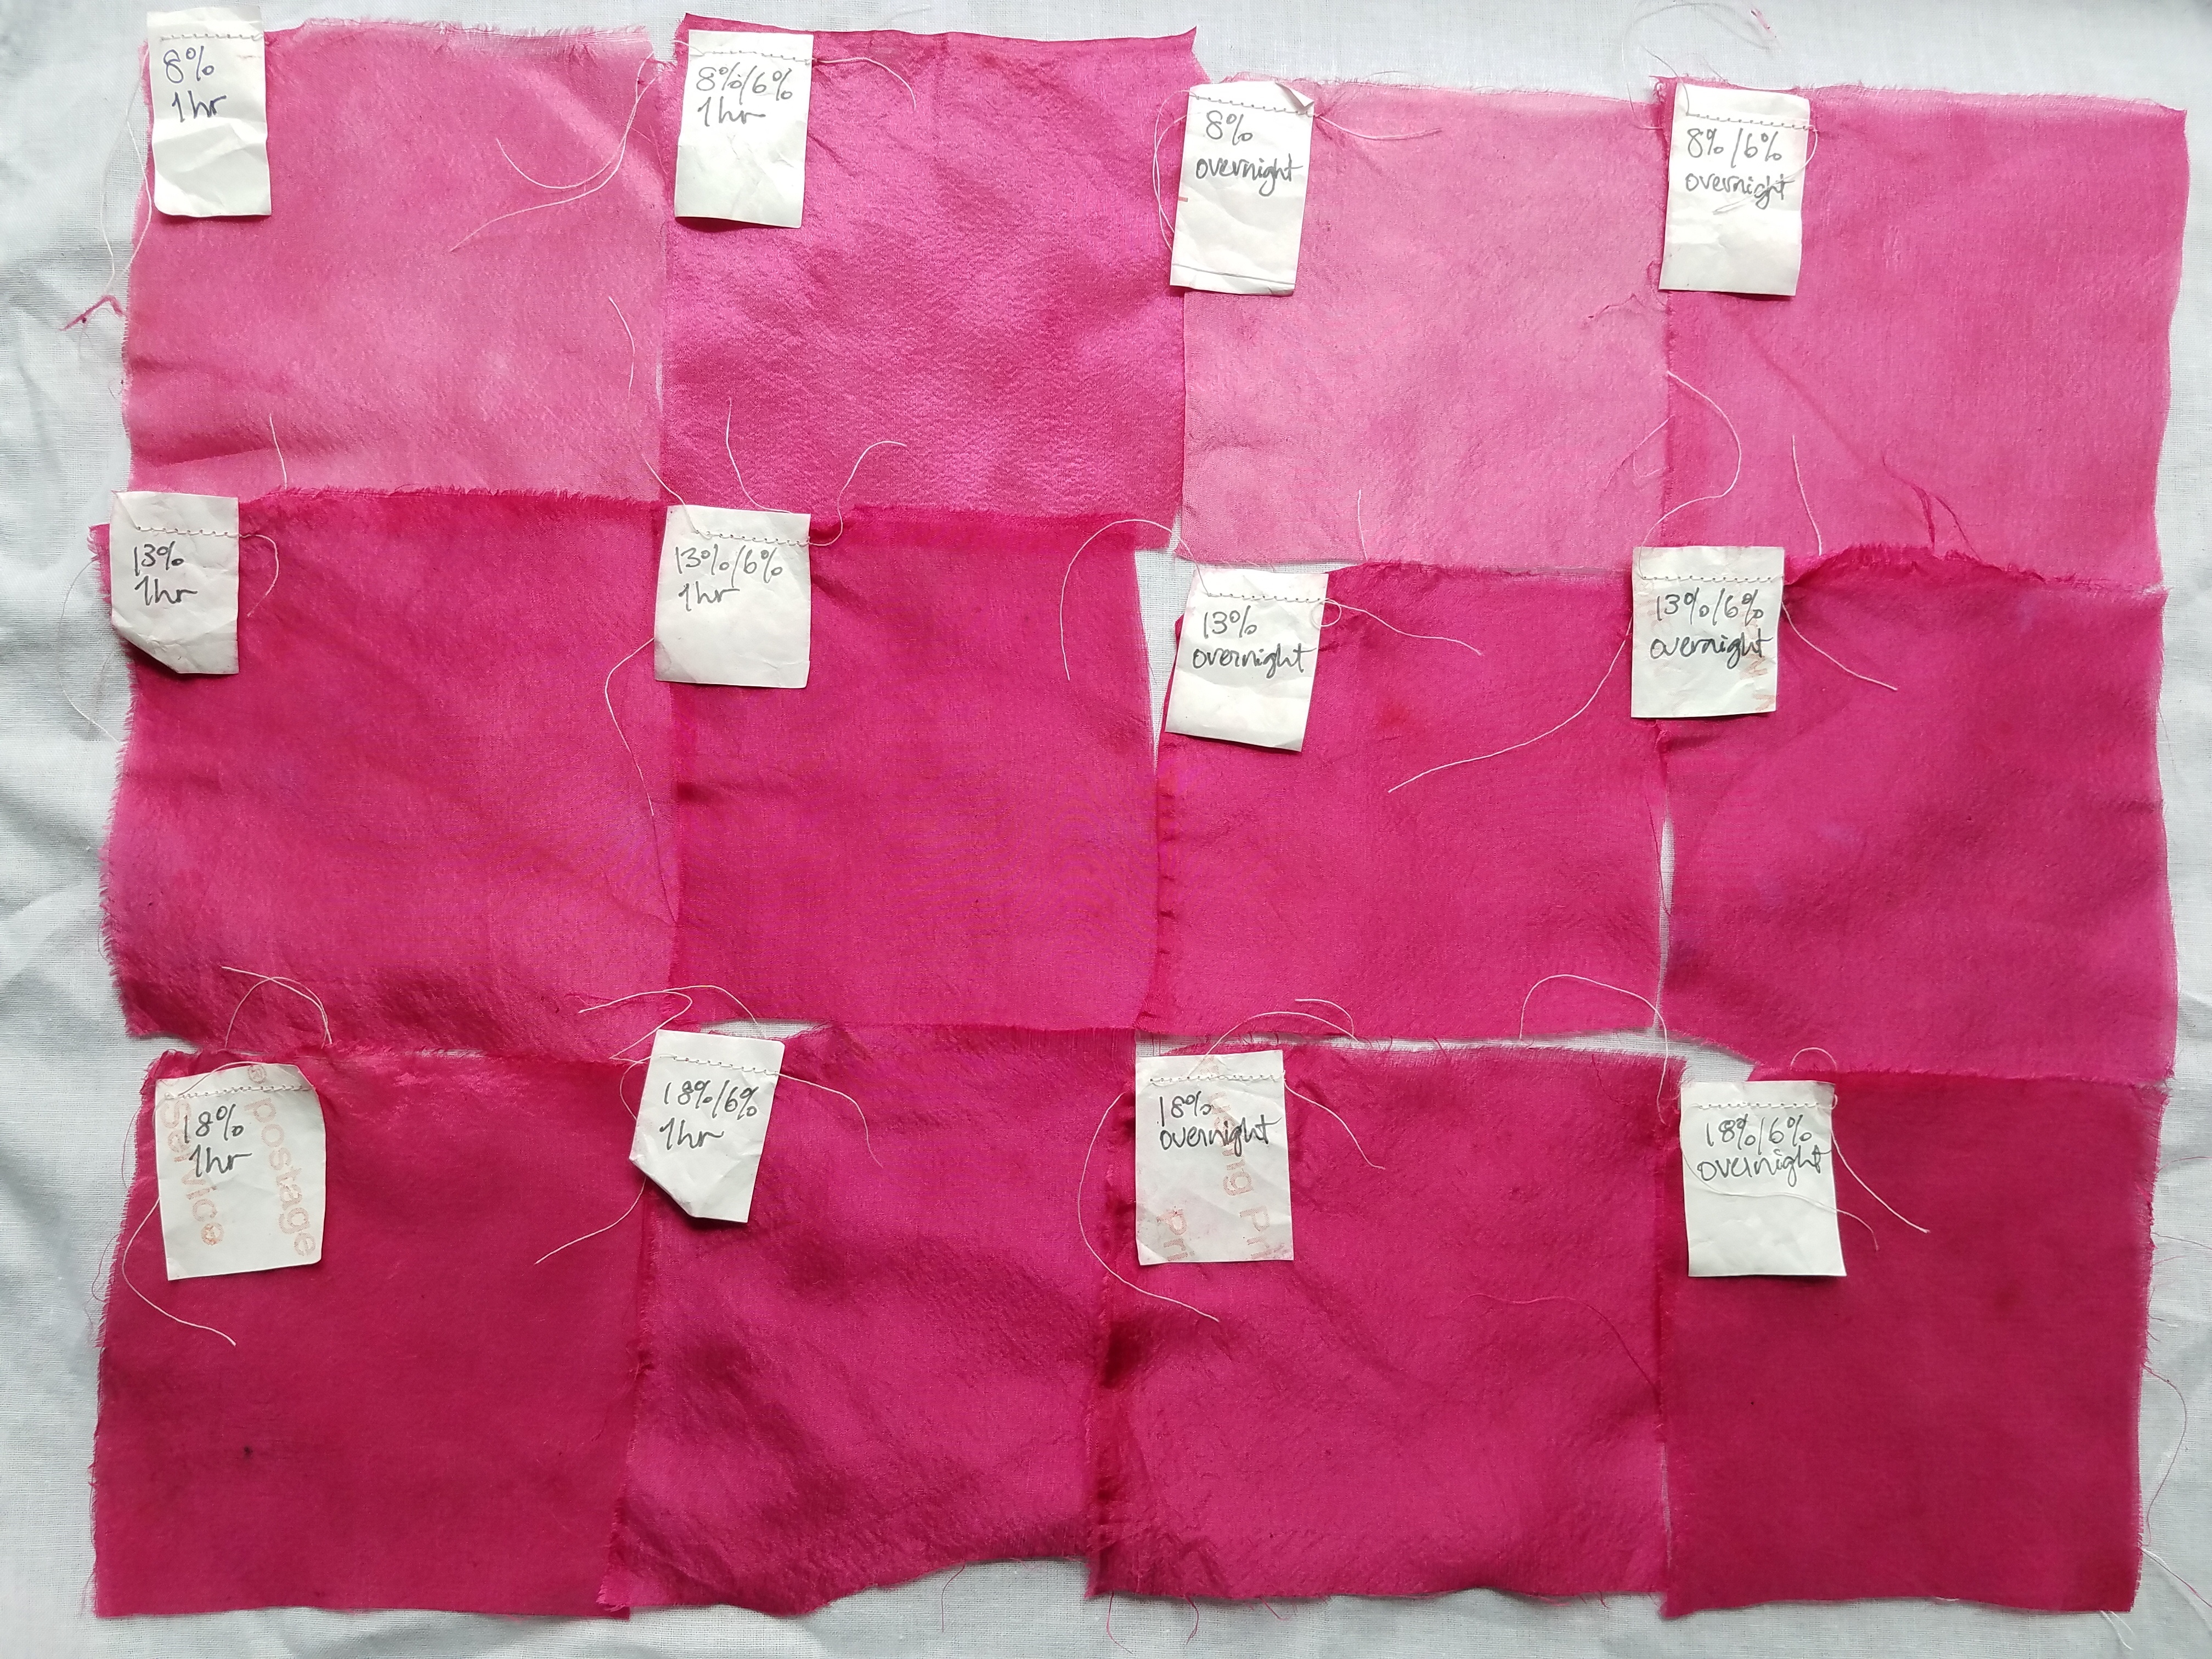
Silk habotai. The cream of tartar definitely helps the dye uptake, especially noticeable at the lowest strength mordant.

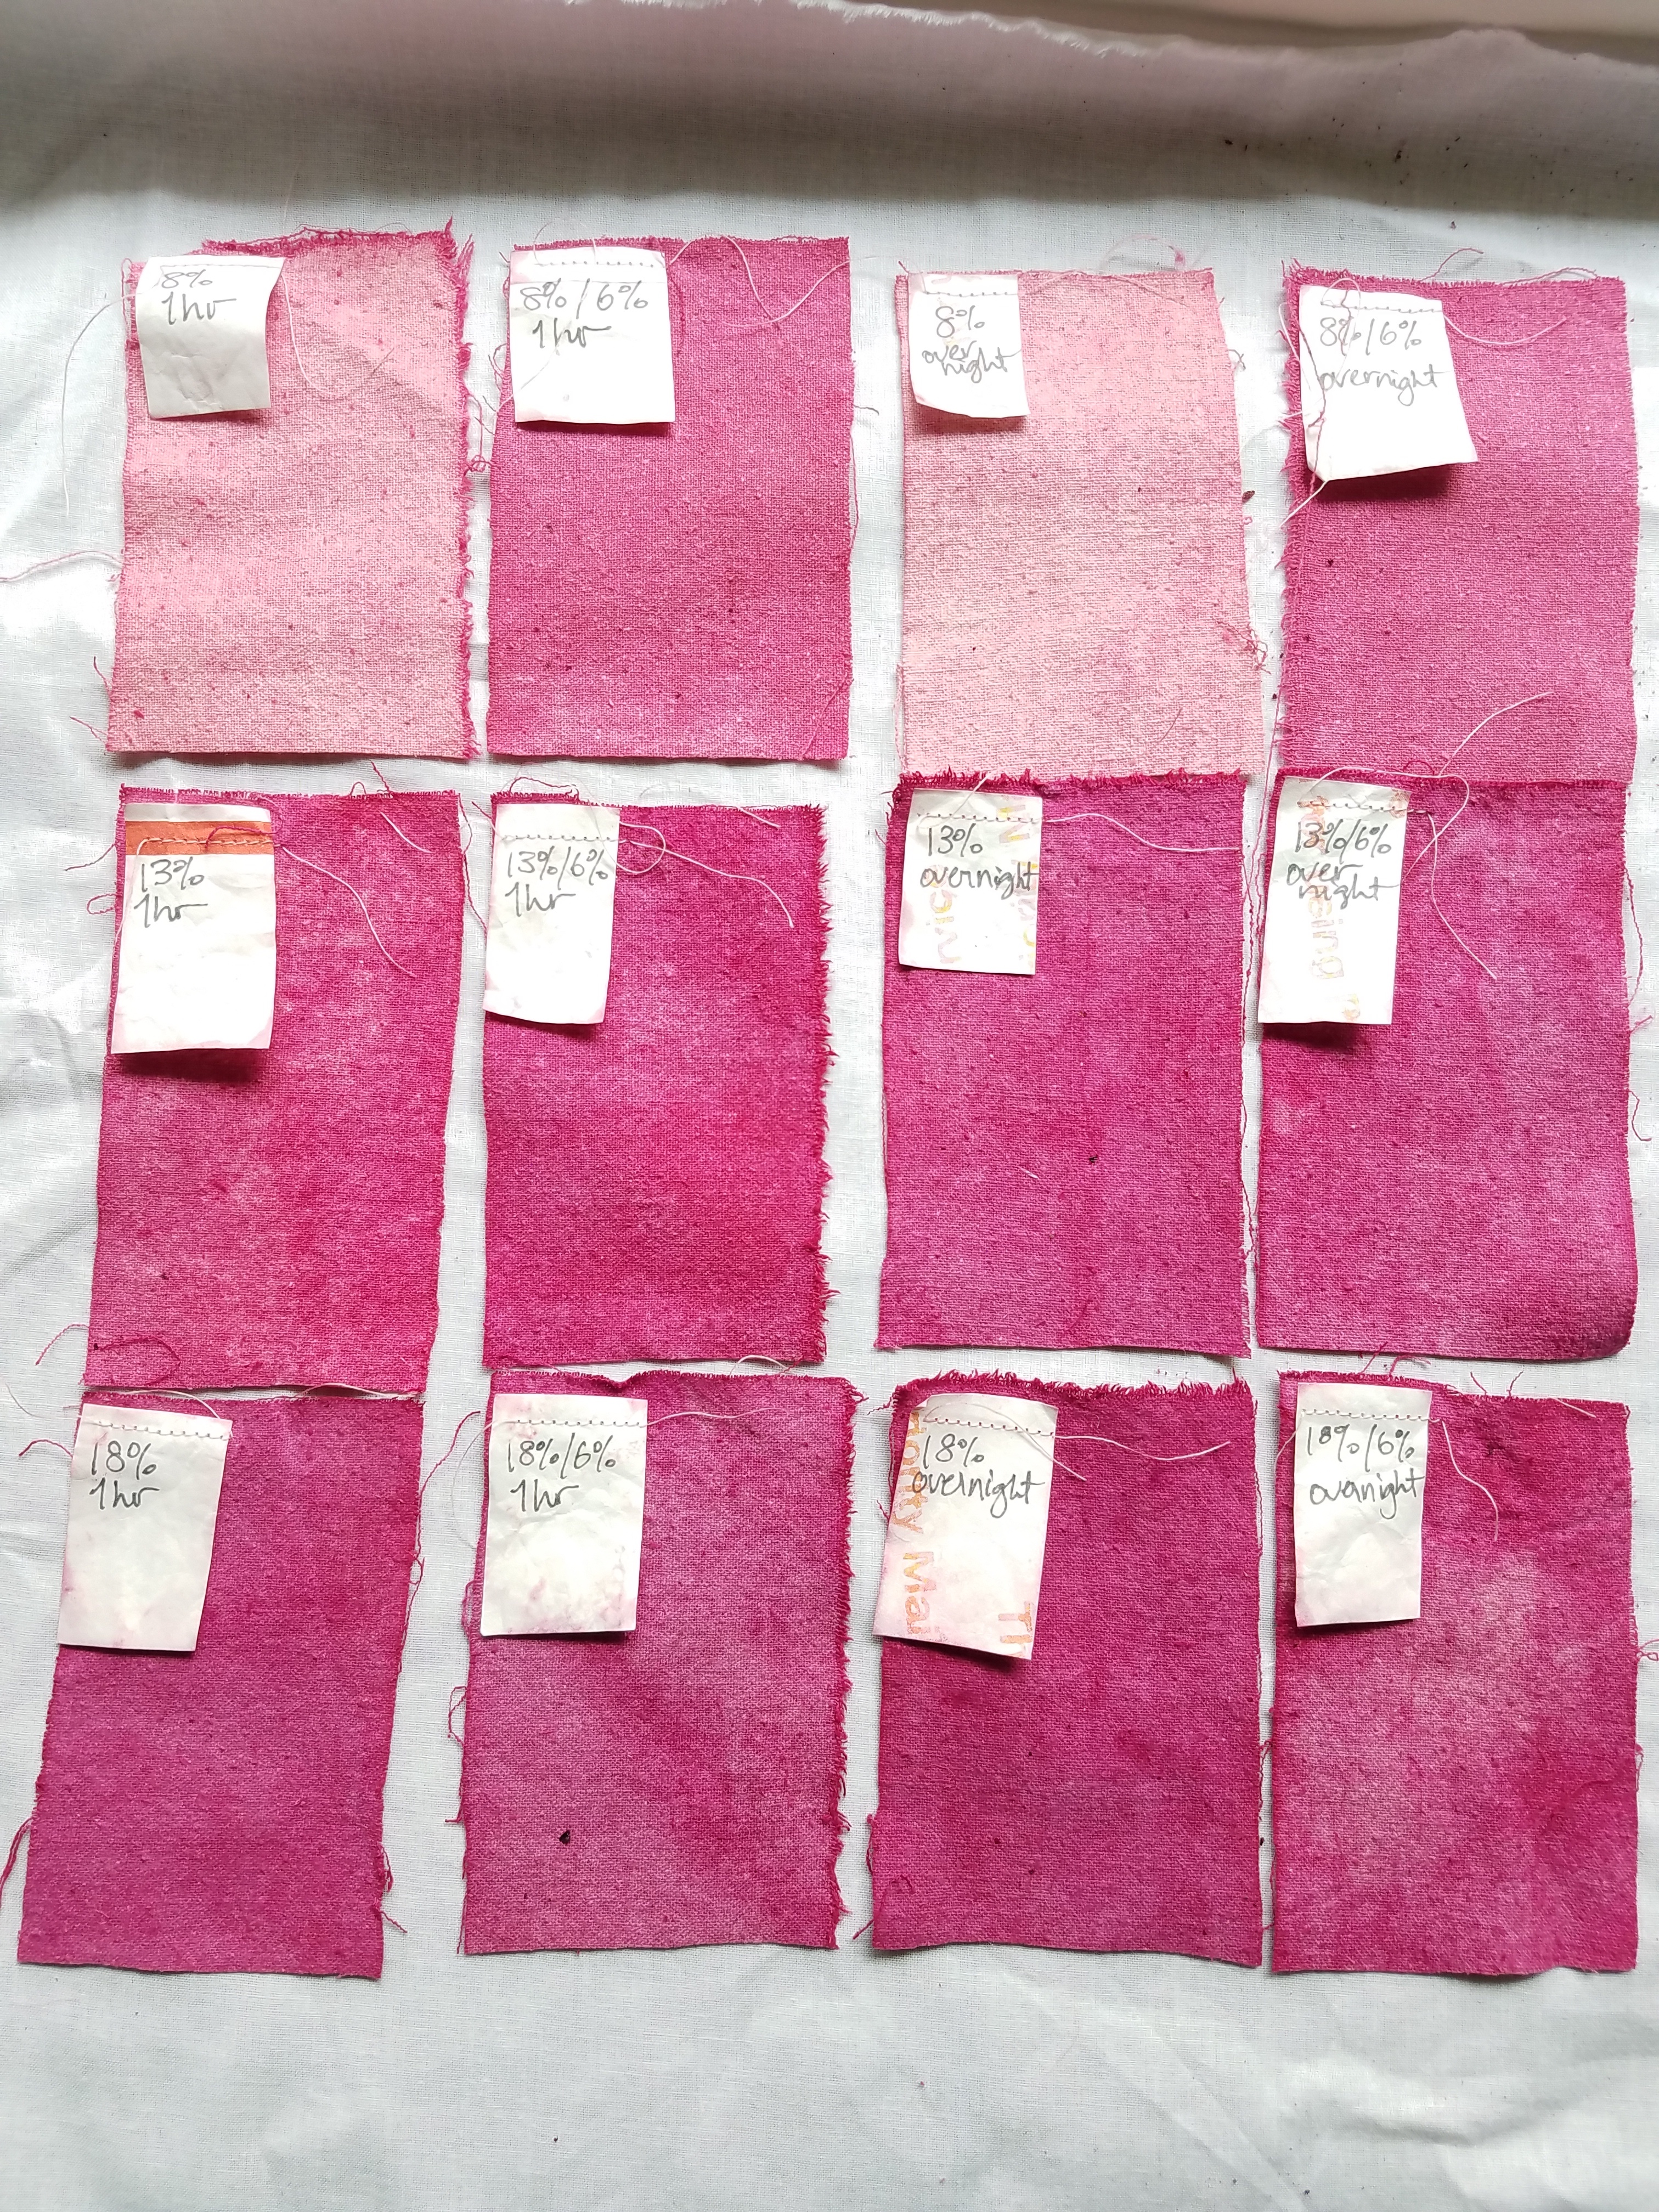
Silk noil. The unevenness of color I attribute to not enough wetting out time. In the future anything with silk will soak overnight.

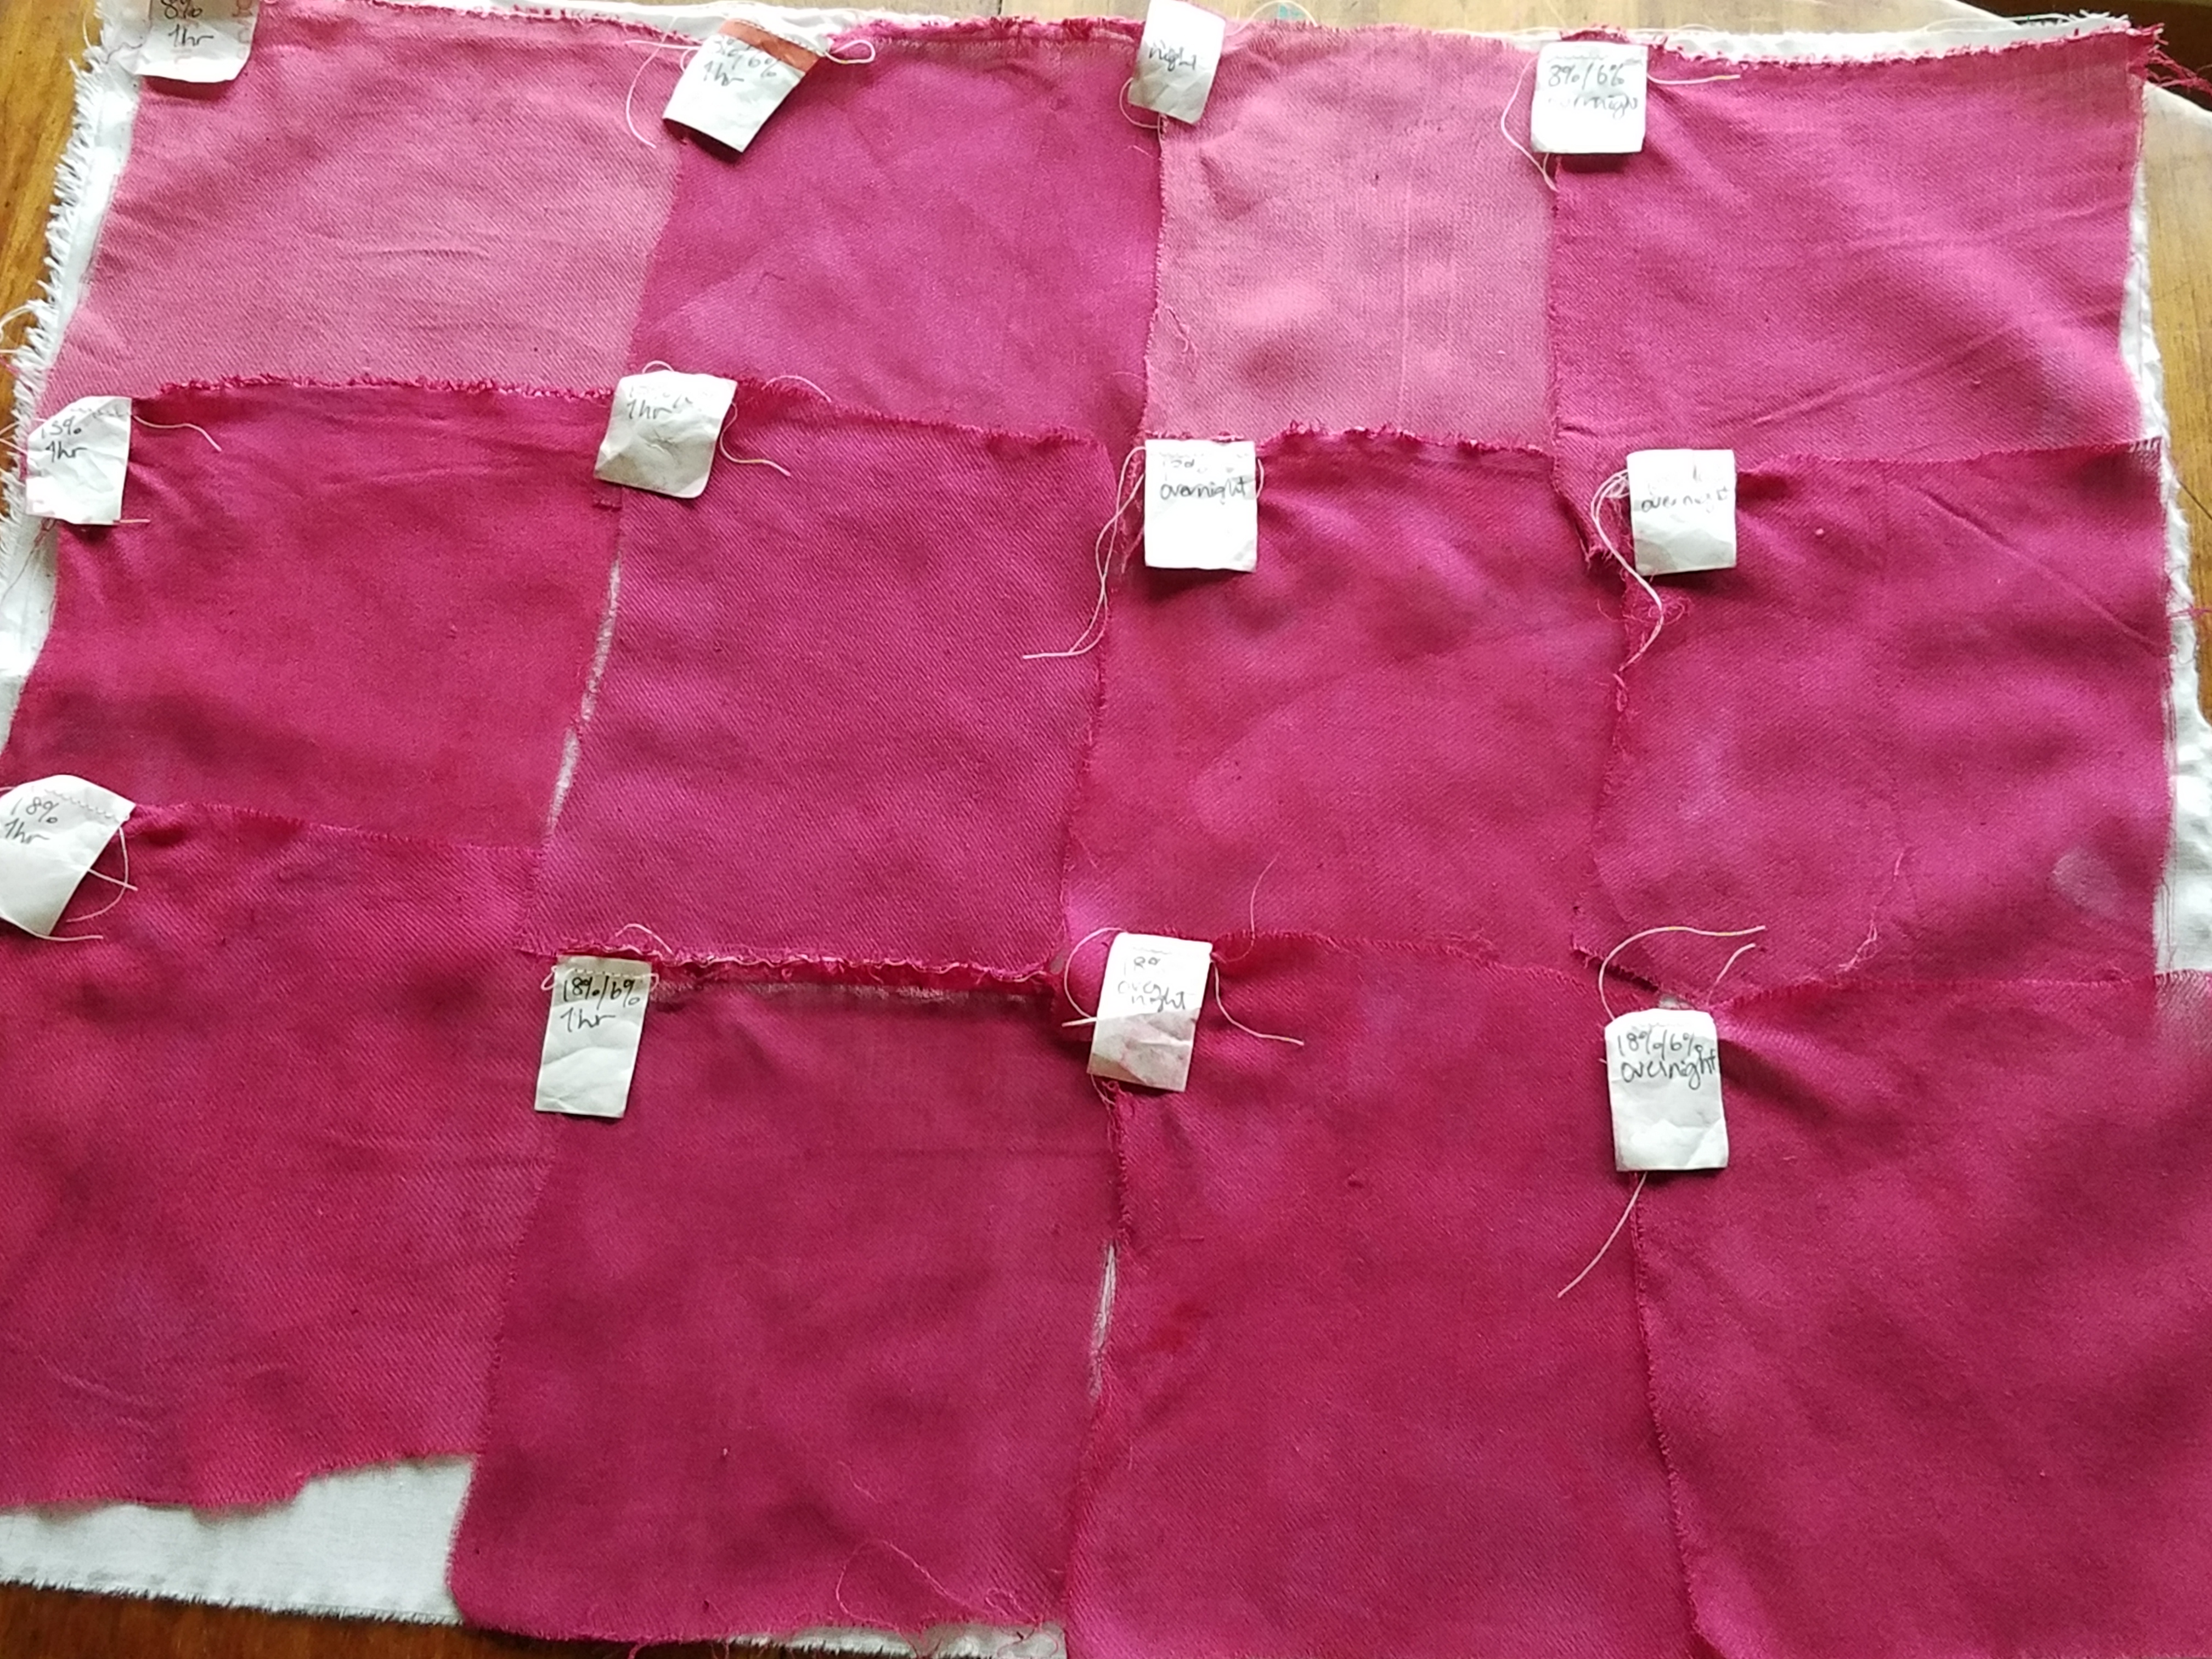
This is a thin 60%silk/40% wool twill. I was surprised that I liked the 18%/6% 1hr mordant the best.

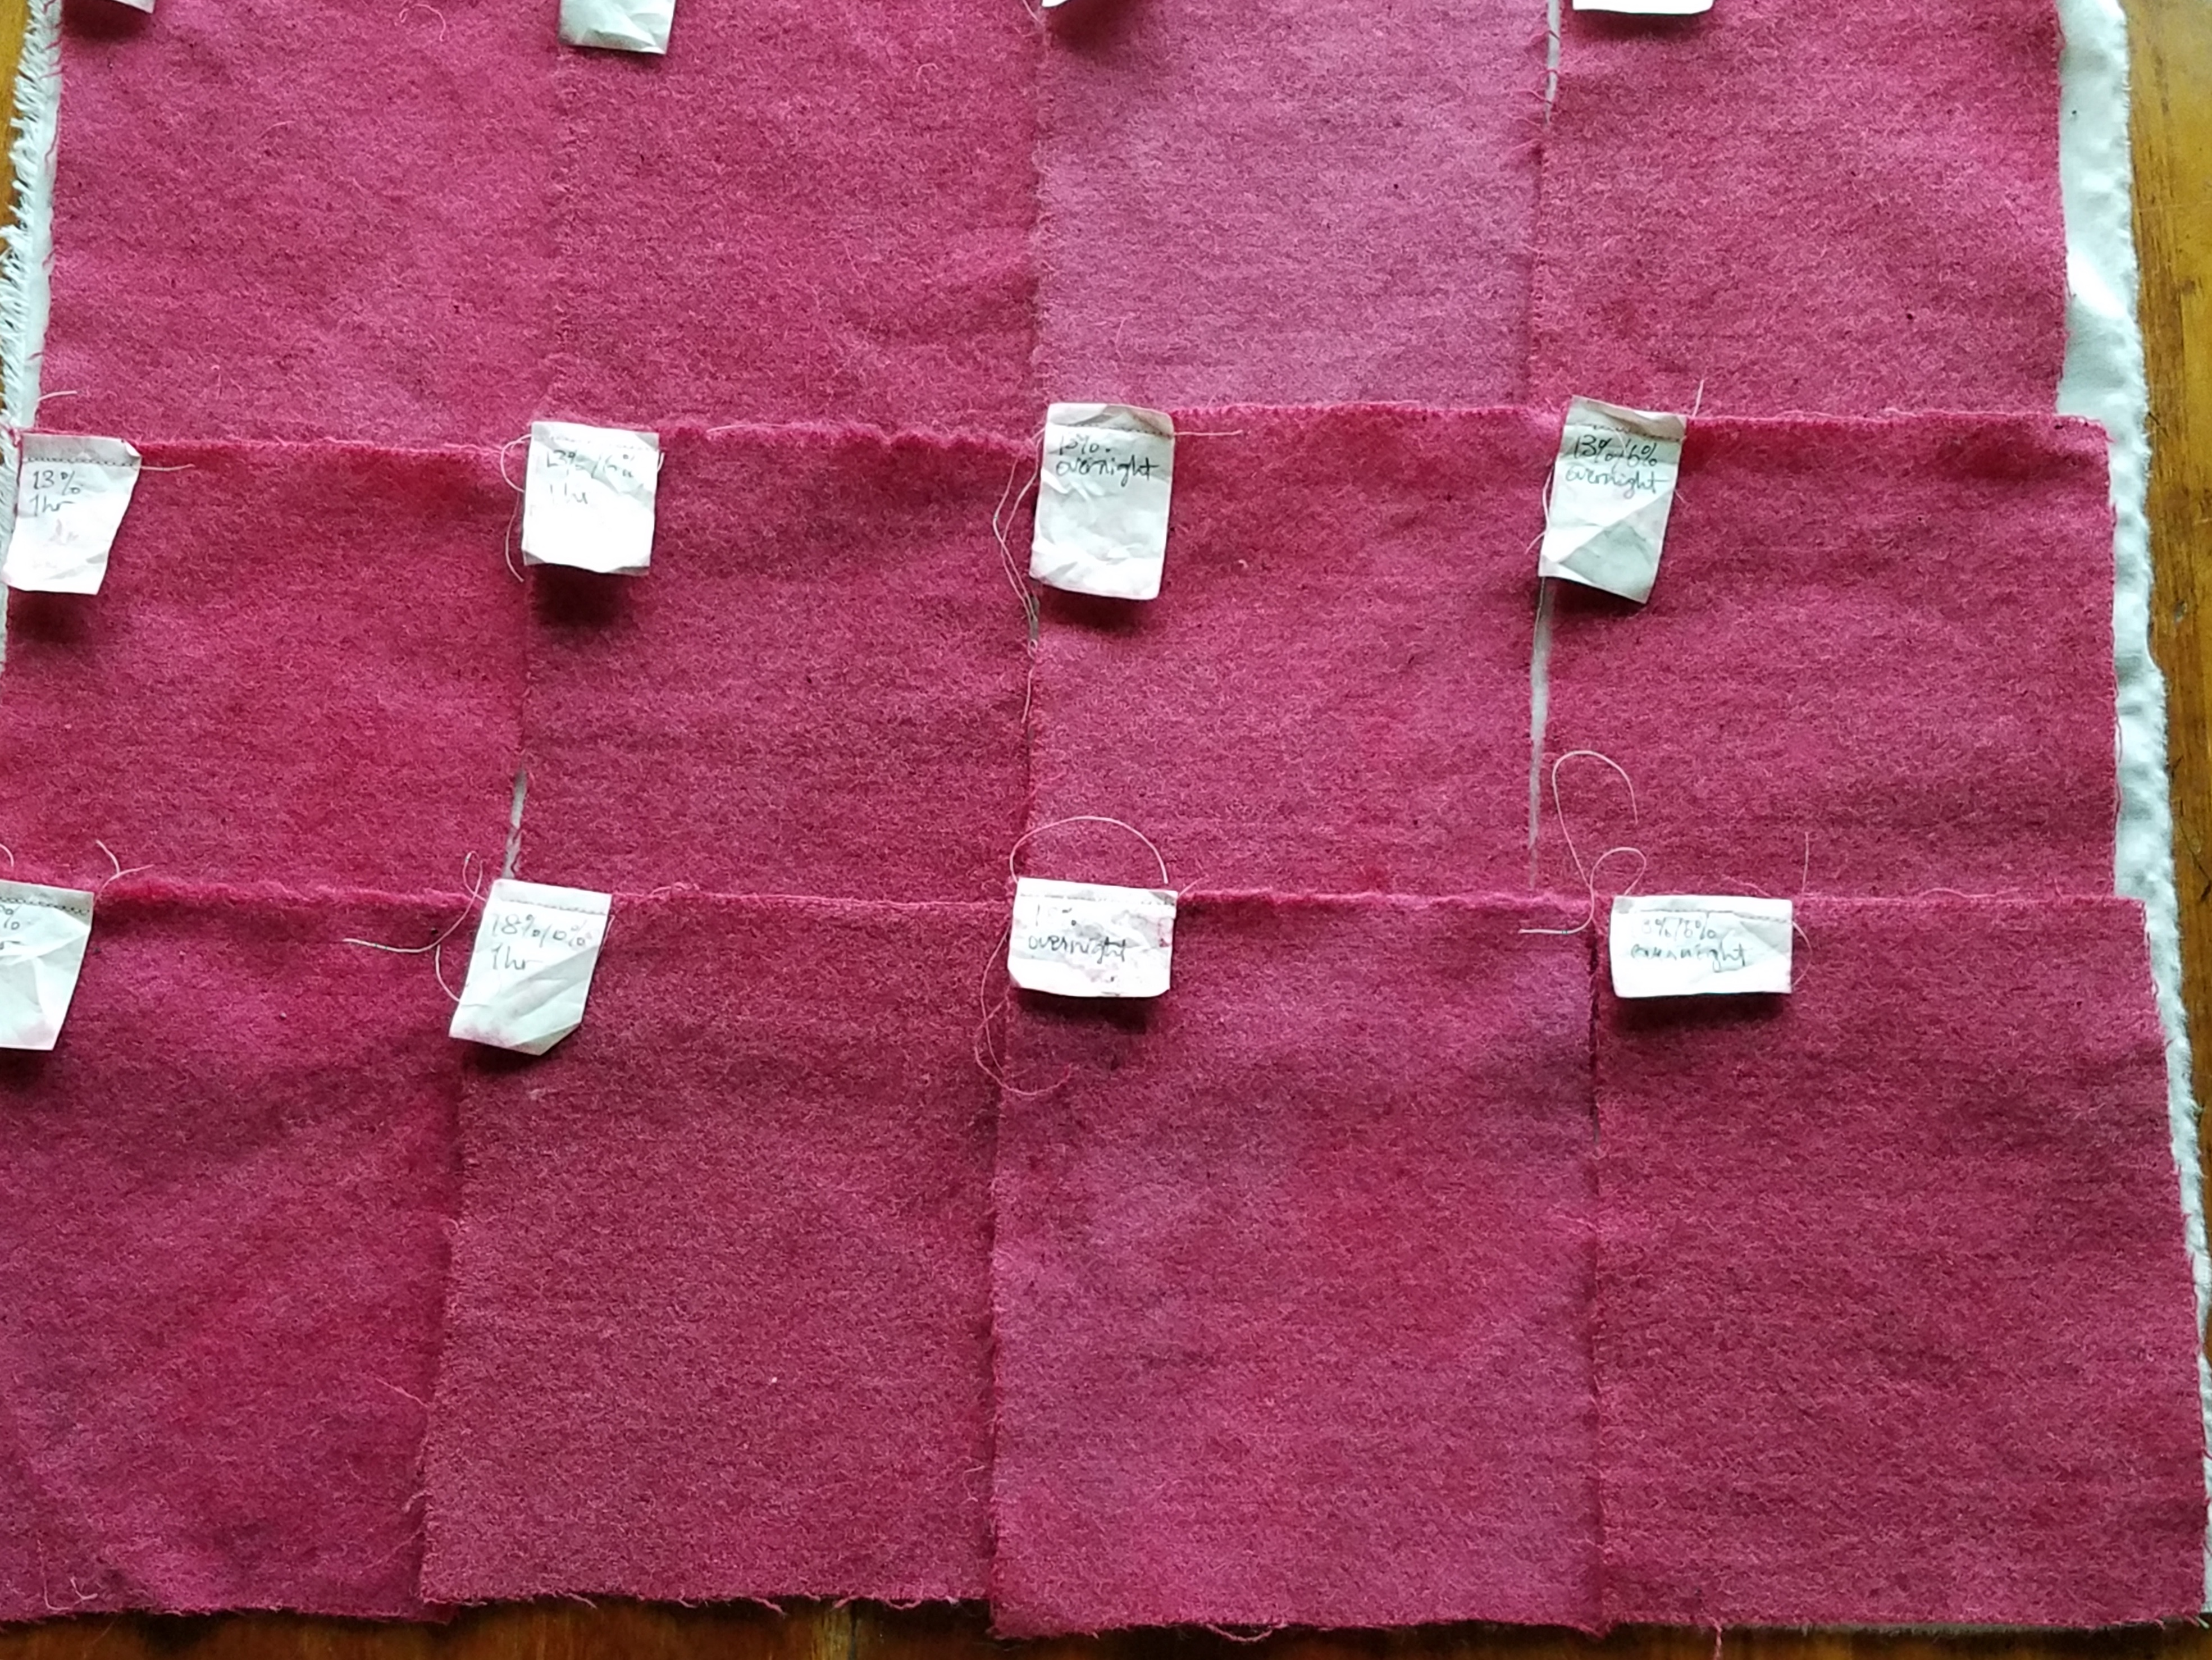
Medium weight wool challis. Not as great a difference between the 13% and 18% mordant strengths as on the silks.

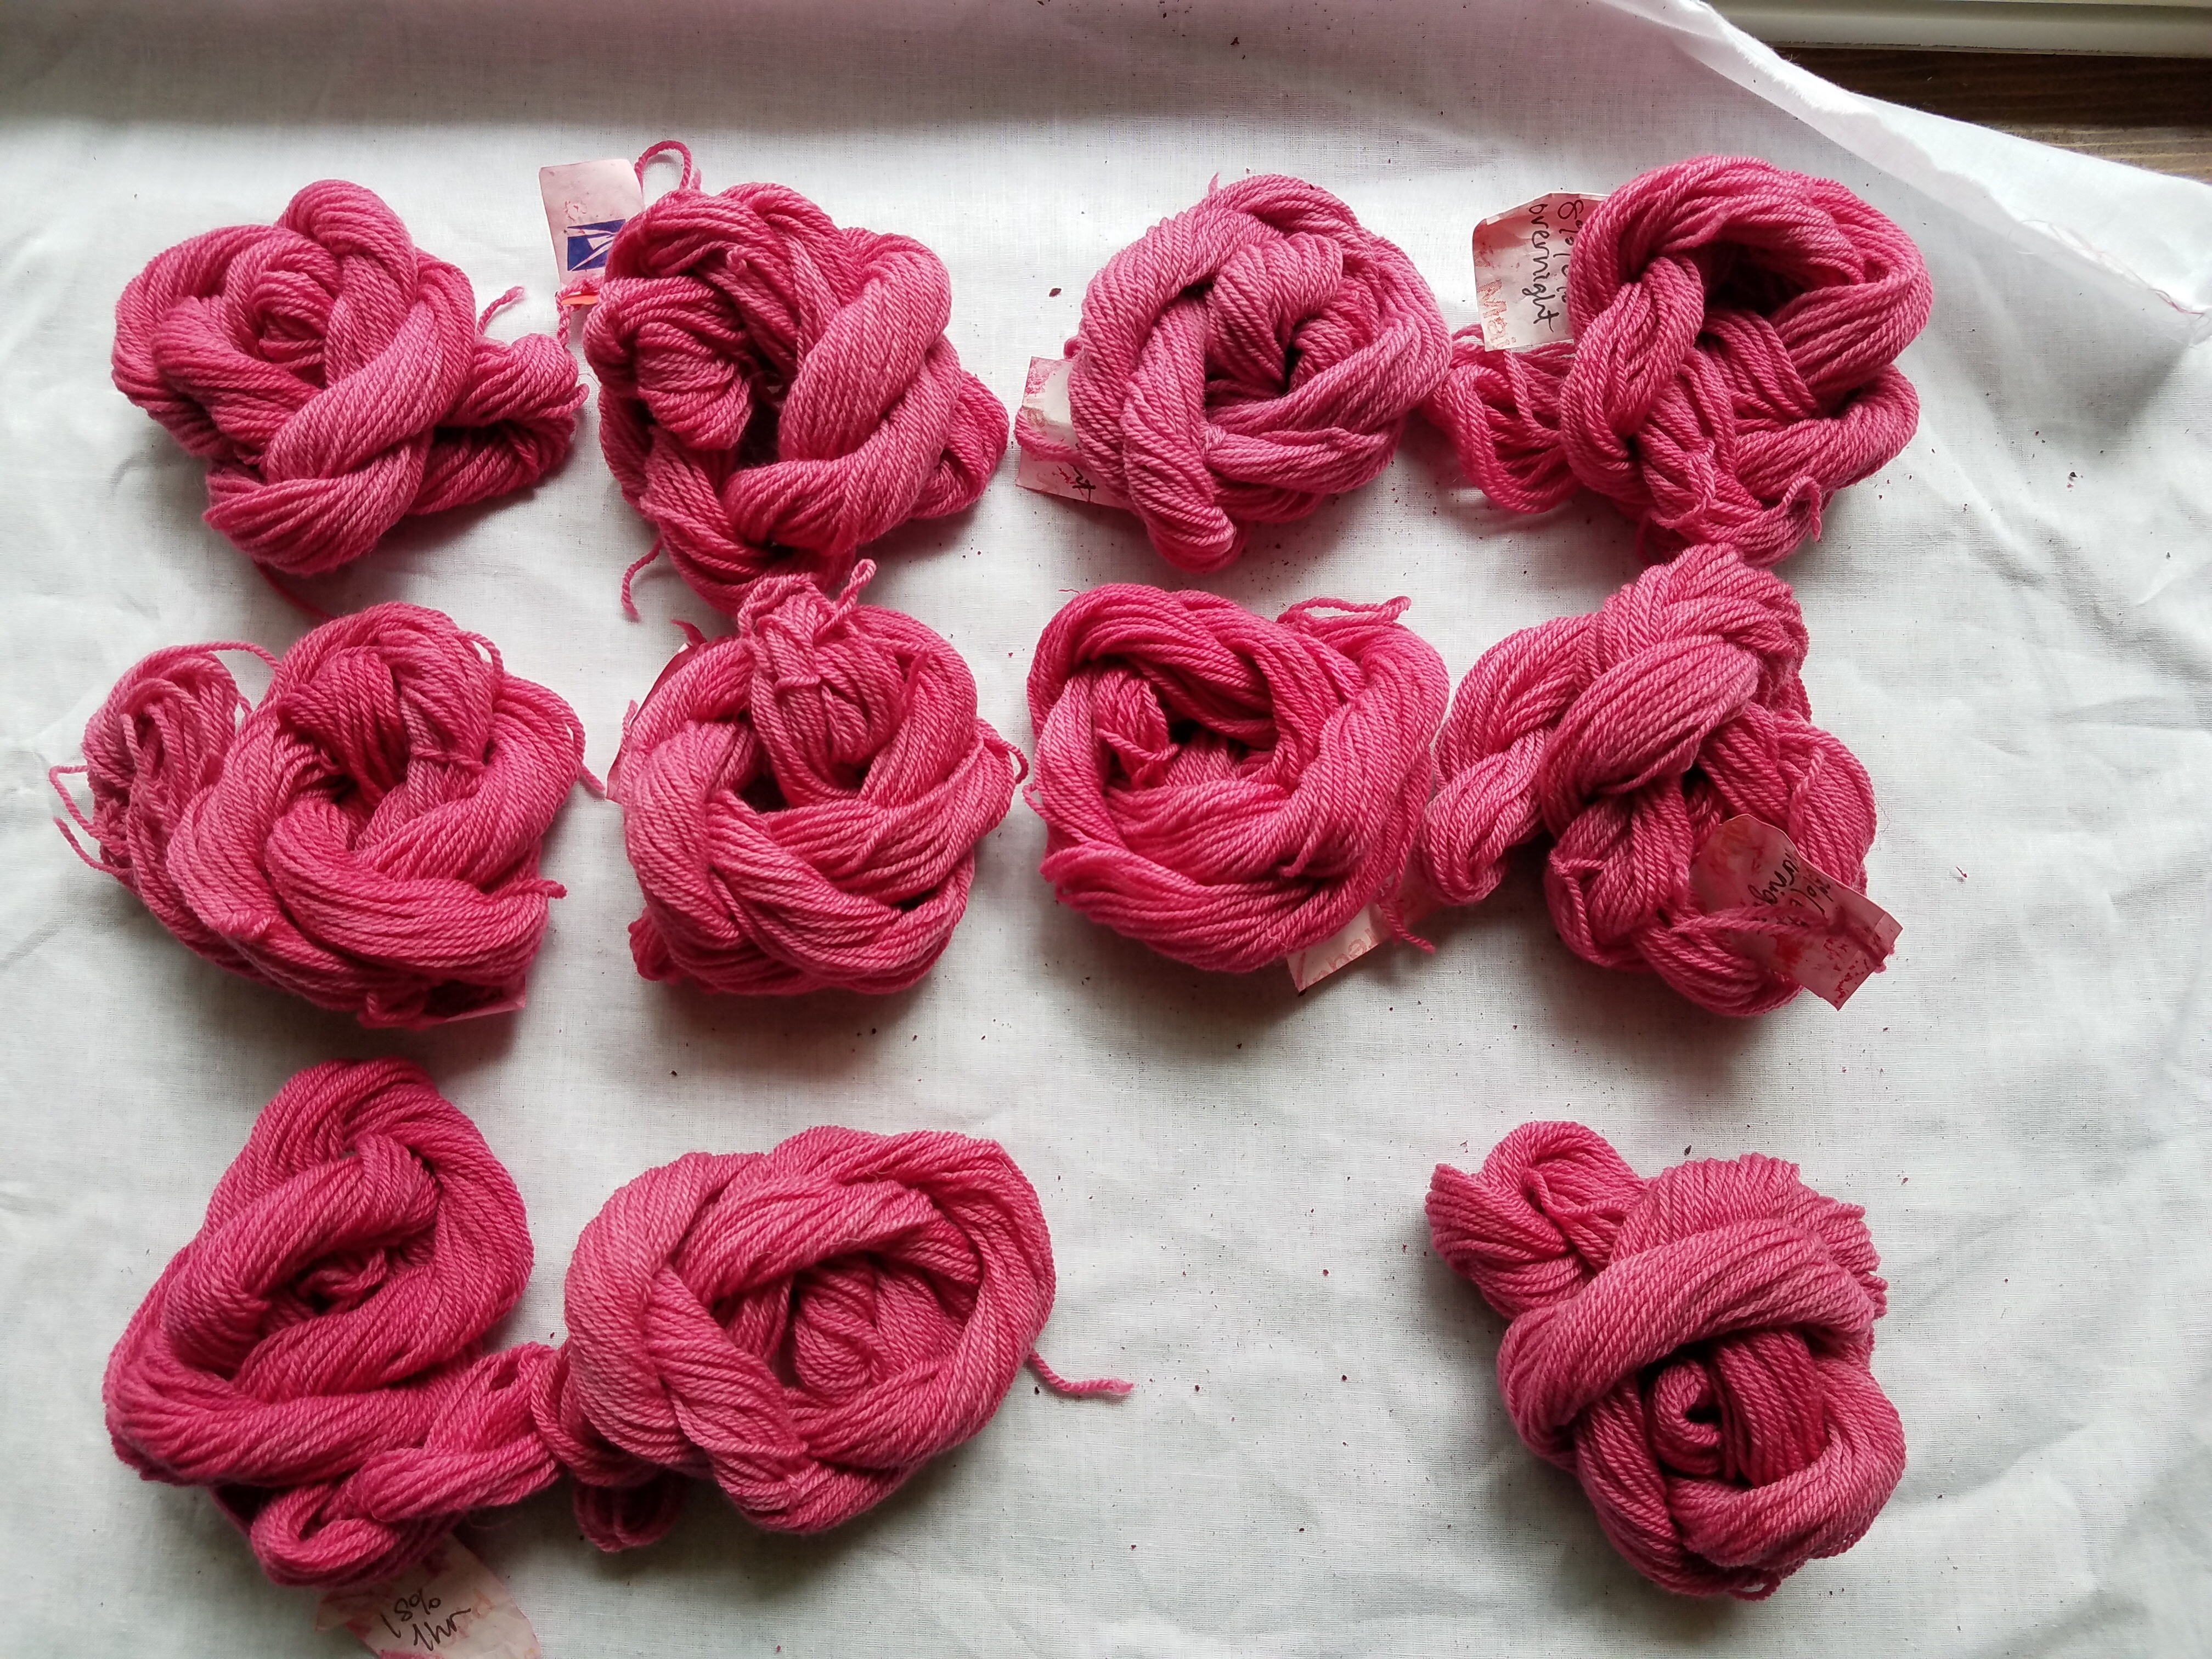
Commercially prepared undyed organic merino yarn. I didn’t scour it, and I should have! I think the color uptake at all mordant strengths would have been much better. The 18% overnight skein is missing— I ran out of yarn.

Takeaways:

Its pretty clear that more mordant equals more dye uptake. This was a strong dyebath, with plenty of color left over (I dyed several more yards of fabric afterwards with the leftover bath). Between 13% and 18% the difference isn’t as stark as at 8%, so I might do an additional test at 15%WOF and see if I can see a big enough difference to merit the additional mordant.

It’s not so clear in the photos, but the samples mordanted on heat for one hour had a nicer, more even color than the ones brought up to temperature and then left to cool overnight. This surprised me. In the future I will probably keep on heat for one hour, then let cool naturally before removing the fiber. This has also dissuaded me from trying a recipe I found on the internet for mordanting in cold water!

I will definitely be wettting out silks overnight, and scour any fiber I haven’t already prepped myself. I will use cream of tartar, for both mordant uptake and nicer hand. The final test, of course, is a light-fast test. My hypothesis is that the higher mordant strength will be more fast.

Light-fast test in progress.

At this point I’m of the opinion that the prep work, from scouring through mordanting, is the key to nicely dyed fiber. The dye bath is basically proving how good a job I’ve done. A stronger dye bath won’t produce any more color than the amount of mordant bonded to the fiber. This test was done with cochineal, which won’t dye without some sort of mordant; if I was dyeing with something substantive like onion skin, the extra mordant strength may be unnecessary.

I hope this helps answer the question of how much mordant *you* really need: by all means, do your own experiments!


Small: three ways to make yarn without a spindle or wheel

0

Small

This post is part of our series about small things you can make with what you’ve got to hand. Projects don’t always have to be big, complicated and involve buying lots of new and possibly expensive materials.

Let’s start with yarn. Making yarn might seem daunting but the truth is there are lots of simple ways to make it. You don’t need any special equipment to make yarn. Just scissors and maybe some handcards.

sock becomes yarn

Rag yarn

Let’s start with some old socks. You know the ones where the heels and toes have worn out but the rest of the sock is fine and even made out of some warm fluffy material? Do you throw these away? Or make them into yarn?

Start at the cuff and cut a spiral around and around the sock, avoiding bits that are worn.

It knits up nicely

This yarn can be knit up, but unless you have lots of identical socks you’re not going to get tons of yarn from a pair. I would use this yarn for rag weaving. (future post!)

Obviously you can cut up any fabric and make it into yarn. There’s a cool Saori-made tool called a Sakiori cutter designed specifically to cut fabric into long strips for weaving.

Silk hankies

a dyed silk hanky

Silk hankies are squares made of cocoons that have been softened and then stretched onto a frame-layer upon layer. The hankies can be dyed and spun, but you can also use them for paper making or felting.

knitted silk hanky–no spinning

You can also knit straight from the hanky–no spinning! There are a lot of great youtube videos on silk hanky and silk cocoon uses. I’ve made a pinterest board showing some of them. Here’s a video on how to knit from the silk hankies–featuring a cat.

Silk hankies are cheaper than most silk you can buy to spin. You can even make your own. Here’s another helpful video if that’s something you’d like to try.

Finger-twisted ‘pencil’ roving

You don’t need to spin wool to make it into yarn. There are lots of roving-like (unspun) yarns on the market. Noro does one called Rainbow Roll. So does Alafoss an Icelandic yarn brand. It’s called Plotulopi. You can easily make your own using the finger twisting method or simply by pulling some combed wool through a diz.

I used my handcards to make some rolags which I then pulled out into a long, thin rope. You can knit right away, adding a little twist with your fingers as you go. Don’t worry if the yarn breaks. You can reattach it simply by twisting or rolling the two ends together with your fingers.

rolag rolled into a ball

Super slow yarn: adventures with a wool picker

2

Classic Carder Wool Picker

When Sal and I first started spinning and using raw fleece we spent a lot of time–and I mean a lot–talking about fiber prep. A lot of this conversation revolved around la technique and getting the best results we could with the tools we had.

Recently I had the privilege to borrow my guild’s brand new wool picker. I was excited to use the picker and once I got going with it, I started thinking on the whole process of prepping fiber at home.

The wool picker is a new tool to me. It has big sharp spikes which tease apart the fiber. Push in a little bit of washed fleece in at the front and then push away the boat (that big swinging part with spikes on it). In a few seconds light bits of fluff comes out the other side.

Sometimes fleece can be quite tough to open up after its been washed. The picker gets out a lot of the dirt and VM and pries apart the locks making it ready to card. If  you get a chance to use a picker, do it. The effect is truly incredible. If you’re used to prising locks apart with combs or hand cards the wool picker is faster, easier and doesn’t leave you with sore wrists.

Caution: Big sharp spikes

Pick, comb, card

I put through a shetland fleece and the picker did a great job opening up the fleece and releasing dirt. Seriously this was one dirty fleece! It is also a quite fine fleece and once the picker did its stuff there were tons of nepps.

combed Shetland fleece

At first glance getting out the nepps (unless you want them) looks a daunting task. Out came my wool combs which helped me get out most of the nepps, but not all. I put the combed fleece through the drum carder. There were still nepps, but my light and fluffy batts were lovely to spin.

I also put some Suri alpaca fleece through the picker and the results were great. Suri is tough to process by hand and the picker made easy work of it. I can’t wait to spin a test skein.

suri fleece before

suri fleece after picking

fluffy batts

Slow yarn

Processing raw fleece by hand is time consuming. I haven’t done a lot of big batches of fleece in awhile and had forgotten exactly how long it takes. It also can be a little intimidating when you see a massive pile of fluff that you then may need to go through several times–depending on how fine you want your yarn.

Bear in mind you are not a robot (obviously). Your two hands and some tools are not going to be able to replicate mill-made roving. There will be nepps. There will be a little VM. That’s all fine.

I carded some of the picked fleece into rolags, picked out some of the nepps and it spun nicely into a fat, fluffy yarn. You don’t need go crazy with fiber prep to get a nice, slow yarn.

fluffy shetland yarn

Carding by hand–la technique

3
Millet's Woman Carding Wool

Millet’s Woman Carding Wool

“The purpose of the carding process is to align, thoroughly, all the fibres and to spread them evenly across the carders. This process is essential for the production of a woollen thread and is often employed in preparation for a semi-woollen and semi-worsted yarn.”

—Eileen Chadwick, The Craft of Handspinning

Why use handcards when you can use a drumcarder? Handcards are easily portable and great for blending colours. They are also perfect to make rolags, which are, I believe, the best preparation for longdraw woollen spinning.

Gradient of natural colours. Carded by hand

Gradient of natural colours. Carded by hand

I like my handcards, especially for making rolags. Yes I could use my drumcarder, but for a recent project where I wanted to achieve a gradient effect for a woollen yarn, I stuck with my handcards. Rolags seemed like the way to go for a nice woollen yarn. Carding up rolags is not particularly time consuming once you get the hang of it. You will quickly get a feel for how many rolags you need to spin a bobbin of singles.

Here’s a short video of me demonstrating how I card.

I’m not saying this is the way. It’s the way I was taught by an experienced guild member and reflects the technique Chadwick described in her book.

A couple of tips for handcarding success:

  • Don’t overload your cards with fiber. Handcards aren’t designed to take big quantities. Go for 5-10 grams at a time.
  • Easy does it, don’t grind your cards together.
  • Don’t worry that all the fiber doesn’t transfer from one card to another. It’s not supposed to.
  • If your forearms get sore, you’re doing it wrong. Stroke one card gently over the other.
  • Check out Eileen Chadwick’s carding how to: pages 33-37 of The Craft of Handspinning.

    finished project!

    finished project!

How to choose a fleece for handspinning

9
Herdwick: cute, but not a fleece for beginners

Herdwick: cute, but not a fleece for beginners

Buying my first fleeces to process at home for handspinning was hugely exciting. I’d just been to my first meeting of the Mid-Essex Guild of Weavers, Spinners and Dyers and it happened that two of the members were having a fleece sale that day.

I was lucky to have two experienced guild members there to show me how to look over a raw fleece. They unrolled the fleeces and talked me through what I was looking at, pointed out some of the desirable qualities that hand spinners look for in a fleece. Those are attributes like crimp, softness, good lock structure, cleanliness (no straw, grass or poo, etc). More on that later.

The first fleeces I bought were a Hebridean, a Shetland and a Ryeland. Maybe I went a little overboard. It took a lot of work to get the fleeces scoured, dried and ready to spin. And even though I benefited from having some experts on hand to help choose my fleeces, if I were to do it all over again I would have done my homework first.

Before buying a fleece, I recommend reading up on different breeds and the characteristics of their fleece. There are about 60 sheep breeds in the UK alone and all their fleeces are a little different.

Some, like Cotswold, Teeswater, Lincoln, Leicester and Wensleydale–longwool breeds–have fleeces that are more hair-like, lustrous and require some experience to spin.

Then there are the Downs breeds–Southdowns, Oxfords, Hampshires, Dorsets for example–which have dense fleeces with short staple-lengths, but feature lots of crimp and bounce.

Fleece sale!

Fleece sale!

Then there are the many other breeds that are favourites of hand spinners, like the Shetland, Blue-faced Leicester, Cheviot, Manx Loaghtan and Jacob, which all have their own characteristics. There are also plenty of breeds which aren’t particular favourites of spinners, either because their fleece is too coarse or just not suitable for spinning.

So before jumping in and buying a fleece take a look at some of the books available like Fleece and Fiber Sourcebook or The Spinner’s Book of Fleece to get an idea of what you might like to spin as well as the huge choice available.

There are other questions you want to ask before diving in and buying 4-5 pounds of raw sheep fleece. Are you going to make a worsted or woollen yarn? It will be hard to spin a woollen yarn from a long wool, for example. Which fleeces will best suit your project? Do you want a coloured fleece? How important is softness in your project? Are you looking to create something durable or more lightweight?

What to look for in the fleece 

Now that you’ve decided on a breed, what are you looking for when choosing the actual fleece?

Steve Kennett, vice chairman of the Association of Guilds of Weavers, Spinners & Dyers, visited my guild back in September to speak on how to pick out a fleece.

Steve unrolled one of the fleeces supplied by a member and gave a few pointers on picking a good one. It had a lovely staple length, beautiful crimp and was muck and VM-free. Steve held it up to demonstrate how the fleece should be nice and open—like a lace curtain.

Jacob lock from raw fleece. Nice staple length and crimp, no breakage or second cuts

Jacob lock from raw fleece. Nice staple length and crimp, no breakage or second cuts


You can see in the photo of the Jacob lock what I mean by crimp. It’s simply the little waves in the wool. Crimp makes wool easy to spin as it twists together and the crimp helps the wool lock together. The rule of thumb goes that the more crimp, the finer the wool. Merino, for example, can have 100 waves (crimps) per inch. Longwools have less crimp and often used  by spinners to add texture and lustre to yarn.

Steve Kennett also said to look out for second cuts (short bits the shearer missed on the first pass) felting and second growth—ie when a sheep hasn’t been sheared and begins to grow a second fleece. He recommended  taking off a lock of fleece, holding it firmly in one hand and giving it a good tug. If the lock is breaks avoid the fleece as it is brittle, will not be nice to spin and could result in weak yarn.

The best part of the fleece is going to be on the neck, front legs and back (between the shoulders). Fleece on the back is generally good. Fleece from the hind legs is generally coarser and kempy. Steve recommended being picky about fleeces and perhaps buying several, but only using the best bits.

I don’t know if I’d go to the lengths Steve does–buying many fleeces and throwing a lot of it away. If I were to go back in time, I’d probably have started with one fleece (Shetland) and made life easier for myself. If buying a whole fleece is intimidating, get a friend to share one with you.

Starting with a fleece instead of tops or roving is, I think, a great way to learn more about sheep breeds, fiber prep and spinning. Fleece you’ve scoured and prepared yourself is going to feel and spin differently from commercially processed fiber. Some of the women in my guild consider commercial prepared fiber to be “dead”, because they view it as flat and lacking crimp. I agree with that to a certain extent, however I have found that top or roving from smaller mills tends to retain some of the bounce and crimp.

Gotland sheep Commercial top (l) Raw fleece (r)

Gotland sheep
Commercial top (l)
Raw fleece (r)

Still it’s an eye-opener when you compare commercially prepared roving with that you’ve cleaned and carded yourself. Take a look at this Gotland fiber. On the left, straight up commercial roving, on the right Gotland right off the sheep. Looks a lot different right? Doesn’t even look like it came from the same breed.

For more information on scouring fleece see these posts: Hot tips for scouring fleece or More hot tips on scouring fleece without soap.

Gift Ideas for the Fiberista

2

Rachel suggested we put together a list of fun or useful gifts for the fiber fanatics in your life. Which is funny, because every year before Rachel’s birthday or Christmas I get an email from her husband asking for gift suggestions. In Rachel’s case I’m at an advantage, because we talk about our fiber plans daily, but putting this list together I’m at a disadvantage because nothing on this list is on the list I made for Rachel’s husband! My spinning Guild also has it’s year-end gift exchange in a couple of weeks, so it seems like there’s always an opportunity to buy (or make!) a well-received gift.

Here are some useful tools:

a ball winder

a ball winder with yardage counter

a yardage counter

a swift

Ball winders and swift

Ball winders and swift

a niddy noddy. Make a custom-sized one on the cheap out of PVC.

small scissors

measuring tape

a wraps-per-inch gauge

blocking pins

a diz:

Diz

a hackle

a blending board

a dog comb or flick carder for preparing fleece

a few extra bobbins for their spinning wheel. These are always welcome, but be sure you know what kind of wheel your friend has—different manufacturers make different sizes and they’re not always interchangeable.

soap nuts

spinning wheel oil! I’m always having to depend on my fellow Guild members when my wheel starts whining during meetings, because I don’t have a small travel tube of it.

Does your friend weave? How about a travel loom, a pin loom or an inkle loom? There are plenty of instructions online on how to make a PVC inkle loom.

Inkle loom

Inkle loom

Does your friend only spin wool or alpaca roving? Maybe a gift of cotton, flax, an interesting synthetic fiber, or silk hankies. Rachel and I have found that spinning different types of fibers really helps with our overall technique. A tip: if you give silk hankies, include a bottle of talcum powder. It smooths over the rough places in your hands and makes mawata spinning a breeze.

Does your friend have a drop spindle? A Turkish drop spindle? There are lots of beautiful hand-made spindles out there. Look on Etsy or search online for hand-crafted spindles.

Turkish spindle

Turkish spindle

Notions. I love giving and receiving buttons. I find they inspire new projects, and you can usually find designs for anyone’s favorite interests. Etsy is also a great place to find handmade notions and shawl pins, by artists local to your area or from around the world.

Locally crafted ceramic buttons made by BeadFreaky that I found on Etsy

Locally crafted ceramic buttons made by beadfreaky that I found on Etsy

A salad spinner. These work great for getting the wet out of small batches of fiber. If you think your recipient will be confused, include a little unwashed fiber in the basket. Another tip: if your friend is in need of a salad spinner for, well, salad, definitely get her two! Thrift stores are a great place to find perfectly good second hand salad spinners for fiber processing.

Knitter’s graph paper. Great for charting things or keeping track of where you are in a pattern (ahem, Rachel). We happen to have a handy-sized Sheep Cabana version available in our brand new Etsy shop:

Sheep Cabana Knitter's Graph Paper

Sheep Cabana Knitter’s Graph Paper

Books. We are a bit on the fence about books. I like ones that are reference books, stitch dictionaries, and other how-to types.

If your friend really likes making socks, the latest sock-pattern book might be up his alley. I would check out his library first. Your friend’s Ravelry queue or Pinterest boards are also good places to check for favorite designers and designs. Some designers on Ravelry also give the option to gift patterns electronically, which is great. Support your indie designers!

There are some novelty books out there which non-knitters tend to give knitters. Coffee table books, if you will. If you’re tempted by something like that, ask yourself how many faux-taxidermy meerkats or rustic-modern crochet ponchos your friend is going to make. If it’s a resounding “That many!” then go for it. But still: if your friend has an e-reader, consider the e-version of the book.

One last idea is project bags and small notions cases. Lots of people make these, probably people you already know in your Instagram feed.

If I’ve left anything off this list, it’s because it’s on Rachel’s surprise list. However, as far as gift giving goes, if in the long run your recipient would rather have something useful than be surprised, just ask them what they might want! I find that that’s often the most appreciated gift of all.


More hot tips for scouring fleece–without soap

2
Soap nuts!

Soap nuts!

Have you heard of soap nuts? They’re the little glossy shells from the fruits of trees and shrubs of the Sapindus genus. They can be boiled in water to make a liquid soap or popped into a muslin bag and added to laundry. Even though they’re called soap nuts they’re not soap as is commonly known (lye plus fat). Soap nuts are lauded as a non-toxic and sustainable laundry alternative. Oh, and they’re a lot less expensive than commercial detergents.

So what does this have to do with scouring fleece? I started using soap nuts for my family’s laundry mainly because of their eco credentials, but also because they lack the heavy perfumes present in so many commercial detergents. Smelly detergents! Yuck! They worked incredibly well.

I also struggled to find an unscented, eco-friendly detergent to use on fleece and thought the fleece scouring solutions (like Power Scour) on the market to be on the expensive side. When it came to getting ready for a big fleece scouring session I thought, hey, why don’t I try the soap nut liquid on the fleece?

How did it go? Well, it worked.

I made up the soap nut solution–boil 50 grams of soap nuts in 2 litres of water for 10 minutes. Cool. Strain. (50g of soap nuts can make 12 litres soap.)

Bowmont fleece soaking in soap nut solution and hot water

Bowmont fleece soaking in soap nut solution and hot water

I filled a bucket with very hot water, gently added about 250 ml (roughly 1 cup) soap nut solution and then added my fleece. Immediately I could see the water turing that milky brown colour you get when washing fleece. I let it sit for awhile before draining it and spinning it out in the washing machine.

Yes, I put wet fleece in my washing machine on the spin cycle. It’s the same technique Sally mentioned in her post on scouring fleece. Your fleece won’t felt. If you’re worried about smell you can clean your machine with white vinegar and baking soda. I didn’t have a smell problem.

The next step was to rinse the fleece in hot water. I had a very greasy fleece (Bowmont) and it felt sticky when I took it out of the washing machine. To address this stickiness I added a good dose of white vinegar to the hot water rinse. I figured hey, it won’t hurt the fleece, right? My theory was the acidic vinegar would help reduce the stickiness.

Bowmont fleece drying

Bowmont fleece drying

When I added the vinegar the fleece fizzed and bloomed, opening up nicely. I let it sit for awhile before spinning it out in the washing machine and spreading it out on a sheet in the garden to dry. There’s no vinegary smell on the fleece either.

It occurred to me that I’d run this experiment on a relatively clean fleece–no muck, negligible VM. What about a muckier one? I found some fleece that needed a little more work, picked out the really gross stuff and soaked it in the soap nut solution and ran it through the same process in the washing machine and vinegar rinse.

Muckier fleece

Muckier fleece

This fleece is a 3/4 Southdown lamb and not nearly as greasy as the Bowmont. The soap nut and vinegar treatment worked really well.

Getting the dirt out! (3/4 Southdown fleece)

Getting the dirt out! (3/4 Southdown fleece)

You get through a lot of water when washing fleece. I didn’t want to pour it down the drain and instead used it to water the garden. That’s another benefit of using soap nuts. Yes the water is a bit greasy and mucky, but there isn’t anything harmful to plants or the wider environment in it.

There is another way to wash a fleece without soap–the fermented suint method. Basically the method is: soak your fleece in rainwater until the suint (sheep sweat) ferments creating a kind of soap. I have not tried this method, but I’ve spoken to a few people who swear by it. Although apparently it’s better for low-lanolin fleeces and it’s even smellier than scouring fleece with soap.


Autumn Leaves and Contact Dyeing

2
image

Instructor’s sample of leaf contact dyeing

I had my first Natural Dyeing class at the Oregon College of Art and Craft last week. We started by walking the campus and collecting various autumn flora: fallen oak and maple leaves, pink-backed cherry leaves, fresh comfrey, spotted dying blackberry leaves, walnut hulls, tupelo, madrone and walnut leaves, Indian blood grass, and anything else that caught our eye. The ostensible purpose of this was to collect material to make our own contact dyed projects, but really it was to get us excited about natural dyeing. This time of year in the Pacific Northwest the ground is littered with dyestuffs, and the quick and easy method we learned yielded pattern as well as color.

image

Once we collected our leaves, we laid them out onto fabric or paper, and either rolled up our fabric tightly around a stick (or for added color, around a rusty iron nail) or accordion folded and clamped for a shibori effect. These packets are then simmered in a water bath for an hour, and then removed and unwrapped.

image

image

What I found most interesting about this technique is that there is really very little dye in individual leaves (for the most part tannic acids) but because of the wrapping or clamping, the color can’t migrate anywhere other than onto the fabric or paper. In other words, the opposite of leveling. In a lot of cases, the color transfer is more akin to printing— the fabric or paper is not really dyed per se, but stained or imprinted with the actual leaf color, giving pinks or greens which don’t exist as an actual dye. Our instructor cautioned us as much, saying that these colors will fade with washing or over time. That said, there definitely was dyeing of fabric around the periphery from the tannic acids, and also where the rusty nails provided an iron mordant.

Here is a leaf print where I had an iron plate clamped to the outside of my fabric packet:

image

Leaf print on silk noil with iron plate

And likewise wrapped around a large rusty nail:

image

Silk charmeuse leaf print wrapped around iron nail

Here is the difference of the dyestuffs on cellulose. For one, I didn’t get my packet wrapped tightly enough and the colors ran. For another, the yellows and greens remained printed while the tans of the tannic acids didn’t penetrate as much. I expect this to be a function of the density of the cellulose in paper form, and I would expect better tans on cotton yarn:

image

Wrapped leaf print on paper

This technique also led me to revisit my forays into dyeing with candy. I’d encountered poor results with a lot of candies that contained very little dye. So I tried some candy contact dyeing:

image

image

The candy melted pretty quickly, so it was hard to keep the fabric tight, but the dye migrated onto the fabric rather than into the dye pot. I can see some candy-related shibori in my future!

I’d also encountered  some inexpensive pomegranates at the grocery store last week, and per Rachel’s last post I bought them for some seasonal dyeing. Pomegranates contain ellegic acid, which are yellow tannins, so I thought this would be a quick way to see what sort of coloring I could get from them:

image

This is one slice of pomegranate:

image

Folded and clamped pomegranate slice on silk charmeuse

And here is multiple slices and layers, with the rest of the pomegranate in the dye pot:

image

Folded and clamped pomegranate on silk noil, over some walnut hull spots

Tight wrapping and clamping is the key to good transfer, but whether you are preserving autumn leaves, testing dyestuff potential, or finding another use for seasonal candy, it’s such a quick and easy technique that it’s definitely worth trying.

But is it yarn?

2
Art yarn?

Art yarn?

Ah the allure of Art Yarn. Behold its super-chunky sparkle, its beads, its coils and luscious locks. Resistance is futile. Or is it?

When I started to spin I announced to Sal that all I wanted to make was art yarn. I probably told her I wanted to explore colour and texture. I was making it up.

Sal told me something like this: If you’re ever planning to make anything like a sweater or a wearable garment you should think about making less-arty yarn.

She had a point.

These days I think about hand spun yarn completely differently. What I used to consider art yarn, I now classify as novelty yarn.

Most of the time I’m experimenting with new materials and techniques. I’m spinning to weave or to knit. My use of art yarn is sparse. That’s partly thanks to my fairly boring sartorial habits. Sal tells me that’s a trend now! Yay!

So what about art yarn?

Last month Alison Daykin gave my guild a talk on art yarn (see below). Beforehand I was curious what she would have to say and it got me thinking. What is art yarn? Is it yarn for yarn’s sake? Is it a novelty item? Does anyone actually use it?

I still make a lot of art yarn, but I call it handspun. Like most spinners I’m experimenting with colour, texture and gauge. Most of it isn’t sparkly or bejeweled. The excitement is in the color or the materials.

Here’s some sport weight yarn I made for a weaving project.

Blue yarn

Blue yarn

The blue colorway is a combination of natural coloured and dyed fleece.

The red is a blend of acid and natural-dyed fleece as well as natural coloured. To me these are rich in colour and texture. I’ve made little aesthetic decisions throughout the making process.

Red yarn

Red yarn

Is it art or is it yarn?

These are some examples of what are more commonly considered to be art yarn. There are the dyed locks, the thick/thin look and some bouclé-like yarn.

Bouclé, sort of

Bouclé, sort of

P

Thick thin

Yarn or art? Both?

Lexi Boeger sees it this way: “I believe the onus is on the buyer to look at the yarn and be able to determine an appropriate project to use it for. This puts more work on the buyer, but ultimately it will make that person also more creative..” (See Spinartiste)

Boeger goes on to say that art yarn can help the knitter (or weaver for that matter) think beyond the pattern and become a designer. My reading of that is: art yarn can be a starting point. It asks the question: what can you make with me?

It’s worth pointing out that Lexi Boeger isn’t making art yarn anymore.

Locks

Locks

JazzTurtle has a long list of patterns that can use art yarn. But to me art yarn is perfect for weaving–especially saori weaving, which is all about experimentation and personal expression. It’s not really concerned with pattern or convention.

This saori-inspired piece uses some art yarn. For me this piece was a big departure from the norm. Here are colours and textures far from my comfort zone. It marks a step in a creative journey, but I’m not sure the path ends at art yarn.

Weaving with art yarn

Weaving with art yarn

[Sal here. I’m going to horn in on your post for a minute]

I would argue that handspinning is technology, and as such there is an intrinsically practical component to the resulting product. Some yarns take a good deal of skill to make well (bouclé for example), or have aesthetic consideration in their colors or textures (as yours do above), and this intersection of technical skill and aesthetic consideration I would call “craft”. Calling something “art yarn” is almost oxymoronic. Yarn for yarn’s sake, as you say, really makes no sense— like building a chair that you can’t sit on. But I know plenty of people who spin and never do anything with the yarn because they don’t knit or crochet or weave, and are perfectly happy that way. I suppose there is a Venn diagram we could make that shows the people who like to build chairs, but don’t actually sit down. I think one could certainly make yarn that’s an end in and of itself, and it could be considered art instead of artisanal, but I think the intention behind it is key, because it would be subverting the concept of yarn. The rest, as you say, is novelty yarn. I’m curious what your guild speaker had to say on the subject. And if they have any good patterns.

[Now back to our regularly scheduled blog post ;)]

Fancy Yarn and permission to spin

When Alison Daykin came down from Derbyshire to talk to the Mid-Essex Guild about art yarn, like Sal I was curious what she had to say about art yarn. One reason for that curiosity was I suspected [knew] many guild members were dubious of art yarn. Many–not all–take the view that art yarn is what you make when first learning to spin. “Don’t worry,” they tell new spinners. “You’ve just made art yarn!” And then everyone laughs.

Alison Daykin described what she makes as fancy yarn, not art yarn. Fancy yarn, Alison explained was any kind of yarn you made that’s non-standard–core spun, bouclé, crepe, thick/thin–that has some irregularity in the making. That irregularity could be introduced in any or all of the steps for making yarn: prepping fiber, color blending, spinning and finishing.

According to Alison, fancy yarn isn’t anything new,  in fact Mabel Ross, author of The Encyclopedia of Handspinning, was an early advocate of fancy yarn.  However, when Alison started spinning in the late 80s/early 90s she felt spinning non-standard or fancy yarn was discouraged. She was taught that the point of spinning was to churn out yards and yards of yarn that looked like it had been made in a mill.

“I wanted to make different yarn and I felt inferior, because I didn’t want to spin plain yarn,” she said. But after taking a course on spinning and dyeing for tapestry weaving from Bobbie Cox, Alison felt she had, “Permission to spin whatever I wanted. Once you know the rules, you can break them.”

Art yarn, Alison said, is a term that grew out of a trend of making yarn out of recycled materials like plastic bags and cassette tape. She did not see the point in putting yarn in a bowl or hanging it up to admire.

“If I can’t use the yarn, then I’ve wasted my time. Use it to make a garment look different. If you use a little yarn in a piece, it can look lovely. Art yarn has got to be practical as well as beautiful,” she added.


Hot Tips for Scouring Fleece

5

Our last Guild meeting was all about scouring fleeces, presented by Cydne Pidgeon.

Tip #1: If  you’re going to be scouring a whole fleece, place the fleece in a grocery basket that fits inside a large rectangular storage tub. You can fill your storage tub with hot soapy water and then lower the fleece in the basket. This way the fleece is always supported, even when lifting it back out to drain. You can have a second storage tub with hot rinse water at the ready. As a bonus, you can use your storage tubs for actually storing things when not in use.

Tip #2: Don’t rinse it yet! Spin all that hot soapy water out before you rinse it. Cydne was doing this demonstration outdoors, and she had one of these devices:

image


This is an electric spinner. The advantage over your top load washer’s spin cycle is that it can go up to 1800 rpm, so it can get all the water out very quickly. It also runs on 110V instead of household appliance 220V, so it’s easy to plug in outside with an extension cord. It has a drain spout on the bottom so you can catch the rinse water, which is advantageous if you have a septic system like I do, so you can divert that grey water out of the sewer and onto your flower beds instead. This nifty device can be purchased here.

Cydne passed around a lock of scoured, spun-out Rambouillet, and it was very clean and almost dry. Since all the soapy water has been removed, there’s only need for one rinse. She spun the fleece in the spinner again after the rinse water, and it was clean, unmatted in any way, and again, almost dry. Fabulous!

Tip#3: If you’re only scouring some locks inside a mesh bag in a smaller bucket, you can still spin between the wash and the rinse…just use a salad spinner. These are readily available at second hand stores, so you don’t have to share with your lettuces.

Tip #4: If you are scouring very fine fiber (like angora), mesh lingerie bags are usually not small enough mesh to keep the fiber in. Bridal veil material is very fine mesh, and you can easily sew up your own bag with a zipper on top.

It’s hot outside. Those fleeces will be cleaned and dried in no time.

Natural dyeing with cotton

5


left to right: onion skins, madder, indigo

left to right: onion skins, madder, indigo on organic cotton yarn

It’s funny what can get you off and running on a project. Dyeing cotton really wasn’t on my to-do list until I read an article in the Winter 2015 Spin Off where Dye-lishus premordanted cotton sliver was tested and reviewed. My first thought was, what’s the fuss with cotton that would make premordanted sliver desirable? Would it make dyeing easier?

One of the things the Dye-lishus premordanted cotton sliver apparently can do, which home mordanting can’t, is allow the fiber to take acid dyes, which are made for dyeing protein fiber (wool, silk, etc). Dye-lishus’s USP is: you can dye this fiber with anything–acid dye, food colouring, procion dyes–and it will stick.

However, my interest in mordanting my own cotton was stronger than my desire to try out the Dye-lishus fiber. Another day perhaps.

A quick internet search informed me that mordanting cotton for natural dyeing is a two- to three-step process, depending on the kind of cotton used. It’s not complicated. It’s not particularly labor intensive. It’s just one or two more steps than mordanting wool.

There are some important things you should know before mordanting and naturally dyeing cotton.

* Cotton is mordanted with tannic acid, then aluminium acetate. Those are different mordants than the ones used for wool. Both are available from natural dye suppliers.

* Depending on what kind of cotton you’re going to dye, you may want to scour the yarn or sliver. I washed my yarn in very hot water with soda crystals. If you’re using organic cotton, don’t bother with this step.

As with all aspects of natural dyeing–on cotton, wool or otherwise–there are many recipes. I used the simplest one I could find, which happened to be on the Wild Colours site. It has lots of information on natural dyes and mordants.

I used 10 percent of weight of goods (WOG). To mordant 100 grams of fiber and yarn, I used 10 grams of tannic acid and 10 grams of aluminium acetate. It’s worth getting a digital scale to weigh the mordants. Put a clean yogurt pot on the scale, zero it, then tip in your mordant.

Soak your fiber/yarn for a good hour before adding it to a dye pot in which you have dissolved 10 grams of tannic acid. You want there to be enough hot water to cover the fiber and give it a bit of room. No need to heat the pot, just leave it until you’re ready for the next step. I left mine overnight.

Repeat the process, but this time dissolve 10 grams of aluminium acetate and then add your wetted down fiber. Again, you need hot water to dissolve the aluminium acetate, but you don’t need to heat the pot. I left mine to soak overnight in a bucket.

When ready to dye the fiber, make sure to rinse it well to get out any mordant that hasn’t attached to the fiber. Do it now or it makes the fiber a bit chalky after dyeing. Otherwise make sure to rinse your fiber well after dyeing.

I dyed with madder and onion skins, because that’s what I had to hand. I soaked the madder root in hot water overnight. I used 50 percent WOG of madder. Onion skins are very generous in terms of dye yield. I used a few handfuls and that was plenty.

IMG_0410

cotton yarn, madder dye bath

Give the madder about an hour to simmer. I strained the root into a jelly bag, which I then returned to the dye pot. It saves you having to pick out little bits of madder from the fiber and makes sure you’re getting your money’s worth from the dyestuff. I fished out the onionskins with a slotted spoon put them in the compost.

Once the fiber was in the dye pots I left them to simmer for about an hour. I then removed them from the heat and left them to cool.

Dye baths made with natural dye stuffs do not exhaust the way acid dye baths do. That means there will appear to be a lot of color left in the dye pot. With acid dyes, you know the dye bath is exhausted when the water is clear. That doesn’t happen with most natural dye stuffs.

madder on cotton sliver

madder on cotton sliver

IMG_0416

top: cotton sliver, bottom: cotton yarn with onion skins

Rinse your fiber well and leave to dry.

Last, but not remotely least, cotton can be dyed naturally without any mordanting or pretreatment whatsoever. Just make an indigo vat, following Sal’s fabulous fruit vat instructions. Indigo is a substantive dye–like walnuts and lichen–and does not require any mordanting process. Just look at it. Beautiful!

IMG_0421

Indigo on cotton yarn (top), wool (middle), sea cell (bottom)