Super slow yarn: adventures with a wool picker

2

Classic Carder Wool Picker

When Sal and I first started spinning and using raw fleece we spent a lot of time–and I mean a lot–talking about fiber prep. A lot of this conversation revolved around la technique and getting the best results we could with the tools we had.

Recently I had the privilege to borrow my guild’s brand new wool picker. I was excited to use the picker and once I got going with it, I started thinking on the whole process of prepping fiber at home.

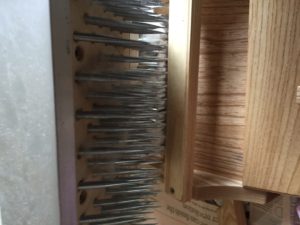
The wool picker is a new tool to me. It has big sharp spikes which tease apart the fiber. Push in a little bit of washed fleece in at the front and then push away the boat (that big swinging part with spikes on it). In a few seconds light bits of fluff comes out the other side.

Sometimes fleece can be quite tough to open up after its been washed. The picker gets out a lot of the dirt and VM and pries apart the locks making it ready to card. If  you get a chance to use a picker, do it. The effect is truly incredible. If you’re used to prising locks apart with combs or hand cards the wool picker is faster, easier and doesn’t leave you with sore wrists.

Caution: Big sharp spikes

Pick, comb, card

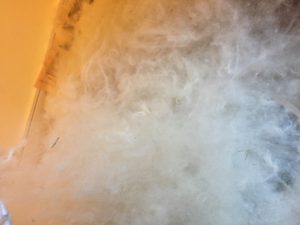
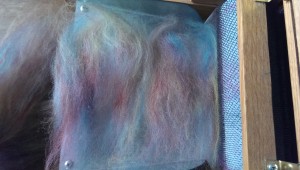
I put through a shetland fleece and the picker did a great job opening up the fleece and releasing dirt. Seriously this was one dirty fleece! It is also a quite fine fleece and once the picker did its stuff there were tons of nepps.

combed Shetland fleece

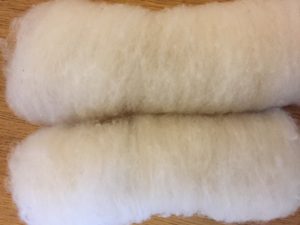
At first glance getting out the nepps (unless you want them) looks a daunting task. Out came my wool combs which helped me get out most of the nepps, but not all. I put the combed fleece through the drum carder. There were still nepps, but my light and fluffy batts were lovely to spin.

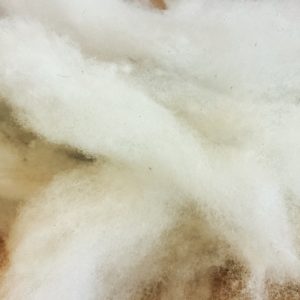
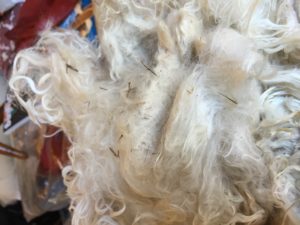
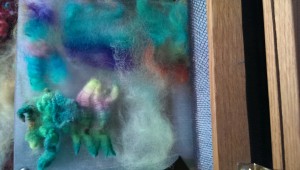
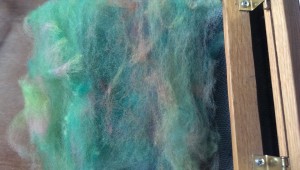
I also put some Suri alpaca fleece through the picker and the results were great. Suri is tough to process by hand and the picker made easy work of it. I can’t wait to spin a test skein.

suri fleece before

suri fleece after picking

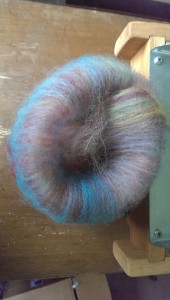
fluffy batts

Slow yarn

Processing raw fleece by hand is time consuming. I haven’t done a lot of big batches of fleece in awhile and had forgotten exactly how long it takes. It also can be a little intimidating when you see a massive pile of fluff that you then may need to go through several times–depending on how fine you want your yarn.

Bear in mind you are not a robot (obviously). Your two hands and some tools are not going to be able to replicate mill-made roving. There will be nepps. There will be a little VM. That’s all fine.

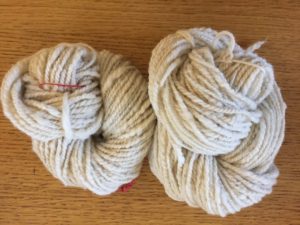
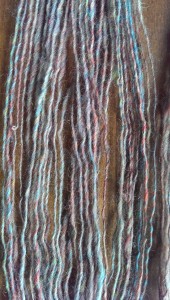
I carded some of the picked fleece into rolags, picked out some of the nepps and it spun nicely into a fat, fluffy yarn. You don’t need go crazy with fiber prep to get a nice, slow yarn.

fluffy shetland yarn

How to choose a fleece for handspinning

9
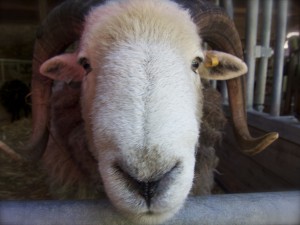
Herdwick: cute, but not a fleece for beginners

Herdwick: cute, but not a fleece for beginners

Buying my first fleeces to process at home for handspinning was hugely exciting. I’d just been to my first meeting of the Mid-Essex Guild of Weavers, Spinners and Dyers and it happened that two of the members were having a fleece sale that day.

I was lucky to have two experienced guild members there to show me how to look over a raw fleece. They unrolled the fleeces and talked me through what I was looking at, pointed out some of the desirable qualities that hand spinners look for in a fleece. Those are attributes like crimp, softness, good lock structure, cleanliness (no straw, grass or poo, etc). More on that later.

The first fleeces I bought were a Hebridean, a Shetland and a Ryeland. Maybe I went a little overboard. It took a lot of work to get the fleeces scoured, dried and ready to spin. And even though I benefited from having some experts on hand to help choose my fleeces, if I were to do it all over again I would have done my homework first.

Before buying a fleece, I recommend reading up on different breeds and the characteristics of their fleece. There are about 60 sheep breeds in the UK alone and all their fleeces are a little different.

Some, like Cotswold, Teeswater, Lincoln, Leicester and Wensleydale–longwool breeds–have fleeces that are more hair-like, lustrous and require some experience to spin.

Then there are the Downs breeds–Southdowns, Oxfords, Hampshires, Dorsets for example–which have dense fleeces with short staple-lengths, but feature lots of crimp and bounce.
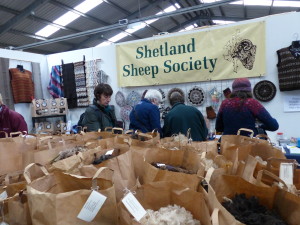
Fleece sale!

Fleece sale!

Then there are the many other breeds that are favourites of hand spinners, like the Shetland, Blue-faced Leicester, Cheviot, Manx Loaghtan and Jacob, which all have their own characteristics. There are also plenty of breeds which aren’t particular favourites of spinners, either because their fleece is too coarse or just not suitable for spinning.

So before jumping in and buying a fleece take a look at some of the books available like Fleece and Fiber Sourcebook or The Spinner’s Book of Fleece to get an idea of what you might like to spin as well as the huge choice available.

There are other questions you want to ask before diving in and buying 4-5 pounds of raw sheep fleece. Are you going to make a worsted or woollen yarn? It will be hard to spin a woollen yarn from a long wool, for example. Which fleeces will best suit your project? Do you want a coloured fleece? How important is softness in your project? Are you looking to create something durable or more lightweight?

What to look for in the fleece 

Now that you’ve decided on a breed, what are you looking for when choosing the actual fleece?

Steve Kennett, vice chairman of the Association of Guilds of Weavers, Spinners & Dyers, visited my guild back in September to speak on how to pick out a fleece.

Steve unrolled one of the fleeces supplied by a member and gave a few pointers on picking a good one. It had a lovely staple length, beautiful crimp and was muck and VM-free. Steve held it up to demonstrate how the fleece should be nice and open—like a lace curtain.
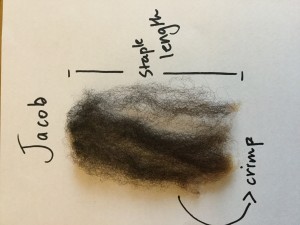
Jacob lock from raw fleece. Nice staple length and crimp, no breakage or second cuts

Jacob lock from raw fleece. Nice staple length and crimp, no breakage or second cuts


You can see in the photo of the Jacob lock what I mean by crimp. It’s simply the little waves in the wool. Crimp makes wool easy to spin as it twists together and the crimp helps the wool lock together. The rule of thumb goes that the more crimp, the finer the wool. Merino, for example, can have 100 waves (crimps) per inch. Longwools have less crimp and often used  by spinners to add texture and lustre to yarn.

Steve Kennett also said to look out for second cuts (short bits the shearer missed on the first pass) felting and second growth—ie when a sheep hasn’t been sheared and begins to grow a second fleece. He recommended  taking off a lock of fleece, holding it firmly in one hand and giving it a good tug. If the lock is breaks avoid the fleece as it is brittle, will not be nice to spin and could result in weak yarn.

The best part of the fleece is going to be on the neck, front legs and back (between the shoulders). Fleece on the back is generally good. Fleece from the hind legs is generally coarser and kempy. Steve recommended being picky about fleeces and perhaps buying several, but only using the best bits.

I don’t know if I’d go to the lengths Steve does–buying many fleeces and throwing a lot of it away. If I were to go back in time, I’d probably have started with one fleece (Shetland) and made life easier for myself. If buying a whole fleece is intimidating, get a friend to share one with you.

Starting with a fleece instead of tops or roving is, I think, a great way to learn more about sheep breeds, fiber prep and spinning. Fleece you’ve scoured and prepared yourself is going to feel and spin differently from commercially processed fiber. Some of the women in my guild consider commercial prepared fiber to be “dead”, because they view it as flat and lacking crimp. I agree with that to a certain extent, however I have found that top or roving from smaller mills tends to retain some of the bounce and crimp.
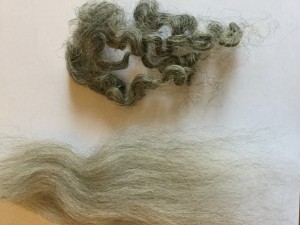
Gotland sheep Commercial top (l) Raw fleece (r)

Gotland sheep
Commercial top (l)
Raw fleece (r)

Still it’s an eye-opener when you compare commercially prepared roving with that you’ve cleaned and carded yourself. Take a look at this Gotland fiber. On the left, straight up commercial roving, on the right Gotland right off the sheep. Looks a lot different right? Doesn’t even look like it came from the same breed.

For more information on scouring fleece see these posts: Hot tips for scouring fleece or More hot tips on scouring fleece without soap.
Hot Tips for Scouring Fleece

5

Our last Guild meeting was all about scouring fleeces, presented by Cydne Pidgeon.

Tip #1: If  you’re going to be scouring a whole fleece, place the fleece in a grocery basket that fits inside a large rectangular storage tub. You can fill your storage tub with hot soapy water and then lower the fleece in the basket. This way the fleece is always supported, even when lifting it back out to drain. You can have a second storage tub with hot rinse water at the ready. As a bonus, you can use your storage tubs for actually storing things when not in use.

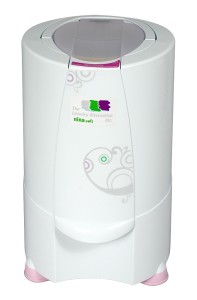
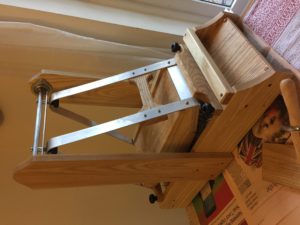
Tip #2: Don’t rinse it yet! Spin all that hot soapy water out before you rinse it. Cydne was doing this demonstration outdoors, and she had one of these devices:

image


This is an electric spinner. The advantage over your top load washer’s spin cycle is that it can go up to 1800 rpm, so it can get all the water out very quickly. It also runs on 110V instead of household appliance 220V, so it’s easy to plug in outside with an extension cord. It has a drain spout on the bottom so you can catch the rinse water, which is advantageous if you have a septic system like I do, so you can divert that grey water out of the sewer and onto your flower beds instead. This nifty device can be purchased here.

Cydne passed around a lock of scoured, spun-out Rambouillet, and it was very clean and almost dry. Since all the soapy water has been removed, there’s only need for one rinse. She spun the fleece in the spinner again after the rinse water, and it was clean, unmatted in any way, and again, almost dry. Fabulous!

Tip#3: If you’re only scouring some locks inside a mesh bag in a smaller bucket, you can still spin between the wash and the rinse…just use a salad spinner. These are readily available at second hand stores, so you don’t have to share with your lettuces.

Tip #4: If you are scouring very fine fiber (like angora), mesh lingerie bags are usually not small enough mesh to keep the fiber in. Bridal veil material is very fine mesh, and you can easily sew up your own bag with a zipper on top.

It’s hot outside. Those fleeces will be cleaned and dried in no time.

Onion skins, madder & gorse blossom

1
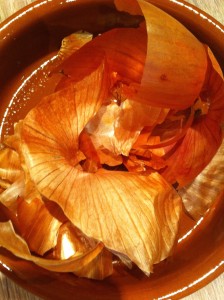
Onion skins

Onion skins

Natural dyeing is something I’ve wanted to try since one of my fellow guild members —Jackie Crook–gave a talk and demonstration last year. I’ve been saving onion skins, trying to grow woad, looking out for natural dye stuff as I’m driving through the Essex countryside. A few weeks ago after the first gorse blossoms appeared I got out my dye pots and started thinking about a dye garden.

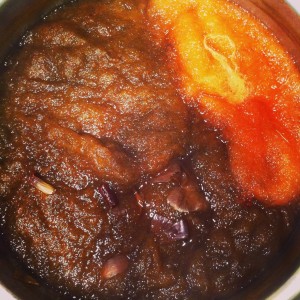
I’ve borrowed Jill Goodwin’s A Dyer’s Manual from the guild library. I followed her instructions for mordanting–I used Alum–and dye stuff to fiber ratios. I soaked madder, made a gorse blossom liquor an

Melon Colorado from madder

Melon color from madder

d boiled up some onion skins.

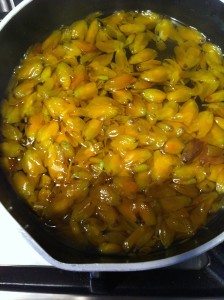
simmering gorse blossoms

simmering gorse blossoms

I used some White-faced Woodland and fawn-colored Shetland fleece as well as some BowmontXDorset (BoDo) and angora yarn to test.

The BoDo/Angora could have used a little more dyestuff to bring out a deeper red color. Next time I’ll be more careful about my dyestuff:fiber ratio.

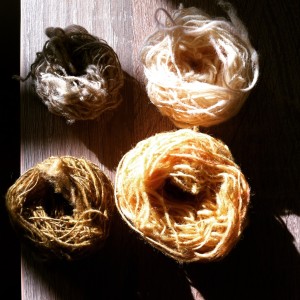
top: gorse, bottom: onion skins

top: gorse, bottom: onion skins

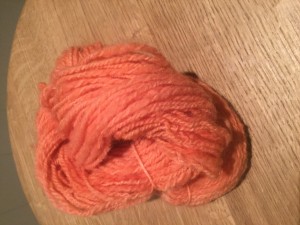
I was most excited by the onion skin result on the fawn-colored fleece. I gave a brilliantly rich green/gold/brown tone. The onion skins dyed the white fleece a lovely brown/gold.

Onion skins with two colors of fleece

Onion skins with two colors of fleece

The effect of the gorse blossom was much more subtle. The white fleece took on a soft lemon tone and the lighter parts of the fawn fleece did too.

One reason–apart from lack of time–I hadn’t gotten into natural dyeing was I thought mordanting the wool would be a pain–it wasn’t. I also wondered whether natural dyeing could possibly yield better results than acid dyes.

Well. Natural dyes yield much subtler tones. You’re not going to get fancy multicolored roving using this method. And that’s OK.

What about the dye garden? Well madder, woad, weld and polygonum tinctorium (indigo) seeds have been found. It’s still too cold to plant anything here, but the ground is being prepared.

Get Carded Sideways

1

In one of the rabbit-warrens of the internet I stumbled across this blog blurb by Stephanie Pearl-McPhee (aka the Yarn Harlot) about sending fiber through your drum carder sideways. I immediately alerted Rachel, that this might be a thing. We had to put it to the test.

I started with a Corriedale batt that I’d already sent through the carder normally:

Corriedale batt

Corriedale batt

I split it in half and sent one half through again sideways:

What! That orientation is wrong!

What! That orientation is wrong!

This is the result. The sideways batt feels thicker and fluffier. I should also note that the fiber piled up in the middle of the drum instead of being spread out evenly.

Left, standard carding, right, sideways carding

Left, standard carding, right, sideways carding

As a different test, I sent an assortment of different staple lengths and fibers through. Longwool, and very crimpy short wool. I didn’t pick the crimpy short wool apart.

Sideways potpourri. This makes it scientific.

Sideways potpourri. This makes it scientific.

Here’s the resulting batt. Then I spun it all up.

Assorted wools batt

Assorted wools batt

Rachel here: Excuse me while I butt into Sal’s post. First of all can I just echo the WTFness of this sideways drumcarding development. Imagine me sort of open mouthed and wondering wha??? and ??? And thinking, well if the Yarn Harlot AND Judith McKenzie say this is The Done Thing, well….

Like Sal, I had to try this sideways drum carding myself. Sal has already described what happens–smaller, fluffier batts. That’s what I found too. Instead of thick and sometimes compacted batts you get fluffy rolags, like the ones you would make on hand cards–but bigger.

These were very easy to spin, like rolags. There was none of that peeling apart and fussing around with a big batt. It was all the good aspects of a hand carded rolag, only bigger and no sore wrists.

Some of the fiber I used was polwarth/silk roving that’s been in my stash for awhile. It opened up nicely when carded sideways and was a breeze to spin.

Lastly I put some scoured fleece (just washed, undyed, still a bit of a mess) through sideways. Here I didn’t see a huge difference putting unprocessed fleece through sideways. The batts were about the same. Having said that, once I get to the stage where I’m going to blend some of this fleece with another fiber or other colours, I’ll be doing that sideways. I like those big, fat rolags!

Longwool single, twist set

Longwool single, twist set

Sally here again: I agree with Rachel, it does make easy-to-spin batts, especially with the longwool blend I tried. I suspect this may be because, by sending the wool through sideways, I’m actually spinning on the fold with the long fibers. I was also able to maintain some of the crimpy locks, which would have been carded apart going through aligned. I think this is definitely a great way to do an art batt.

Test single, both standard carding method and sideways

Test single, both standard carding method and sideways

When I was spinning the batt that was half normal/half sideways, I noticed a definite difference in how the yarn felt while spinning, which I would attribute to a worsted vs. woolen preparation. The sideways portion looked like it was going to have more of a halo due to the fibers not being lined up. If I look very closely, they may be slightly fuzzier, but after washing and setting the twist on the single, there is really very little difference.

So what do you think, Rach, is this actually a thing? My take, it’s definitely not NOT a thing!

Rachel: Sal, I have to agree with you. Not a Thing. I wouldn’t advocate a sideways-only approach to drumcarding. If you want to spin rolags, yes go sideways. If you want to open up some compacted roving, go sideways. But sideways only? I’m not so sure about that.

What I would suggest is being careful about how much fiber you load onto your drumcarder. Don’t overload.


Spinning in the grease

3

Sally and I talk about fiber preparation a lot. Conversations usually start off with a confession.

Rachel: “Um I just bought more fleeces.”

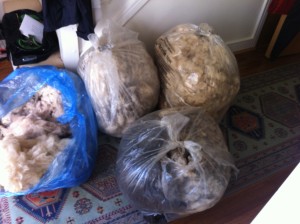
OMG! Where did these come from???

OMG! Where did these come from???

Sal: [laughs] “What are you going to do with them?”

Rachel: “Well right now, they’re in my closet.”

Then we discuss all the processes we could use to turn the raw fleece into The Ultimate Yarn. There’s scouring, combing, carding, dyeing and blending. Then there are infinite techniques–have you heard of the Fermented Suint Method for scouring fleece? Do you card your fleece or comb it? Do you put your fiber into the drumcarder sideways?

Last fall, after buying a few more Shetland fleeces I was so excited to try them out on the wheel that I pulled off some locks and started spinning. No fiber prep at all.

Spinning in the grease isn’t something I usually do, but a lot of spinners do. These are the people who look at you funny when you start talking about scouring fleece and the other fifteen steps you’re going to take before you spin any yarn.

What I learned was spinners who advocate spinning in the grease have a point. One is, if you have a beautiful fleece with nice crimpy locks, it’s a shame to process that out. It’s fine just to tease the locks out a little with your fingers and start to spin. I would recommend, however, picking through the fleece first and removing the dags (poo) and larger bits of vegetable matter. You don’t want that.

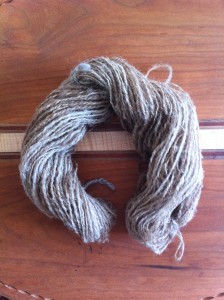
Here’s some Shetland spun in the grease. The yarn plumped up nicely after washing.

Shetland spun in the grease

Shetland spun in the grease


Shetland after washing

Shetland after washing

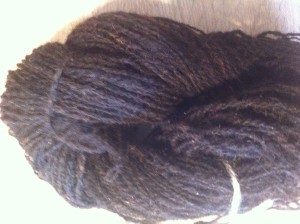
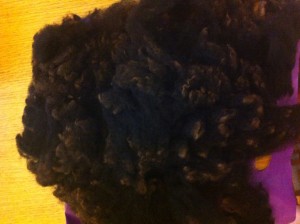
Here’s some Zwartables I spun in the same way.

Zwartables spun in the grease

Zwartables spun in the grease

Zwartables fleece

Zwartables fleece

Yes it is a bit smelly and you should clean your wheel afterwards. Really the final result is the same as if you’d spent days scouring and carding and combing and all the rest.

Safety Note. You do need to be careful handling raw fleece. Pregnant women should not handle raw fleece. Be aware that raw fleece is likely to have sheep excrement on it–so avoid handling that with bare hands. Choose from the sections of the fleece that’s not near the animal’s rear end. Give your hands a thorough scrub when you’re finished. Then wash them again!

How to make a White Christmas wreath

2
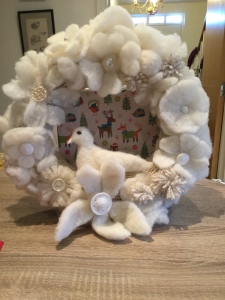
White Christmas Wreath

White Christmas Wreath

The holidays always sneak up on me despite the ample reminders from shops who start stocking their shelves with Christmas Fayre in September. My guild–The Mid-Essex Guild of Weavers, Spinners & Dyers–gave us two months’ warning (maybe more) about this Christmas ornament competition for the December meeting. Still I put the finishing touches on my entry–the White Christmas wreath–in the car before bringing it in to the hall.

The White Christmas wreath is made from materials that anyone who does sewing, knitting and spinning will probably have around the house–felt, buttons, a couple of beads, yarn, stuffing (wool or acrylic) and maybe a pipe cleaner or two if you’re feeling extravagant.

Like so many of my other projects I’d mapped out the what and how mentally. The first step was making some felt for the leaves and flowers. I used the wet felt method described in Complete Feltmaking by Gillian Harris. I used some white fleece I had to hand and some white iridescent angelica fiber. The felt I made was on the thin side and I did needle felt it in places to reinforce. Making the felt was the most time consuming part of the project.

felt--made from llanwenog fleece and angelina fiber.

felt–made from llanwenog fleece and angelina fiber.

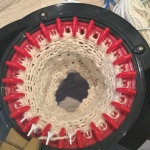
The next step was to make a knitted tube that would act as the base. I used my Addi circular knitting machine and some white handspun yarn. Using the machine knitting the tube took about five minutes.

Making a ring on the Addi machine

Making a ring on the Addi machine

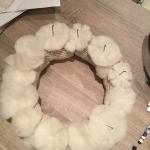
I then stuffed the tube with so neppy bits of wool I have in abundance–meaning the bits of wool left over from the combing/carding process. I sewed the ends together, et voila, a ring.

Flowers and embellishments came next.

adding flowers and leaves

adding flowers and leaves

As you can see from the photo I’ve opted for flowers and leaves which I cut freehand. I’ve sewed and glued on buttons and needle felted leaves and flowers into place. Lastly in a fit of inspiration I needle felted a dove to nestle above the poinsettia-shaped flower.

Oh, and I won the competition!

First trophy I've ever won for anything!

First trophy I’ve ever won for anything!

Welcome to Sheep Cabana

0


just sheepEver wonder how to use all that gorgeous handspun yarn you have created? Looking for inspiration for your next project? The Sheep Cabana team can help.

Sally and Rachel may live on opposite sides of the planet, but that hasn’t stopped us from puzzling through fiber projects together. Now we are sharing the lessons learned over years of fiber obsession.

Sally and Rachel first met back in 1989 at college, living in adjacent dorms. Rachel went out of her way to heckle the resident troublemakers, and Sally went out of her way to cause trouble. But by their senior year, they conceived and co-edited a controversial feminist newspaper. After graduation *sniff* they lost contact. Sally went off to work on cars and after farting around Rachel eventually became a journalist.

Eighteen years later, they reconnected and realised they were both bonkers about knitting. Sally had just bought her first few sheep, a goat and a spinning wheel. When Rachel saw the wheel and met the sheep… let’s just say if she had enough room for sheep, she would have them too. She has settled for a spinning wheel. For now.

Sourcing high-welfare fiber is just one reason Sally started her own fiber flock. The other is, well, sheep are pretty adorable and are good lawnmowers. The goat has a lot of attitude and is best friends with the llama. Rachel has a special fondness for rare and heritage breed fiber animals of the British Isles. Living out in the sticks means she knows where to go (apart from calling Sal) when she needs something special and high welfare to spin.

Sally and Rachel believe in making beautiful projects starting with a bag of fleece. Just because the fiber might be a bit smelly and have a few burrs in it when it comes off the animal, doesn’t mean you can’t create luxurious hand-made objects. It just takes a little work and imagination. Let us show you how. Follow our adventures of trial and error as we try new techniques and seek inspiration for projects. We love confabbing about fiber almost as much as we love fiber!

con·fab

informal
noun
 ˈkänˌfab,kənˈfab/
  1. 1.
    an informal private conversation or discussion.
    “they wandered off to the woods for a private confab”
verb
 kənˈfab,ˈkänˌfab/
  1. 1.
    engage in informal private conversation.
    “Peter was confabbing with a curly-haired guy”