Small: Why spin with a spindle?

2

Spindles and mini skeins

Spindle spinning is cool. There are loads of devoted spindle spinners out there and those of us who favour our wheels are missing out. What do they know that we don’t?

Picking up a long thread 

Humans have used spindles–and even simpler sticks–to spin fiber into yarn for thousands of years. For me, using a spindle is a bit like time travelling with yarn. When I pick up my spindle I’m doing something very similar to our ancestors. That’s a powerful thing, literally picking up the thread begun by people who lived in a world completely different to mine. It’s a point of commonality–making threads to weave and clothe ourselves. 

Imagine how much work went into making garments before that process became industrialised. Clothing was something people held onto and mended. The idea of clothing shops, let alone throw-away fashion would have been unfathomable. 

Spindling reminds me of that.

Spindle as a symbol of female power 

Archeologists find whorls in excavations all over the world. Some viking women were buried with their spindle whorls (the weight) and weaving tools.

“[T]he presence of gendered goods at Viking controlled territories is a concrete indication of female burials. These gendered goods include “(pairs of) oval brooches, disc brooches, trefoil buckles, arm rings, necklaces, caskets, spindle whorls.” (Women Traders of the Viking Age: An Analysis of Grave Goods)

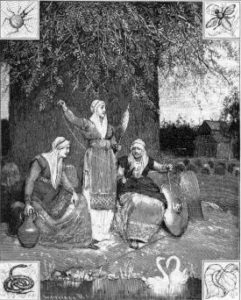
Norns

The spindle and weaving tools was associated with female power in some ancient Northern European traditions.

“According to Norse mythology, aristocratic women were associated with the Norns—the mystical weavers of fate who could spin or cut off the threads of human life and destiny. High status women were, therefore, felt to have an ability to influence fate.” (Ancient Scandinavia: Viking Women)

“She had the body of a Venus… with arms”

Venus: without arms

How is it the dumbest AC/DC lyric reminds me of spinning? Well. You know Venus. She’s the armless statue in Paris’ Louvre Museum. People like to take selfies with her. There are people out there who wonder what the Venus de Milo was doing… when the statue had arms. Some people believe she may have been spinning.

“One idea in particular piqued the interest of Elizabeth Wayland Barber, a professor emeritus at Occidental College who wrote the book Women’s Work: The First 20,000 Years. Perhaps, Barber thought, Venus was spinning thread. Spinning in ancient Greece had associations with fertility and sex — fitting for the goddess of love and reproduction. Women created thread, seemingly from nothing but a bit of fluff, similar to the mystery of birthing babies. Also, women on Greek vases depicted spinning are actually prostitutes occupying themselves as they wait for clients.” (Smithsonian Magazine)

The idea of a spinning Venus de Milo was tested by Virginia Postrel who hired San Diego-based designer and artist Cosmo Wenman to create a 3D model of Venus spinning. She talks about that process in a 2015 Slate article.


Cosmo Wenman’s Venus Spinning, arms imagined


The model he made is now in a museum in Switzerland–just in case you want to check it out.

Simplest spinning tool

On a more practical note: spindles come in all shapes and sizes, and they are the simplest spinning tool. You can put twist into yarn using just a stick. I love that you can make your own spindle with a few dollars worth of supplies. I’ve made a spindle out of my childhood Tinkertoys.

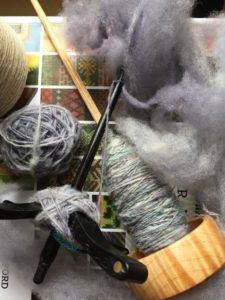
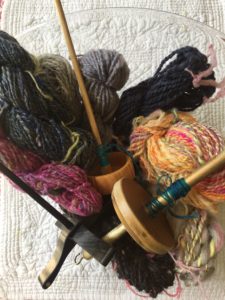
spindles, fluff and yarn

It’s simple. It’s easy. It’s accessible. Spindle spinning doesn’t have a financial barrier for entry. You don’t need a niddy noddy, lazy kate or a ball winder. You don’t need accessories. Just spin and make yarn. 

You can make any kind of yarn on a spindle–two-ply, three-ply any ply, fancy yarn or not. You don’t need certain types of spindles or to make any adjustments to make different yarns. Also, I as I pointed out a few years back, spindles are perfect for spinning on the go.

Stand and spin

My back has been bothering me recently. Sitting at my wheel can make it worse. I realised another great thing about spindle spinning: standing and spinning. Although after awhile my shoulders do get a little tight. Take breaks.

Spinning on a spindle reminds me that not every project needs to yield tons of yarn. We don’t always have to set out to spin a sweater’s worth. Spindles are perfect for making mini-skeins for small projects. 

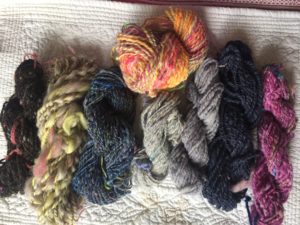
mini skeins

Many spindle spinners do spin lots of yarn for big projects. Check out the Spindlers Ravelry group and prepare to be impressed. Lots of inspiration.

I’d love to hear from people who like to spindle spin. What is it about this kind of spinning that appeals?
Small: three ways to make yarn without a spindle or wheel

0

Small

This post is part of our series about small things you can make with what you’ve got to hand. Projects don’t always have to be big, complicated and involve buying lots of new and possibly expensive materials.

Let’s start with yarn. Making yarn might seem daunting but the truth is there are lots of simple ways to make it. You don’t need any special equipment to make yarn. Just scissors and maybe some handcards.

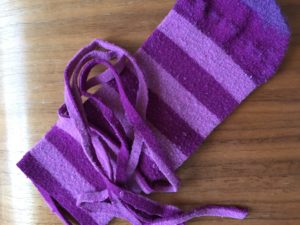
sock becomes yarn

Rag yarn

Let’s start with some old socks. You know the ones where the heels and toes have worn out but the rest of the sock is fine and even made out of some warm fluffy material? Do you throw these away? Or make them into yarn?

Start at the cuff and cut a spiral around and around the sock, avoiding bits that are worn.

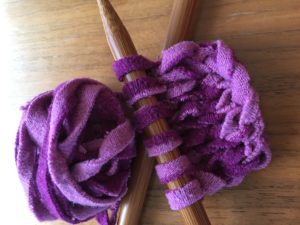
It knits up nicely

This yarn can be knit up, but unless you have lots of identical socks you’re not going to get tons of yarn from a pair. I would use this yarn for rag weaving. (future post!)

Obviously you can cut up any fabric and make it into yarn. There’s a cool Saori-made tool called a Sakiori cutter designed specifically to cut fabric into long strips for weaving.

Silk hankies

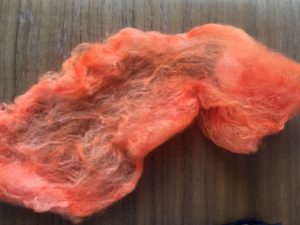
a dyed silk hanky

Silk hankies are squares made of cocoons that have been softened and then stretched onto a frame-layer upon layer. The hankies can be dyed and spun, but you can also use them for paper making or felting.

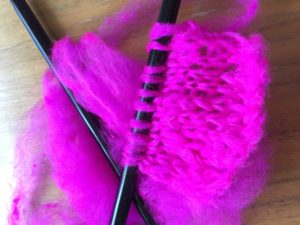
knitted silk hanky–no spinning

You can also knit straight from the hanky–no spinning! There are a lot of great youtube videos on silk hanky and silk cocoon uses. I’ve made a pinterest board showing some of them. Here’s a video on how to knit from the silk hankies–featuring a cat.

Silk hankies are cheaper than most silk you can buy to spin. You can even make your own. Here’s another helpful video if that’s something you’d like to try.

Finger-twisted ‘pencil’ roving

You don’t need to spin wool to make it into yarn. There are lots of roving-like (unspun) yarns on the market. Noro does one called Rainbow Roll. So does Alafoss an Icelandic yarn brand. It’s called Plotulopi. You can easily make your own using the finger twisting method or simply by pulling some combed wool through a diz.

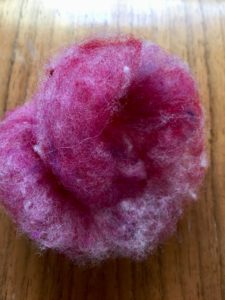
I used my handcards to make some rolags which I then pulled out into a long, thin rope. You can knit right away, adding a little twist with your fingers as you go. Don’t worry if the yarn breaks. You can reattach it simply by twisting or rolling the two ends together with your fingers.

rolag rolled into a ball

small

2

Start small. Start with a scrap of cloth, a drop spindle, a silk cocoon, a few yards of yarn or grams of wool. See what you can make.

Start compact, like a seed, and grow into something bigger. Maybe your project is a seed intended to be a dye garden.

Think small environmental impact. Take something worn and repurpose it. Make rag rugs or an upcycled yoga mat. Get inspired to mend in the Japanese boro style.

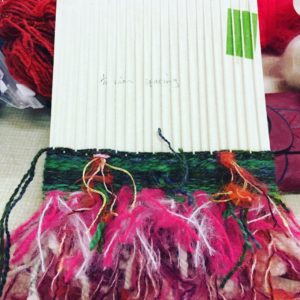
weaving on cardboard

Use small tools– a felting needle, a drop spindle or a postcard-sized piece of cardboard repurposed as a loom.

Silk cocoon ornaments, Kyoto

Unravel a silk cocoon. Knit a fair isle square and then another. Crochet a toy for your child. Knit a sweater for your favourite teddy bear. Make a pompom. A tassel.

We’ve started a pinterest board with ideas for small projects. Throughout 2018 we’ll be developing this idea and seeing how big it can get.

Super slow yarn: adventures with a wool picker

2

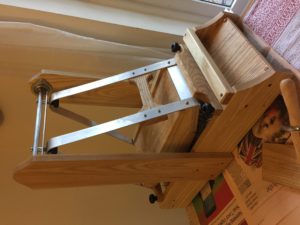
Classic Carder Wool Picker

When Sal and I first started spinning and using raw fleece we spent a lot of time–and I mean a lot–talking about fiber prep. A lot of this conversation revolved around la technique and getting the best results we could with the tools we had.

Recently I had the privilege to borrow my guild’s brand new wool picker. I was excited to use the picker and once I got going with it, I started thinking on the whole process of prepping fiber at home.

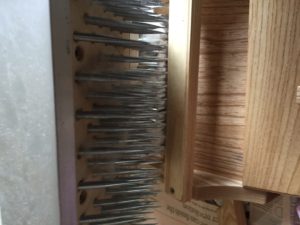
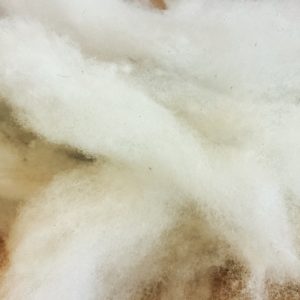
The wool picker is a new tool to me. It has big sharp spikes which tease apart the fiber. Push in a little bit of washed fleece in at the front and then push away the boat (that big swinging part with spikes on it). In a few seconds light bits of fluff comes out the other side.

Sometimes fleece can be quite tough to open up after its been washed. The picker gets out a lot of the dirt and VM and pries apart the locks making it ready to card. If  you get a chance to use a picker, do it. The effect is truly incredible. If you’re used to prising locks apart with combs or hand cards the wool picker is faster, easier and doesn’t leave you with sore wrists.

Caution: Big sharp spikes

Pick, comb, card

I put through a shetland fleece and the picker did a great job opening up the fleece and releasing dirt. Seriously this was one dirty fleece! It is also a quite fine fleece and once the picker did its stuff there were tons of nepps.

combed Shetland fleece

At first glance getting out the nepps (unless you want them) looks a daunting task. Out came my wool combs which helped me get out most of the nepps, but not all. I put the combed fleece through the drum carder. There were still nepps, but my light and fluffy batts were lovely to spin.

I also put some Suri alpaca fleece through the picker and the results were great. Suri is tough to process by hand and the picker made easy work of it. I can’t wait to spin a test skein.

suri fleece before

suri fleece after picking

fluffy batts

Slow yarn

Processing raw fleece by hand is time consuming. I haven’t done a lot of big batches of fleece in awhile and had forgotten exactly how long it takes. It also can be a little intimidating when you see a massive pile of fluff that you then may need to go through several times–depending on how fine you want your yarn.

Bear in mind you are not a robot (obviously). Your two hands and some tools are not going to be able to replicate mill-made roving. There will be nepps. There will be a little VM. That’s all fine.

I carded some of the picked fleece into rolags, picked out some of the nepps and it spun nicely into a fat, fluffy yarn. You don’t need go crazy with fiber prep to get a nice, slow yarn.

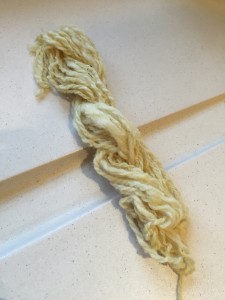
fluffy shetland yarn

Weave to wear: Make a dressy jacket (part one)

2


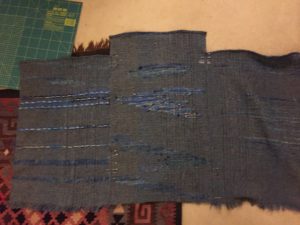
Finished cloth

Finished cloth

Sal tells me I need to take more notes while I work. It’s because when she asks me for measurements and quantities I used for a project I usually don’t have a good answer.

Recently I finished weaving a length of fabric to make a dressy jacket and although I didn’t make any notes I’m going to put down some thoughts, tips and tricks here. This way Sal will have no excuse not to get started on her Chanel-style jacket. She’s going to weave and sew it for her next guild challenge which is all about tweed. It needs to be done by February. No pressure Sal!! 😉

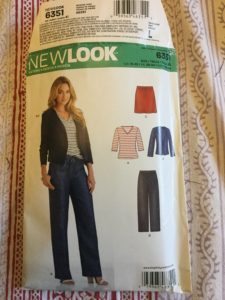
Pick a commercial sewing pattern: If you are new to sewing or simply new to sewing with handwoven, don’t pick a pattern that’s overly complicated. Keep it simple. I picked NewLook 6351. The jacket is comprised of two sleeves, four front pieces, two back pieces and a facing piece. If you are using a thick piece of cloth, you need to think about how your seams are going to work and whether you will need a lining. That could be tricky to do with a thick piece of cloth.

Jacket Pattern by New Look

Jacket Pattern by New Look

Make a muslin: A muslin is a trial run of your garment that can be adjusted for fit. I use muslin cloth–a creamy coloured cotton–when I’m making dresses or trousers, because when you spend a lot of time making your own garments, you want it to fit. Check out the Tilly & the Buttons site for everything you need to know about muslin (toile) making.

I’ve never had a garment that I haven’t had to adjust. There is some great information about adjusting patterns on the Colette blog and Sewalongs. You don’t want to spend time weaving cloth and then sewing it only to have something that doesn’t fit. If you need help making alterations on the muslin, I would ask an experienced sewist for help.

Once you have your muslin completed and fitted, hold onto it. This is now your pattern.

You might want to try a sample garment in fabric in a similar in weight to your handwoven. Make your mistakes on the sample, not on your handwoven.

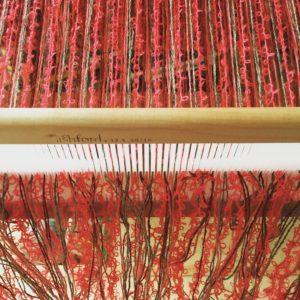
Direct warp

Direct warp

Do the math: The New Look jacket pattern calls for about 1.3 meters of 150cm wide fabric. I have a 80 cm (32 inch) loom and therefore I decided to weave 3 meters of cloth. I put a 4 meter warp (I wanted about 60cm extra warp for wastage) on the loom using a 50/10cm dent reed (12.5 dents per inch). I used almost the entire width –400 dents. Four meters multiplied by 400 dents equals 1600 meters of warp yarn.

I was far less precise with the warp meterage. My idea was to use stash yarn and luckily I had plenty.

I’d estimate I used 700 meters of yarn in the warp (3 picks per cm x 300cm x 80 cm/100). I used different yarn weights and even some roving in there, plus a bunch of my handspun bouclé, so that’s very much a ballpark figure.

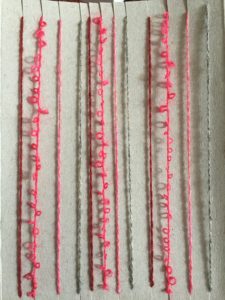
How does your planned warp look?

How does your planned warp look?

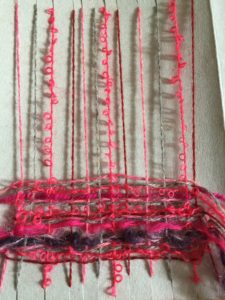
Sample and warp: Before I dressed the loom, I made some cardboard squares to test out colour combinations. This was a quick and easy way to see how the colours and yarns I picked out looked together. I wanted to see the warp colour sequence and get a feel for how the yarns worked together.

The next step was to dress the loom (i.e. warp it) which I did using the direct warping method.

Once thing I wish I hadn’t done was use boucle in the warp. BAD IDEA. It stuck and snapped and was a total nightmare. Avoid!

Weave: Weave, weave and weave. I didn’t follow a pattern and just went with by colour and texture. I used this project to do some stash busting. Very gratifying.

add some weft

add some weft

Finish your cloth: Once you’ve woven your little heart out, remove the cloth from the loom. Give it a gentle wash in some hand hot water and a small amount of gentle soap. Rinse then carefully squeeze out the water. Do not wring your fabric. Remove excess water by rolling your cloth in a towel. Hang out on the line to dry.

Part two: Cutting your cloth. Coming soon. Once I do it.

Handmade gift ideas for men

6

The leaves are just starting to change colour and fall, but the Christmas puddings are on the shelves at the shops and it’s just a matter of time before the first pre-Christmas sales begin.

Over the past few years my sister, mother and I have been giving each other handmade gifts at Christmas. Mom makes wonderful hooked rugs and cushions and my sister has made us beautiful felted stockings, knitted scarves and sweaters. I’ve woven wraps for my mom and made yarn and soap for my sister.

This year I want to make a gift for everyone in my family–luckily we are a small group! The problem has been coming up with something different and useful for my dad and husband.

I did a search for DIY/handmade gifts for men and the options some of the ideas were hilarious–a bouquet of bacon, flavoured toothpicks and “restore an heirloom axe“. Also apparently beard oil is The Thing, but we are a beardless bunch.

Not all the ideas I saw were totally crazy and here are some that aren’t beard oil, bacon, scarves or hats.

Utility tote by Don Morin

Utility tote by Don Morin

Man bag: I was telling Sal about this tote bag my dad uses as a sort of briefcase. It is a freebie from a pharmaceutical company he was given for judging a science fair. It is ripe for replacement.

I found this utility tote pattern by Don Morin. It’s perfect, and as Sal says all I have to do is stencil some drug logos on it.

There are loads of free patterns for messenger bags out there both knitted, felted and sewn. How about upcycling some jeans or natural dyeing or printing on some organic hemp fabric then sewing it up into a bag? There are so many ways to use your fiber arts and sewing skills for a messenger bag.

Finlayson "sweater" (Thread Theory)

Finlayson “sweater” (Thread Theory)

Sweatshirt: I love this Finlayson Sweater from Thread Theory. I’m going to make this up for my husband. I’ve got some jersey fabric in my stash. There are some nice organic jerseys available now that could be naturally dyed. Or maybe you have some handwoven you could use. Here’s a link to our guide to using handwoven for sewing projects.

For further inspiration: Independent designers have some beautiful sewing patterns for men now. Check out Walden, Thread Theory, Hot Patterns and Merchant and Mills.

Man scrub: Men like a good scrub just as much as women. Last year I wove washclothes using Syne Mitchell’s Loop-pile washcloth pattern from her book Inventive Weaving on a Little Loom. I used cotton, but she has a hemp/aloo version which would be a great alternative to those plastic shower poufs. Once this one has outlived its usefulness you can throw it on the compost pile and make another one.

There are knit and crochet options. Here’s a shower mitt from yarnspirations which could be knitted in hemp or cotton. For crocheters, here’s a loofah.

Do you want to make homemade soap? You should. Look no further than Humblebee & Me. Loads of idea not just for soap, but things like DIY tiger balm, after shave and lip balm.  This woman is a genius.

Slippers: Slippers are a classic dad gift. There are so many patterns to choose from including: Martha Stewart’s, Drops’ felted and these gorgeous ones from Arne & Carlos.

There are some upcycling possibilities here. Why not use old sweaters,  felt them and sew them into slippers. You could sew a bit of old denim on the bottom to make them sturdier.

Dice bag: Do you have any gamers in your life? How about a dice bag? Here’s a knitted one–twelve – sided no less! You could run up one on the sewing machine maybe with Doctor Who fabric? Or Space Cats!!!

Mug cosy: Another classic. Again there are loads of patterns on Ravelry. But you could easily use woven fabric or even sew them with your favourite novelty fabric. Free patterns galore online.

Other ideas might be making a belt on an inkle loom or knitting a pair of socks.

One last idea which is not sewing/fiber arts related, but I think is a great idea for a Fathers Day present–homemade barbecue rub. My dad would definitely use this! Thanks Martha.

Last year Sal wrote a post on gifts for the fiberista. Lots of good ideas here.

Please let us know your ideas for making for men.

Sewing a simple garment with handwoven fabric

0

Whenever I show my mom one of my weaving projects she asks the same question: “is it a table runner?” The question sets my teeth on edge. Long and relatively narrow woven fabric could be mistaken for a table runner, but as my friend Sarah Howard has demonstrated many times over with a little imagination it can be so much more.

Saori weaving books show many of quick and creative ways to use handwoven to make simple garments. If you are looking for a tailored garment these aren’t for you. Take a look at what Sarah does.

What I like about these saori projects is their simplicity. You don’t need to be a whizz with the sewing machine and you don’t even need a pattern. What you do need is a tape measure and a pair of scissors (or a rotary cutter) a ballpoint needle for your sewing machine and maybe some iron-on woven interfacing. Ballpoint needs are used for sewing jersey fabrics and work great on handwoven. Definitely use one.

IMG_2162

I wanted to make the draping collar vest in the Beginners’ Saori Clothing Design book. The book is very clear that these garments are designed for the average Japanese woman—5′ 2″ (157 cm) and 120 lbs (54 kg). The draping collar vest “pattern” calls for fabric 40 cm (15 3/4 in) wide x 172 cm (1.88 yards) long. That piece is then cut into three–2 x 54 cm, 1 x 64 cm– two pieces of equal length and one longer piece which becomes the collar.

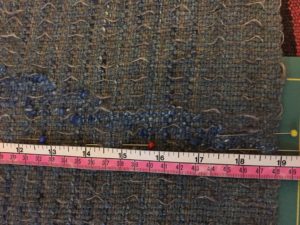
For my vest adjustments had to be made. I measured my back–from the neck to the top of my butt and from my shoulder to the top of my waist to get ballpark measurements for width and length. Keep in mind your woven fabric will shrink when you finish it. Whatever your measurements are, add on some more to account for shrinking.

I made my fabric about 50 cm (19 3/4 in) wide and ended up being 211 cm (2.3 yards). That was plenty. After washing the fabric by hand in hot water and a little soap I was ready to go.

First step was to figure out how long to make my pieces. I subtracted 172 (length of suggested fabric) from 211 (length of my fabric). That gave me 39 cm which I divided by three to get 13 cm. To increase the size of the original pattern, I added 13 cm to each piece, which gave me two pieces at 67 cm and one at 77 cm.

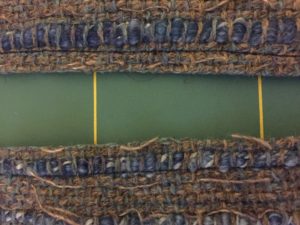
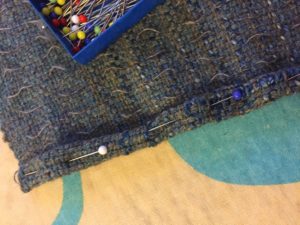
Now for the cutting. Saori weaving books suggests sewing two lines across the fabric and then cutting between the pieces. This is to minimise fraying. Remember the old saying measure twice, cut once? Definitely follow that rule when working with handwoven. In the photo below I’ve mapped out where I want to sew with a trail of pins.

pins in a line to follow for sewing.

pins in a line to follow for sewing.

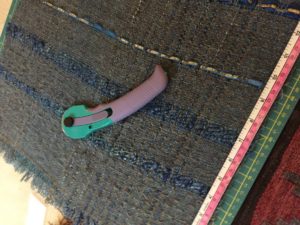
I sewed to lines and then cut between them using a rotary cutter. Scissors are fine.

cutting between the lines

cutting between the lines

The next step is adding a hem on to the tops of all three pieces. I simply rolled the fabric over, pinned it and then sewed.

pinning and sewing the hems

pinning and sewing the hems

Once the hems are sewn, lay out the three pieces of fabric right side up. The longer piece is in the middle, lining them up at the bottom and overlapping them slightly. Pin into place.

lay out fabric right side up, sew on the right side

lay out fabric right side up, sew on the right side

On the right side, sew 5 cm from the shoulder to the arm hole, leave however much you want for an arm hole (about 25-30 cm) and then sew the rest of the seam. Repeat on the other side. Flip over and make a small hem on along the bottom (on the wrong side). I ironed on a small strip of interfacing and then did a zigzag over it.

Et voila!

Finished garment

Finished garment

IMG_2169

Daffodils, St David’s day & Welsh cakes

3
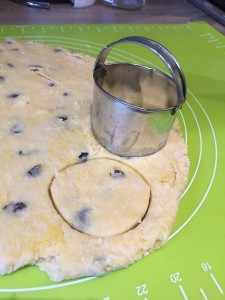
Welsh cakes

Welsh cakes

It’s St. David’s day, the day commemorating Wales’ patron saint. It’s a day for daffodils and making welsh cakes, which are a sort of scone/pancake hybrid and delicious.

Today I embarked on some St David’s day-inspired craft activities–dyeing with daffodils and heather–and made a batch of Welsh cakes. The cakes are all but eaten and I have some dye results to share.

I was inspired by an article in YarnMaker to use daffodils as dye stuff. The sample in the article was a lot more yellow than what I’ve been able to achieve. However, I’m sure if I used more flowers I would have gotten a stronger colour. Still I like this pale yellow.

imageHere in England the daffodils have been out for a few weeks and there are many more to come. Anyone who has waited all winter to get out and gather some fresh dye stuff, daffodils are a great place to start  I used 6-8 small blossoms for the dye stock and mordanted my Norfolk Horn yarn with alum and cream of tartar. The dye stock was a vivid yellow but it took quite some time for the colour to strike. I’m going to try this again with a greater quantity of flowers.

Daffodils, alum/cream of tartar mordant

Daffodils, alum/cream of tartar mordant

Winter-flowering heather is a hearty if tiny blossom that gives orange/brown to grey and brown/grey colours. It’s another option for those looking for fresh dye stuff in the winter months. Heather is associated more with Scotland than Wales, but I’ve used some handspun Llanwenog to keep the Welsh theme going.

Heather and a few mahonia berries

Heather and a few mahonia berries

I used a few handfuls of white heather blossoms in my dye pot and after awhile a orange/brown colour appeared.

The first sample (bottom) here is with the alum/cream of tartar mordant which to my eye has made a light rusty brown. (It’s not easy to see in the photo).

Top: heather, iron mod  Mid: heather, copper mod Bot: heather, alum/cream of tartar mordant

Top: heather, iron mod
Mid: heather, copper mod
Bot: heather, alum/cream of tartar mordant

The second sample (middle) was from the same dyepot to which I added copper sulphate as a modifier. To me this sample is somewhere between a yellow, a pale green and a brown, depending on the light and what colours it sits next to. It doesn’t look like much, but I love it’s subtlety.

The final sample (top) is again from the same dyepot with iron added as a modifier. I see a pale blue/grey. I love how these three sample look together. I can envision using this palette in a weaving project or perhaps a sweater or wrap.

Spring time is still a few weeks away, but more dyestuff is popping out of the hedgerows and flower beds everyday. It’s been warm here and I’ve seen gorse for a few weeks now and the first broom flowers have started to appear. Gorse gives a yellow and its smell is unbelievable–think pineapples and coconut. Broom should also give yellow with alum and a green with copper.

Warm weather means that sunny spots other flowers are growing. Keep your eyes open for calendula. There’s also leftovers to gather. I pocketed a few handfuls of Mahonia berries the other day. Allegedly they give some colour. There are also ivy berries and acorns.


How to choose a fleece for handspinning

9
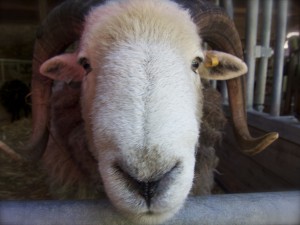
Herdwick: cute, but not a fleece for beginners

Herdwick: cute, but not a fleece for beginners

Buying my first fleeces to process at home for handspinning was hugely exciting. I’d just been to my first meeting of the Mid-Essex Guild of Weavers, Spinners and Dyers and it happened that two of the members were having a fleece sale that day.

I was lucky to have two experienced guild members there to show me how to look over a raw fleece. They unrolled the fleeces and talked me through what I was looking at, pointed out some of the desirable qualities that hand spinners look for in a fleece. Those are attributes like crimp, softness, good lock structure, cleanliness (no straw, grass or poo, etc). More on that later.

The first fleeces I bought were a Hebridean, a Shetland and a Ryeland. Maybe I went a little overboard. It took a lot of work to get the fleeces scoured, dried and ready to spin. And even though I benefited from having some experts on hand to help choose my fleeces, if I were to do it all over again I would have done my homework first.

Before buying a fleece, I recommend reading up on different breeds and the characteristics of their fleece. There are about 60 sheep breeds in the UK alone and all their fleeces are a little different.

Some, like Cotswold, Teeswater, Lincoln, Leicester and Wensleydale–longwool breeds–have fleeces that are more hair-like, lustrous and require some experience to spin.

Then there are the Downs breeds–Southdowns, Oxfords, Hampshires, Dorsets for example–which have dense fleeces with short staple-lengths, but feature lots of crimp and bounce.

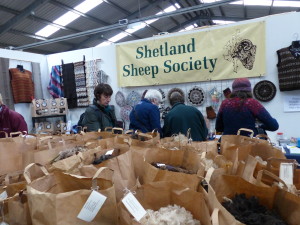
Fleece sale!

Fleece sale!

Then there are the many other breeds that are favourites of hand spinners, like the Shetland, Blue-faced Leicester, Cheviot, Manx Loaghtan and Jacob, which all have their own characteristics. There are also plenty of breeds which aren’t particular favourites of spinners, either because their fleece is too coarse or just not suitable for spinning.

So before jumping in and buying a fleece take a look at some of the books available like Fleece and Fiber Sourcebook or The Spinner’s Book of Fleece to get an idea of what you might like to spin as well as the huge choice available.

There are other questions you want to ask before diving in and buying 4-5 pounds of raw sheep fleece. Are you going to make a worsted or woollen yarn? It will be hard to spin a woollen yarn from a long wool, for example. Which fleeces will best suit your project? Do you want a coloured fleece? How important is softness in your project? Are you looking to create something durable or more lightweight?

What to look for in the fleece 

Now that you’ve decided on a breed, what are you looking for when choosing the actual fleece?

Steve Kennett, vice chairman of the Association of Guilds of Weavers, Spinners & Dyers, visited my guild back in September to speak on how to pick out a fleece.

Steve unrolled one of the fleeces supplied by a member and gave a few pointers on picking a good one. It had a lovely staple length, beautiful crimp and was muck and VM-free. Steve held it up to demonstrate how the fleece should be nice and open—like a lace curtain.

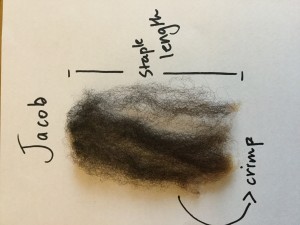
Jacob lock from raw fleece. Nice staple length and crimp, no breakage or second cuts

Jacob lock from raw fleece. Nice staple length and crimp, no breakage or second cuts


You can see in the photo of the Jacob lock what I mean by crimp. It’s simply the little waves in the wool. Crimp makes wool easy to spin as it twists together and the crimp helps the wool lock together. The rule of thumb goes that the more crimp, the finer the wool. Merino, for example, can have 100 waves (crimps) per inch. Longwools have less crimp and often used  by spinners to add texture and lustre to yarn.

Steve Kennett also said to look out for second cuts (short bits the shearer missed on the first pass) felting and second growth—ie when a sheep hasn’t been sheared and begins to grow a second fleece. He recommended  taking off a lock of fleece, holding it firmly in one hand and giving it a good tug. If the lock is breaks avoid the fleece as it is brittle, will not be nice to spin and could result in weak yarn.

The best part of the fleece is going to be on the neck, front legs and back (between the shoulders). Fleece on the back is generally good. Fleece from the hind legs is generally coarser and kempy. Steve recommended being picky about fleeces and perhaps buying several, but only using the best bits.

I don’t know if I’d go to the lengths Steve does–buying many fleeces and throwing a lot of it away. If I were to go back in time, I’d probably have started with one fleece (Shetland) and made life easier for myself. If buying a whole fleece is intimidating, get a friend to share one with you.

Starting with a fleece instead of tops or roving is, I think, a great way to learn more about sheep breeds, fiber prep and spinning. Fleece you’ve scoured and prepared yourself is going to feel and spin differently from commercially processed fiber. Some of the women in my guild consider commercial prepared fiber to be “dead”, because they view it as flat and lacking crimp. I agree with that to a certain extent, however I have found that top or roving from smaller mills tends to retain some of the bounce and crimp.

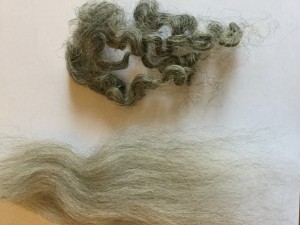
Gotland sheep Commercial top (l) Raw fleece (r)

Gotland sheep
Commercial top (l)
Raw fleece (r)

Still it’s an eye-opener when you compare commercially prepared roving with that you’ve cleaned and carded yourself. Take a look at this Gotland fiber. On the left, straight up commercial roving, on the right Gotland right off the sheep. Looks a lot different right? Doesn’t even look like it came from the same breed.

For more information on scouring fleece see these posts: Hot tips for scouring fleece or More hot tips on scouring fleece without soap.

More hot tips for scouring fleece–without soap

2
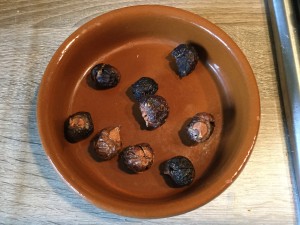
Soap nuts!

Soap nuts!

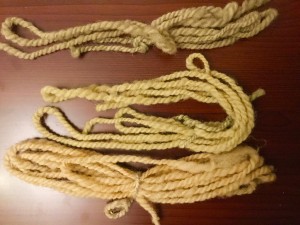
Have you heard of soap nuts? They’re the little glossy shells from the fruits of trees and shrubs of the Sapindus genus. They can be boiled in water to make a liquid soap or popped into a muslin bag and added to laundry. Even though they’re called soap nuts they’re not soap as is commonly known (lye plus fat). Soap nuts are lauded as a non-toxic and sustainable laundry alternative. Oh, and they’re a lot less expensive than commercial detergents.
So what does this have to do with scouring fleece? I started using soap nuts for my family’s laundry mainly because of their eco credentials, but also because they lack the heavy perfumes present in so many commercial detergents. Smelly detergents! Yuck! They worked incredibly well.
I also struggled to find an unscented, eco-friendly detergent to use on fleece and thought the fleece scouring solutions (like Power Scour) on the market to be on the expensive side. When it came to getting ready for a big fleece scouring session I thought, hey, why don’t I try the soap nut liquid on the fleece?

How did it go? Well, it worked.

I made up the soap nut solution–boil 50 grams of soap nuts in 2 litres of water for 10 minutes. Cool. Strain. (50g of soap nuts can make 12 litres soap.)

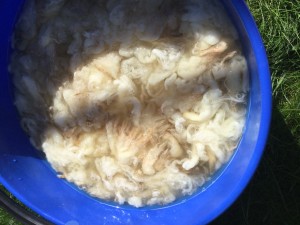
Bowmont fleece soaking in soap nut solution and hot water

Bowmont fleece soaking in soap nut solution and hot water

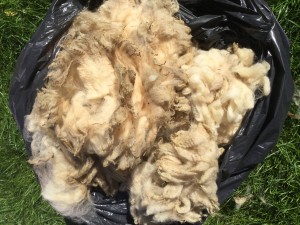
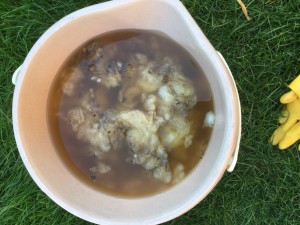
I filled a bucket with very hot water, gently added about 250 ml (roughly 1 cup) soap nut solution and then added my fleece. Immediately I could see the water turing that milky brown colour you get when washing fleece. I let it sit for awhile before draining it and spinning it out in the washing machine.

Yes, I put wet fleece in my washing machine on the spin cycle. It’s the same technique Sally mentioned in her post on scouring fleece. Your fleece won’t felt. If you’re worried about smell you can clean your machine with white vinegar and baking soda. I didn’t have a smell problem.

The next step was to rinse the fleece in hot water. I had a very greasy fleece (Bowmont) and it felt sticky when I took it out of the washing machine. To address this stickiness I added a good dose of white vinegar to the hot water rinse. I figured hey, it won’t hurt the fleece, right? My theory was the acidic vinegar would help reduce the stickiness.

Bowmont fleece drying

Bowmont fleece drying

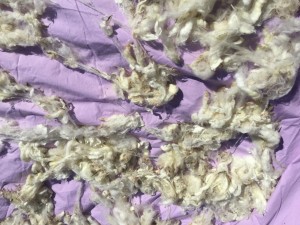
When I added the vinegar the fleece fizzed and bloomed, opening up nicely. I let it sit for awhile before spinning it out in the washing machine and spreading it out on a sheet in the garden to dry. There’s no vinegary smell on the fleece either.

It occurred to me that I’d run this experiment on a relatively clean fleece–no muck, negligible VM. What about a muckier one? I found some fleece that needed a little more work, picked out the really gross stuff and soaked it in the soap nut solution and ran it through the same process in the washing machine and vinegar rinse.

Muckier fleece

Muckier fleece

This fleece is a 3/4 Southdown lamb and not nearly as greasy as the Bowmont. The soap nut and vinegar treatment worked really well.

Getting the dirt out! (3/4 Southdown fleece)

Getting the dirt out! (3/4 Southdown fleece)

You get through a lot of water when washing fleece. I didn’t want to pour it down the drain and instead used it to water the garden. That’s another benefit of using soap nuts. Yes the water is a bit greasy and mucky, but there isn’t anything harmful to plants or the wider environment in it.

There is another way to wash a fleece without soap–the fermented suint method. Basically the method is: soak your fleece in rainwater until the suint (sheep sweat) ferments creating a kind of soap. I have not tried this method, but I’ve spoken to a few people who swear by it. Although apparently it’s better for low-lanolin fleeces and it’s even smellier than scouring fleece with soap.


Last of the summer dyes

2
Marigolds

Marigolds

Autumn has been a mellow affair. Trees are only starting to turn colour and drop leaves. Flowers continue to bloom and there is plenty of natural dye stuff still to be gathered. It’s time to get a basket and take a walk to find some dye stuff to try out now or over the winter.

Coreopsis

Coreopsis

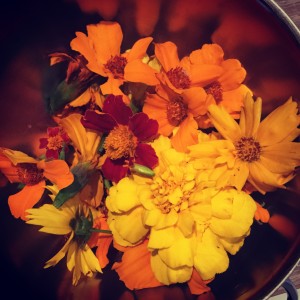
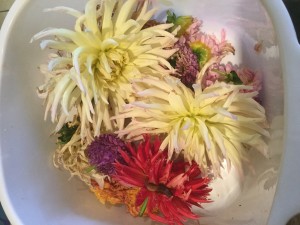
I’m drying dahlias, marigolds, calendula and coreopsis from my garden. Acorns and walnuts are both good for dyeing as are sumac leaves, rhubarb roots, carrot tops, willow leaves and bark, chrysanthemums and pine cones. Not all plants will give you color and some that do–especially berries–are not colourfast. Don’t waste your time dyeing with blackberries or beets, for example, because the colour will fade quickly.

Dahlias

Dahlias

Lichen is also an option, but not all lichens give a dye. Sally is planning an in depth post on lichen dyeing so I will just give a few pointers on lichen gathering and preparation. Do your homework before you go out to identify lichens that give a dye. If you’re not sure there is the bleach test. If the lichen turns red when treated with a drop of bleach it should give colour for dyeing. Here is a helpful link on lichen dyeing.

Personally I’ve had no luck with lichen. Any pointers are appreciated!

As Autumn becomes winter there won’t be as much dye stuff around. However ivy berries and leaves might be worth a try along with mahonia berries. And there is always the humble onion skin. It gives a beautiful golden color and is simple to find and use. Other household items that give color include pomegranates and avocados.

For those of you who need help identifying plants I suggest a book that has pictures and descriptions of plants local to you. As Sally found out it’s properly identifying plants and trees is pretty important.

I use River Cottage’s Hedgerow book for identification. Books like the Ashford Book of Dyeing and Jill Goodwin’s A Dyers’ Manual give a lot of information on what colors certain plants give and whether they are color fast.

One other project for the budding natural dyer is to grow your own dye plants. I’ve started madder this year, which I need to re-pot into a larger container. Other flowers like dahlias, marigolds and coreopsis have all given loads of lovely yellows and gold colors this year. They’re all easy to grow and inexpensive. If you have space you might also try woad, indigo, St John’s Wort and safflower. It’s easy to find seeds online or from another natural dyer.