Towards an indigo revival?

3

Jenny Balfour Paul

Recently my guild was privileged to host Jenny Balfour Paul, a world expert on the history of indigo and its use by different peoples. That history is a global story of chemistry and dyes that goes back at least 6,500 years.

“It’s unbelievably ancient this dye. All the other dyes change. Indigo is always blue,” she said.

Balfour Paul’s lifelong study of indigo started mainly by chance as a project to document vanishing traditions so that when the time came they might be revived. Her work has taken her to Yemen, India, China, the Marquesas Islands and beyond.

“My life has been guided by a molecule. It’s a perfect molecule. Without indigo there would be no natural blue dye,” she said.

“Even indigo stories are based on chemistry. Indigo is invisible in the plant. It’s dyed cool not hot. It’s green in the leaves you have to extract the color with oxygen. No other dye does that. Everything about it is different. Indigo doesn’t absorb into fibers. It sits on top of it, in layers.”

But indigo’s story also has a dark side linked to slavery and exploitation, which in some areas is holding back its revival as an environmentally friendly alternative to chemical dyes. Balfour Paul does not shy away from this part of the indigo story, which she sees as the second part of the indigo tale.

The indigo miracle

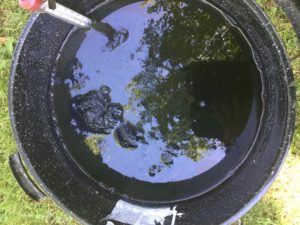
Indigo vat

The first chapter in the indigo story is—broadly— the incredible story of how indigo pigment, invisible in its host plants, was detected, extracted and used by humans in the first place. Indigo shows up in different plants around the world. It’s the same molecule, but in Europe it’s found in Woad, in Japan it’s polygonum and in Mali it’s Lonchocarpus cyanescens.

How did humans happen upon this miracle molecule? No one really knows. What we do know is indigo dyeing traditions developed worldwide and many of them have since vanished. Or in the case of indigo dyeing in Yemen, it’s literally being bombed out of existence.

Slavery and exploitation
The middle of the indigo story is enmeshed with slavery and exploitation in the US, the Caribbean and India.

In the US, indigo was introduced into colonial South Carolina in 1740 where it was grown on plantations by slaves. It became the colony’s second-most important cash crop after rice.

Jamaica’s first colonial crop was indigo, again grown on plantations by slaves.

In India, farmers were forced to grow indigo and workers’ conditions were appalling. Indigo was big business and in 19th century half the exports from Kolkata were indigo.

That all came to an end in the early 20th century as synthetic indigo had almost completely replaced the natural pigment by about 1914.

Revival?

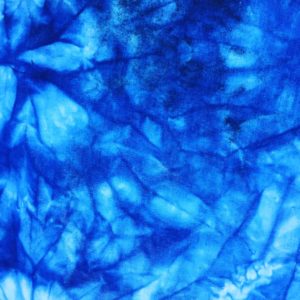
Shibori dyed with Indigo

Indigo has struggled to overcome its cultural baggage particularly in India, says Balfour Paul. She is optimistic however that the page has turned for indigo.

“Now it’s a story about revival and environmentally friendly dyeing,”she says.

In El Salvador indigo is now vacuum packed or canned as a paste. The revival of indigo in El Salvador being used by Gap, Levi’s and Benetton for baby clothes, because they know synthetic indigo is toxic, said Balfour Paul.

In 2013 Levi’s 511 collection featured organic, indigo-dyed jeans. People really need one pair of organic jeans, not 10 from discount retailers, says Balfour Paul.

Jamaicans are revisiting indigo and in Kolkata and throughout Bengal there are efforts afoot to reintroduce natural dyeing.

Sustainability and slow fashion are the way forward, said Balfour Paul: “I’m going with it.”

What’s next for Jenny?

Jenny Balfour Paul continues to follow the indigo molecule. She is now working now with Dominique Cardon—another natural dyeing superstar— on the Crutchley Archive at the Southwark Archive in London.

According to the University of Glasgow’s Centre for Textile Conservation and Technical Art History:

“Thanks to descendants of the Crutchley family who owned and ran a dye company on the south bank of the River Thames 300 years ago, rare records from this era have survived. The collection includes sumptuous pattern books with samples of wool ‘topped’ with red from madder and cochineal dyes, dyeing recipes and instructions, and customer names and amounts of credit.”

“In 1740 they could colour match as well as any modern dyer. The archive is full of dye recipes,”Balfour Paul said.

I personally can’t wait to see the fruits of their work. It’s bound to be fascinating for any student of natural dyeing.

Jenny Balfour Paul bibliography

Indigo in the Arab World (1996)
Indigo: Egyptian mummies to blue jeans (1998)
Deeper than indigo (2015)

Jenny on the Maiwa podcast

Fresh Leaf Indigo

4

The hardest part about dyeing with fresh leaf indigo is growing the indigo. One of the people in my natural dyeing study group did all the hard work, and brought it in to share. This is what fresh Japanese indigo looks like:

Japanese indigo, persicaria tinctoria

Japanese indigo, persicaria tinctoria

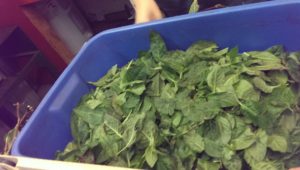
The leaves are picked off the stems:

2016-09-27-18-42-19

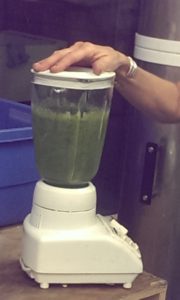
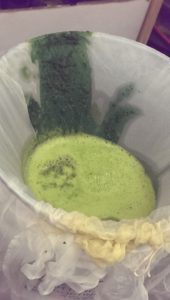
Then blended with ice water:

2016-09-27-19-25-25

And strained through a cloth (in this case, silk):

2016-09-27-19-29-35

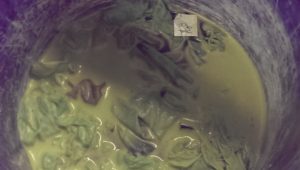
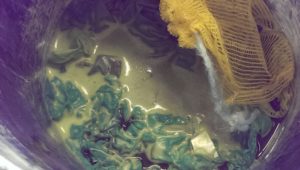
We squeezed out the cloth to extract as much juice as possible, and this was our dye bath. We put our fiber in, a mix of wool, linen and silk:

Fresh indigo dye bath

Fresh indigo dye bath

We massaged the items in the bath occasionally, and let them sit in the bath about an hour. The bath began to oxide:

2016-09-27-19-43-03

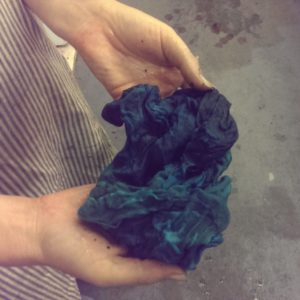
We then removed the items from the bath and let them air out. The color slowly changed from green to blue on silks, a pale green on linen, and a dark blue-green on wool. The oxidation time was much slower than with a reduced-indigo vat.

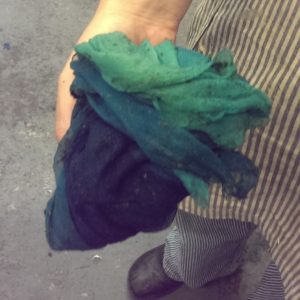
This is the silk straining cloth:

Straining cloth after several batches

Straining cloth after several batches

Straining cloth after half an hour

Straining cloth after half an hour

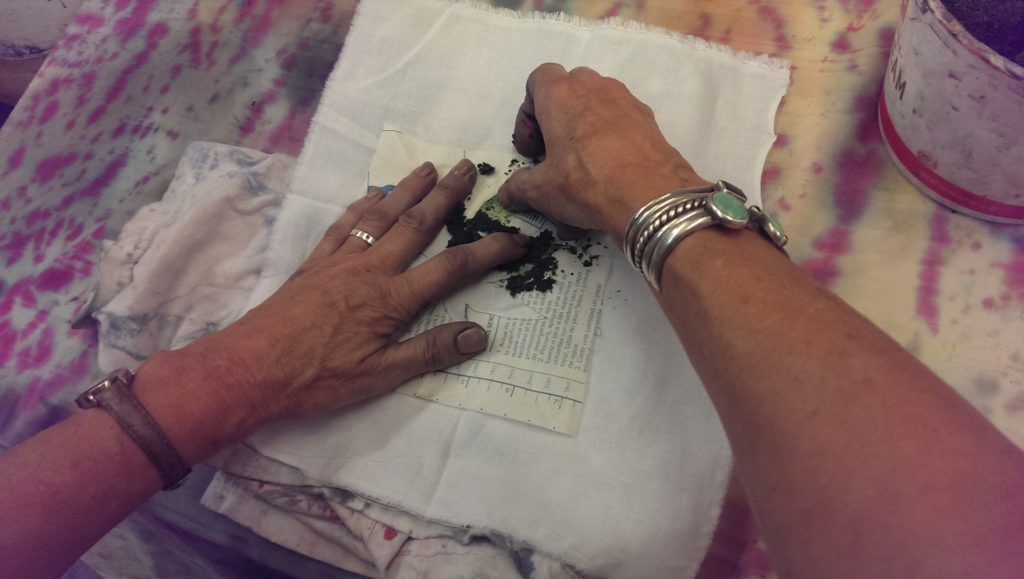
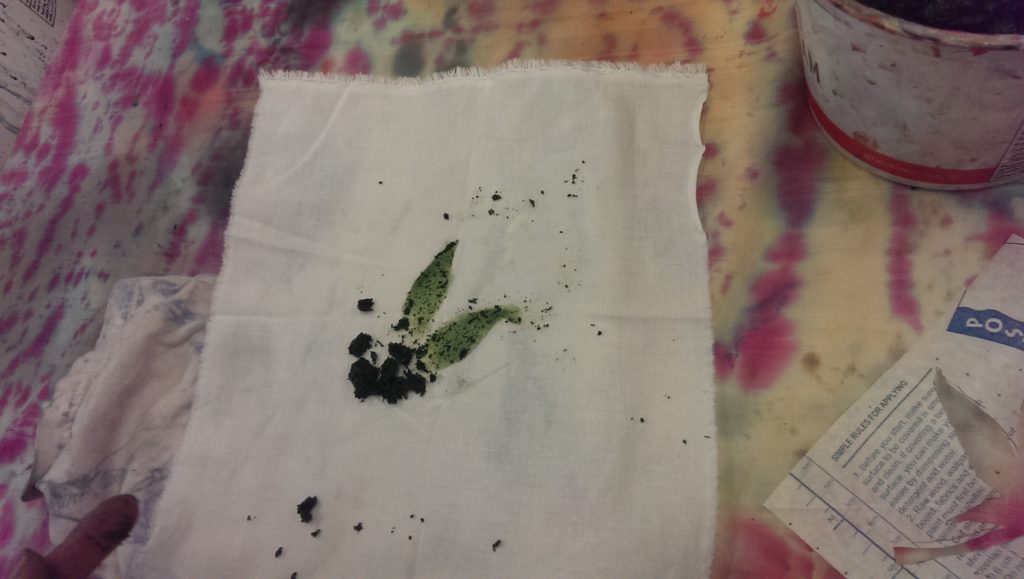
Bonus round: we also used the leftover pulp from the straining cloth to  “paint” on fabric— basically rubbing it into the fiber like a grass stain.

2016-09-27-20-07-01 2016-09-27-20-08-13

We let the pulp-prints dry and oxidize before rinsing. And although we did not do this step, here are instructions to precipitate out the indigo from a fresh bath, to use in a reduction vat. It’s a great teaching article using fresh woad.

Japanese indigo seeds are available from various places on line, and the plants like a warm, humid environment. Humid places can get several crops per season before the plants die. Places that are dry in the summer (like western Oregon) can get one crop during the growing season with irrigation.

Natural dyeing with cotton

5


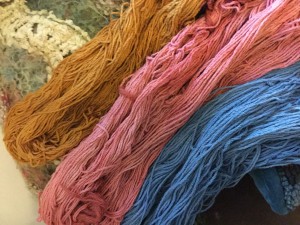
left to right: onion skins, madder, indigo

left to right: onion skins, madder, indigo on organic cotton yarn

It’s funny what can get you off and running on a project. Dyeing cotton really wasn’t on my to-do list until I read an article in the Winter 2015 Spin Off where Dye-lishus premordanted cotton sliver was tested and reviewed. My first thought was, what’s the fuss with cotton that would make premordanted sliver desirable? Would it make dyeing easier?

One of the things the Dye-lishus premordanted cotton sliver apparently can do, which home mordanting can’t, is allow the fiber to take acid dyes, which are made for dyeing protein fiber (wool, silk, etc). Dye-lishus’s USP is: you can dye this fiber with anything–acid dye, food colouring, procion dyes–and it will stick.

However, my interest in mordanting my own cotton was stronger than my desire to try out the Dye-lishus fiber. Another day perhaps.

A quick internet search informed me that mordanting cotton for natural dyeing is a two- to three-step process, depending on the kind of cotton used. It’s not complicated. It’s not particularly labor intensive. It’s just one or two more steps than mordanting wool.

There are some important things you should know before mordanting and naturally dyeing cotton.

* Cotton is mordanted with tannic acid, then aluminium acetate. Those are different mordants than the ones used for wool. Both are available from natural dye suppliers.

* Depending on what kind of cotton you’re going to dye, you may want to scour the yarn or sliver. I washed my yarn in very hot water with soda crystals. If you’re using organic cotton, don’t bother with this step.

As with all aspects of natural dyeing–on cotton, wool or otherwise–there are many recipes. I used the simplest one I could find, which happened to be on the Wild Colours site. It has lots of information on natural dyes and mordants.

I used 10 percent of weight of goods (WOG). To mordant 100 grams of fiber and yarn, I used 10 grams of tannic acid and 10 grams of aluminium acetate. It’s worth getting a digital scale to weigh the mordants. Put a clean yogurt pot on the scale, zero it, then tip in your mordant.

Soak your fiber/yarn for a good hour before adding it to a dye pot in which you have dissolved 10 grams of tannic acid. You want there to be enough hot water to cover the fiber and give it a bit of room. No need to heat the pot, just leave it until you’re ready for the next step. I left mine overnight.

Repeat the process, but this time dissolve 10 grams of aluminium acetate and then add your wetted down fiber. Again, you need hot water to dissolve the aluminium acetate, but you don’t need to heat the pot. I left mine to soak overnight in a bucket.

When ready to dye the fiber, make sure to rinse it well to get out any mordant that hasn’t attached to the fiber. Do it now or it makes the fiber a bit chalky after dyeing. Otherwise make sure to rinse your fiber well after dyeing.

I dyed with madder and onion skins, because that’s what I had to hand. I soaked the madder root in hot water overnight. I used 50 percent WOG of madder. Onion skins are very generous in terms of dye yield. I used a few handfuls and that was plenty.

IMG_0410

cotton yarn, madder dye bath

Give the madder about an hour to simmer. I strained the root into a jelly bag, which I then returned to the dye pot. It saves you having to pick out little bits of madder from the fiber and makes sure you’re getting your money’s worth from the dyestuff. I fished out the onionskins with a slotted spoon put them in the compost.

Once the fiber was in the dye pots I left them to simmer for about an hour. I then removed them from the heat and left them to cool.

Dye baths made with natural dye stuffs do not exhaust the way acid dye baths do. That means there will appear to be a lot of color left in the dye pot. With acid dyes, you know the dye bath is exhausted when the water is clear. That doesn’t happen with most natural dye stuffs.

madder on cotton sliver

madder on cotton sliver

IMG_0416

top: cotton sliver, bottom: cotton yarn with onion skins

Rinse your fiber well and leave to dry.

Last, but not remotely least, cotton can be dyed naturally without any mordanting or pretreatment whatsoever. Just make an indigo vat, following Sal’s fabulous fruit vat instructions. Indigo is a substantive dye–like walnuts and lichen–and does not require any mordanting process. Just look at it. Beautiful!

IMG_0421

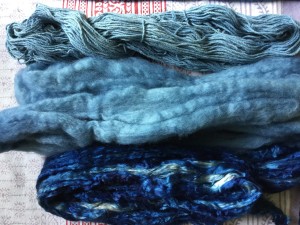
Indigo on cotton yarn (top), wool (middle), sea cell (bottom)

The Indigo Fruit Vat: La Technique

11

image

I recently took a class at the Oregon College of Art and Craft, on how to create a quick, environmentally friendly indigo fruit vat. This method was developed by Michel Garcia, a French chemist, botanist and natural dyer. This post is how to go about it. This other post tells you why it works.

The recipe is very simple: 1 part indigo, 2 parts pickling lime, 3 parts fructose, by weight. If you want to use powdered fructose, you just weigh all your ingredients out on a scale.

We used apple juice— cooked-down, mashed apples in water. Any sweet fruit will work, as will dates, or agave or honey, anything with fructose. The only thing not to use is citrus, which will change the Ph of the solution.

image

By volume, we filled the stockpots we were using about 1/4-1/3 full, then added warm tap water to about 2/3-3/4 full. From the approximate measurements, you can see that the fruit vat is very forgiving. The apple juice was hot and the tap water warm. A warm vat is desirable, but not over 140F, or the chemical reactions won’t take place. The amount of water is not important, other than to have enough space to dye under, because it must all be done below the surface.

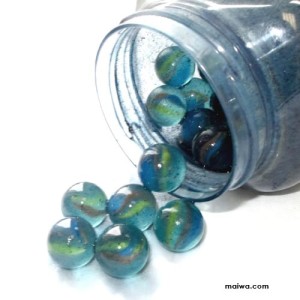
Next the indigo is added. We used 20g of powdered indigo for our stockpot. Since indigo is insoluble, it’s hard to stir in without either agitating (i.e. adding oxygen) the pot quite a bit, or having it sit on the surface. To get around this, we put the indigo and some water in a small mason jar with marbles and shook that mixture around vigorously for a few minutes, essentially making a slurry. That was then carefully poured down the side of the pot, to again, minimize the amount of air being introduced into the vat. Any indigo left in the mason jar was swirled around with more water and added as before.

image

Then we added the pickling lime, also hydrated with some water, and again, carefully poured down the side of the pot. Since we used 20g of indigo, we used 40g of pickling lime.

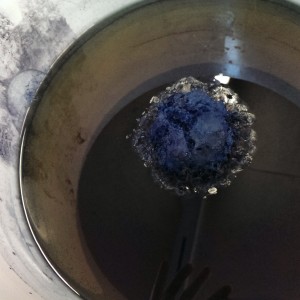
Then everything was given a good stir. By this I mean creating a vortex in the center of the pot, but not so much to be adding air back in. Once a good swirl was going, we held our spoons still against the side of the pot and let everything swirl to the center. At this point any oxygen bubbles come to the surface in the center of the pot. This is called the “flower”, and if the vat is working properly it should be a deep blue. The vat itself will be a clear greenish-yellow, and it will form  a skin on top.

Indigo fruit vat flower

Indigo fruit vat flower

We let the vats sit about an hour for the fruit solids to settle in the bottom of the pot, and for the reducing process to take place. However, out instructor dipped a piece of cloth into her vat about 5 minutes after she stirred hers, and it was already turning a light blue. It’s very fast!

As for the dyeing itself, it must be done below the surface of the liquid, to keep the oxygen out. The fiber should be wetted in warm water prior to dipping, again, to replace the air molecules in the fiber with water molecules. Dip gently down the side of the pot, and hold underneath for at least three minutes. YES WEAR GLOVES! Indigo doesn’t need a mordant, so you will dye your hands, too. During this time massage the fiber. This helps move the indigo into the fiber. As our instructor described it, “Indigo is a large, slow moving molecule. Give it some help.” Depending on what fiber is being dyed, it may be more or less tolerant of the alkaline solution it’s in. Cotton doesn’t mind, but silk and wool can be damaged from too long of contact— they can lose their luster. This is why traditionally cottons are dyed first, then silks, then wools. As the vat is used, it becomes less effective and also less alkaline. Because of the fiber structure of wool, it requires less of the indigo to achieve good color.

After your three minutes or so, bring the material out of the dye vat, and quickly hold it over another bowl to drip in. Any drips back into the vat also add air. Then you must expose the areas that you wanted dyed to the air, so that the indigo re-oxides and forms it’s electrostatic bond with the fiber. You will see it turn from yellow to green to blue, as this process happens. The rule of thumb is to have to material exposed to the air for at least as long as it was in the vat. If the material doesn’t oxidize, it hasn’t been dyed. The other rule of thumb is that at least three dips into the vat a required to achieve a good color. Each subsequent dip happens in the same way, with airing out in between.

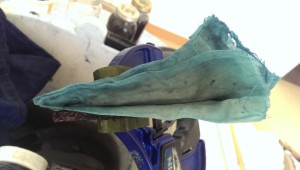
Making sure to air out between the folds for good oxidation

Making sure to air out between the folds for good oxidation

The materials you have dyed will be lighter once they’ve dried, so it’s best to get it darker than the final result you want. Each dip in the vat adds another layer of indigo to the material, so it will be more colorfast than just one dip.

Once the color is to your liking, rinse the material and let dry. If it’s wool or silk, soak in a vinegar/water solution to return the Ph to the liking of the fiber, then soak in a mild soap and water, and rinse. Rinsing is only removing the indigo that didn’t bond to the fiber.

The indigo water that runs off from the dyed material in the vat has been oxidized, so don’t add it back to the vat.

Using an indigo vat can only happen for so long before it stops working. This is not because the indigo is used up, rather, it’s because each “dip” into the dye vat also re-introduces oxygen, so the indigo becomes unavailable again, and there’s not enough fructose left in the vat to get the chemical conversion going again. When you are done for the day, add more fructose to your vat, and you can check the Ph with a Ph test strip. It should be around 9-10. If it’s lower than that, add more pickling lime.

When you want to use your vat next, add more fructose, stir the vat again and let the flower come to the surface. It should be dark blue. If you’ve used the vat a few times and the flower is light blue, you will need to add more indigo.

If you want to dispose of your vat, whisking air (specifically the carbon dioxide in the air) in will turn the pickling lime into calcium carbonate, aka chalk. You can go ahead and water your plants with this. Maybe a nice indigo plant.

Indigo-a-go-go: Better Dyeing through Chemistry

10

I recently took a class on making an indigo fruit vat. The class was great, the vat is quick and easy and you can read how to do it here, but when it was over I was left wondering what’s going on in there?

The interwebs are sort of helpful, in that you can read all about what happens in the indigo dye process, but there appears to be an underlying assumption that dyers aren’t interested in the chemistry behind what they’re doing, so there’s not a lot out there that puts it in layperson’s terms. And they tell you chemically what happens, but not why it happens. Personally, if I know how a process works, I find it a lot easier to do the steps involved correctly, because it makes sense why all the steps are there. If I’m trying to get a bunch of molecules to do what I want them to do, it will be more efficacious if I’m not bumbling around blindly.

So I’ve spent a good amount of time looking for answers to this question, and what I ended up finding was that the ways and means of indigo extraction and dye methods mirror a lot of other human technologies— in the automotive world I call it the Technology of the Day.

This is indigo:

image

This molecule is not what is found in indigo-bearing plants (and snails!). True indigo (indigofera tinctoria) and woad, for instance, each contain different indigo precursors— molecules that will turn into indigo once they’ve been oxidized.

This is indican:

image

This is the precursor to indigo found in the indigofera tinctoria plants. The bow-tie shape is a glucose molecule.

This is indoxyl and this is what actually penetrates the fiber in the indigo vat. The bow-tie shaped glucose has been removed:

image


When making an indigo vat from fresh plants, all that needs to be done is remove the glucose part of the indican, and you get the smaller indoxl molecule. This is what will penetrate the fiber, and then turn into indigo with the addition of oxygen. Putting the fresh plants in a vat and fermenting them will remove the glucose, because the yeasts from the fermentation will eat the sugar part of the molecule and leave the indoxl behind. Here is a not only a nice article about different indigo precursors, but also a step-by-step tutorial on how to dye with fresh woad.

The indigo can also be precipitated out at this point instead of attaching it to a fiber. This will be the powdered indigo. The main thing to keep in mind is that once it’s been oxidized, it’s all the same indigo molecule; even synthetic indigo is identical. (*Mostly. I’ll come back to this later.) There is a lot of socio-economic history surrounding the trade and use of indigo, and it’s really fascinating, and I recommend this book which lays it all out in great detail:

image


The turning of soluble indigo-precursor plants into insoluble indigo is where we then go. The indigo can be moved around and traded rather than be tied to the place and season of the plant material. But it’s also one step forward, two steps back: that indigo molecule is not soluble in water. The indigo precursors in the plants are soluble, but in order to make indigo soluble, the oxygens on the indigo molecule need to form other bonds. The indigo needs to be turned into indoxl, then it can be worked into the fibers to be dyed. When the fiber in this dye bath is taken out and reintroduced into the air, lo and behold it oxidizes— it takes up the oxygen molecules from the air and turns back into the insoluble indigo molecule, where it is held fast by electrostatic bonds within the fiber. The best technical description that I found of how the indigo molecule bonds with fiber can be found here.

There are actually a lot of ways to go about making indigo soluble, and they all involve a reducing agent and an alkaline solution. This is the  indigo vat. There are a lot of reducing agents, some of them very effective, and also toxic. For instance, here’s the process for dyeing jeans. A reducing agent has free electrons that are readily available to bond with any oxygen in the vat, whether it be on the indigo molecule or oxygen from the air.

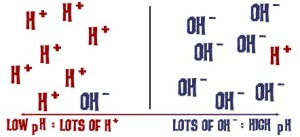
Indigo vats need to be alkaline. An alkaline solution simply has more OH ions than H ions:
image

I couldn’t really find any good descriptions as to why the vat needs to be alkaline— what work are those OH ions doing? I ended up calling my brother in-law, who has a degree in chemistry: a reducing agent adds it’s electrons to form other compounds, so the oxygen bonds on the indigo are transferred and form alcohol chains with the reducing agent. Alcohols are very water soluble. The OH’s in the alkaline solution strip hydrogens off this alcohol group and we end up with the indoxyl. The OH ions are highly reactive, and essentially make the solution even more soluble. The more OH ions, the stronger the alkaline solution is (and the more careful one needs to be in using and disposing of it).

As there are a lot of reducing agents, so there are a lot of ways to go about this reduction, and you can see echoes of the original use of indigo-precursor plants: Fermenting urine is a tried and true method, because the ammonia in urine is already alkaline. Another traditional method is fermenting madder root and bran with soda ash or lye. Fermentations, aside from eating sugars in the original vats, also produce sulfur-containing organic compounds as by-products, which are effective reducing agents. As with any fermentation, you are relying on a process that involves time, often days, at a constant warm temperature. Not only do you have to wait to do your dyeing, but you must rely on a successful fermentation process. Commercial denim dyeing uses very efficient but also much harsher solutions, to the point where repeated dips in the vat need to be carefully timed so that the oxidized indigo already on the denim doesn’t get re-reduced and therefore removed again from the fiber.

I’ve made soap, and I’m not a big fan of dealing with lye, so I’d prefer a weaker base. I’ve successfully made an indigo vat with the madder root and bran, and washing soda which has a weaker Ph than lye. It took about 10 days to be ready to use, and it’s, shall we say, a little stinky. This is the Technology of the Day part: how to get the result you want as cheaply and easily as possible. Cheap and easy are relative terms— for instance, what’s the cost to the environment, or the person using a highly alkaline solution? When you are done with the vat, how are you going to dispose of it? As a home dyer, you can make these choices for yourself.

The fruit-vat method that I learned uses fructose from cooked-down fruit, which are reducing sugars, and pickling lime (calcium hydroxide) to make the solution alkaline. Fruit sugars are an expedient way to make a vat because they have free electrons available at the end of their chemical chains, and so are oxidized rapidly. Interestingly, sucrose, table sugar, will not work. Sucrose is a combination of glucose and fructose, but the way that chemical bond is formed takes up the free electrons at the ends of both chemical chains. Sucrose is not a reducing sugar. But water boiled down with fruits, dates, or honey and agave, all work well, and of course powdered fructose. Citrus doesn’t have a lot of fructose anyway, but the acids in citrus are also going to also going to make the vat less alkaline, so it’s not recommended.

So the sugars bonds with the oxygen, then the OH from the pickling lime reacts with the resulting molecules. Eventually the reducing agent gets used up: the sugar is turned into an acid and so is no longer a reducing agent. Addition of acid will change the Ph of the vat. The enemy of the indigo vat is air, because that re-introduces oxygen into the vat, which turns the indoxl back into indigo, and uses up the reducing sugars. Less introduction of air into the vat means a longer dyeing session. The vat needs to be kept warm, so that those molecules move around and react with each other, but not so warm that the reactions don’t take place. (The traditional fermentation vats would be at the right temperature anyway, to maintain the environment for the yeasts and bacterias.)
image

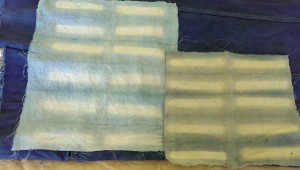
*So it should all be the same color if it’s all the same indigo molecule. Yes. Except if the indigo is precipitated from a plant source, it’s not going to be 100% indigo. There will be other molecules from the plant and the surrounding soil in there as well. Depending on what they are can change the appearance of the color. Also, depending on what fiber is being used the color will appear differently, because of the way that indigo bonds with the space within the fiber. If it’s lustrous like silk or matte like cotton it will appear differently. Depending on how alkaline the solution is, the protein fibers of silk or wool can be damaged. Depending on how well the fiber is worked in the vat will also effect how the color appears, based on how thoroughly the indoxyl is actually worked in or not.

I’ve spent about a month since my indigo class trying to get answers to my question, and I finally feel pretty satisfied that I’ve learned what I wanted to know. This process has also shined a light on the fact that so many natural dye recipes are just that, recipes, without divulging the science and available technology behind them. My hope is to demystify the processes so I can dye with confidence and reasonable expectations. Cochineal, you’re next!