small

2

Start small. Start with a scrap of cloth, a drop spindle, a silk cocoon, a few yards of yarn or grams of wool. See what you can make.

Start compact, like a seed, and grow into something bigger. Maybe your project is a seed intended to be a dye garden.

Think small environmental impact. Take something worn and repurpose it. Make rag rugs or an upcycled yoga mat. Get inspired to mend in the Japanese boro style.

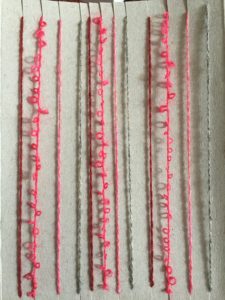
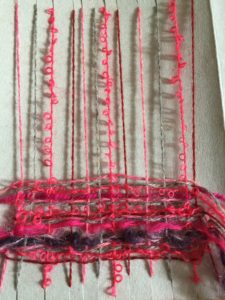
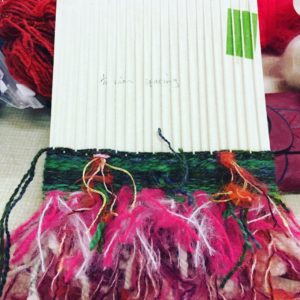
weaving on cardboard

Use small tools– a felting needle, a drop spindle or a postcard-sized piece of cardboard repurposed as a loom.

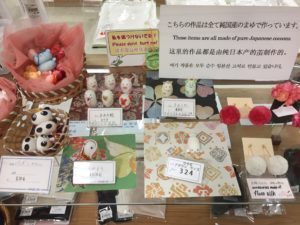
Silk cocoon ornaments, Kyoto

Unravel a silk cocoon. Knit a fair isle square and then another. Crochet a toy for your child. Knit a sweater for your favourite teddy bear. Make a pompom. A tassel.

We’ve started a pinterest board with ideas for small projects. Throughout 2018 we’ll be developing this idea and seeing how big it can get.

Surface Design with Natural Dyes

2

Rachel: “I found these cute block-printed throw pillows I want to make. How can I do that with natural dyes?”

I’m mostly a spinner and knitter, but in the natural dye classes that I attend at OCAC, there are a lot of people who focus on textiles. We’ve used a simple technique to get a lot of different results, and it’s really a lot of fun.

You will need the items you wish to print with: print blocks, stencils, potato stamps, paintbrushes, silkscreens, or anything else, and a few pieces of equipment: a blender, a steamer, an old bedsheet, and gum tragacanth. Gum tragacanth is a natural product that is most often used making fondant for cakes. Here it’s used as a “sticking” medium. What’s good about gum trag vs. other similar products is that it doesn’t interfere with or change the color of your dyestuff.

The technique: mix up some gum trag and water in a blender. Say, 1/4 C gum trag and twice a much water. You will hear and feel the mixture get thicker after about thirty seconds. If it’s too thick, add more water. If it still seems a little runny, let it sit for a bit, it thickens over time. Don’t mix more than you’ll need for your project at hand, because it only lasts about a day in the refrigerator. (Obviously it will be easier to judge once you’ve done it, but a little medium goes a long way.) You will want it thick enough to adhere to your stamps, but not so thick that you lose definition. If you’re silkscreening, you’ll want the thickness of silkscreen ink. Make some practice stamps before you commit to your fabric!

Mordant Printing

You can mix a mordant into your gum trag mixture. We used very small amounts of copper and iron, and a slightly less small amount of alum during our classes.
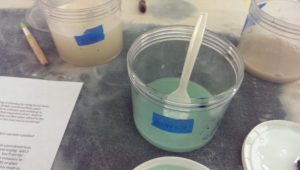
Gum trag with mordants

Gum trag with mordants

Here is a thread spool print with copper mordant:
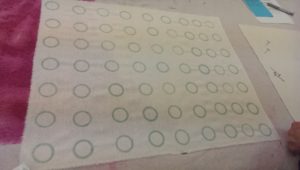
2016-10-04-19-39-50

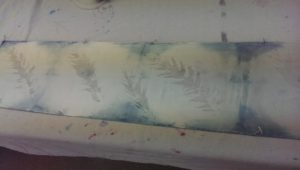
Here I’ve printed on a silk scarf previously dipped in indigo with alum, using a feather for my print:2016-10-04-19-59-47
Here I’ve used an iron mordant on silk noil, again with feathers. I used an old paintbrush to apply the mordant mixture:
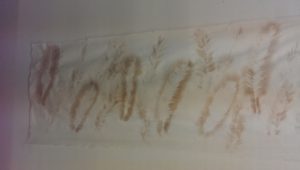
2016-10-04-19-40-51

Discharge Printing

You can mix and acid or a base into your medium to discharge color on an already dyed piece.
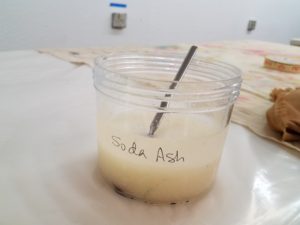
Gum trag with soda ash

Gum trag with soda ash

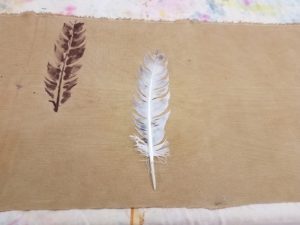
Here I tried using soda ash to shift the color on a pisolithus mushroom-dyed piece of silk:
2016-10-18-19-17-33

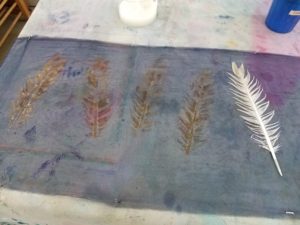
Here I’ve used tartaric acid to discharge the logwood dye on silk organza:
2016-10-18-20-22-27

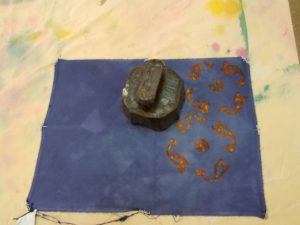
You can do combinations of these techniques:
2016-10-18-20-22-36

Discharging with a print block

And printing with an iron mordant

And printing with an iron mordant

How to set your prints:

Lay out your dried fabric on an old cloth in a single layer, fold extra cloth over, and roll up, jelly roll style so that it will fit in your steamer basket. You want STEAM ONLY! Take care that the water is not getting into the bottom of the basket, and place a towel or piece of felt on top underneath the lid to keep condensed water from dripping back down. Make sure you’ve got steam going before placing your jelly roll in the steamer basket. Steam ten minutes, and remove carefully. Let cool until it’s comfortable to handle, then unroll.
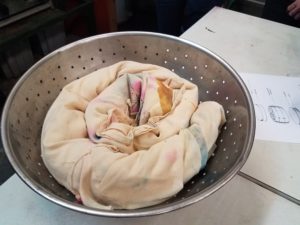
Jelly roll in steamer basket

Jelly roll in steamer basket

Wash your steamed fabric in warm, soapy water to get the gum trag residue out. It still contains mordant, discharge or dye, and if the excess isn’t washed out it will go into your dye pot and change the result.

Here are some results after dyeing our prints. The yellow is from onion skins, the pink from Brazilwood, and the orange a combo of both.
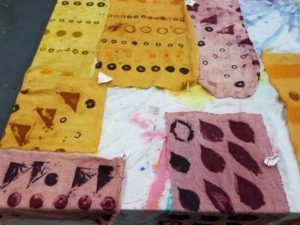
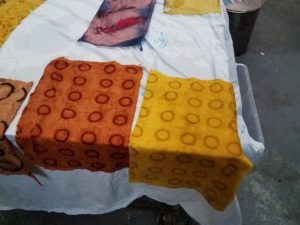
2016-10-11-19-47-43

2016-10-11-19-33-30

Here are my feathers. You can see that the gum trag wasn’t washed out completely by the extra dark muddiness around the onion skin feathers.
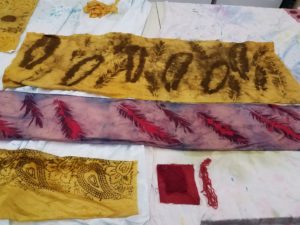
2016-10-11-19-33-24

I decided to after-mordant the whole piece in alum, and not only did that get rid of the excess print fuzz, it changed the color of everything. It’s a bit 1970’s decor now, but I think it will still make a nice pillow:
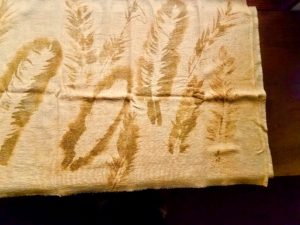
2016-11-14-14-09-41

For the discharge printing, you don’t necessarily have to steam the piece before washing. Here’s a sample of logwood on silk that I discharged by painting the back of a leaf with gum trag and citric acid, and then simply washing when I liked the result. It made a nice multi-colored effect:
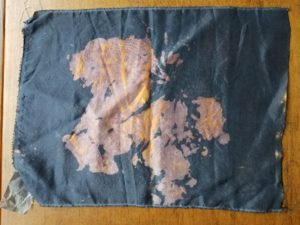
2016-11-14-14-07-15

I steamed my Ph-shifted fabric, and once I washed it out it ended up being merely discharged. I think I would have had better results if I’d washed it out as with the leaf print:
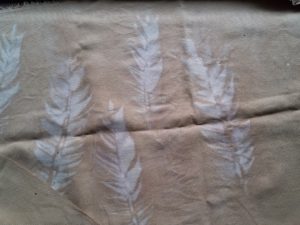
2016-11-14-14-10-18

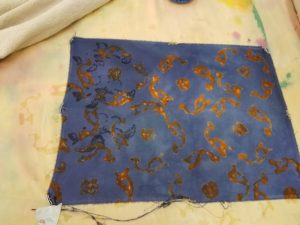
And here is a piece of silk crepe de chine that I silkscreened with alum and then dyed in Osage orange:
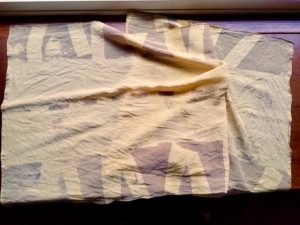
2016-11-14-14-16-07

So, to answer your question Rachel, you have a lot of options. You can make a mordant print on unmordanted fabric. You can make a (different) mordant print on mordanted fabric. I didn’t include any photos, but you can mix natural dye extracts with your gum trag and print directly that way, with color. You can discharge already-dyed fabric. And you can do combinations of these techniques. You’ll no doubt have noticed that all these examples are on silk, but many of my classmates used this same technique on cellulose fibers.

There is also the option of surface design using natural pigments, which I’ll cover in my next post.
Weave to wear: Make a dressy jacket (part one)

2


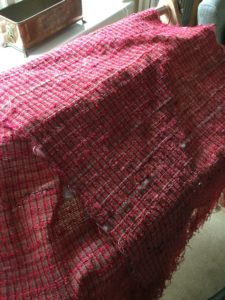
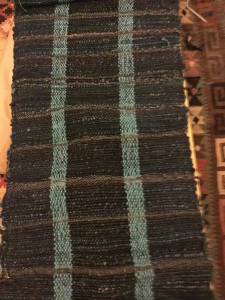
Finished cloth

Finished cloth

Sal tells me I need to take more notes while I work. It’s because when she asks me for measurements and quantities I used for a project I usually don’t have a good answer.

Recently I finished weaving a length of fabric to make a dressy jacket and although I didn’t make any notes I’m going to put down some thoughts, tips and tricks here. This way Sal will have no excuse not to get started on her Chanel-style jacket. She’s going to weave and sew it for her next guild challenge which is all about tweed. It needs to be done by February. No pressure Sal!! 😉

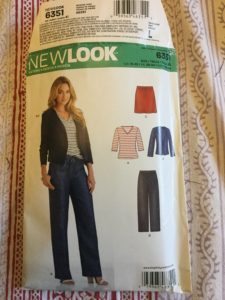
Pick a commercial sewing pattern: If you are new to sewing or simply new to sewing with handwoven, don’t pick a pattern that’s overly complicated. Keep it simple. I picked NewLook 6351. The jacket is comprised of two sleeves, four front pieces, two back pieces and a facing piece. If you are using a thick piece of cloth, you need to think about how your seams are going to work and whether you will need a lining. That could be tricky to do with a thick piece of cloth.

Jacket Pattern by New Look

Jacket Pattern by New Look

Make a muslin: A muslin is a trial run of your garment that can be adjusted for fit. I use muslin cloth–a creamy coloured cotton–when I’m making dresses or trousers, because when you spend a lot of time making your own garments, you want it to fit. Check out the Tilly & the Buttons site for everything you need to know about muslin (toile) making.

I’ve never had a garment that I haven’t had to adjust. There is some great information about adjusting patterns on the Colette blog and Sewalongs. You don’t want to spend time weaving cloth and then sewing it only to have something that doesn’t fit. If you need help making alterations on the muslin, I would ask an experienced sewist for help.

Once you have your muslin completed and fitted, hold onto it. This is now your pattern.

You might want to try a sample garment in fabric in a similar in weight to your handwoven. Make your mistakes on the sample, not on your handwoven.

Direct warp

Direct warp

Do the math: The New Look jacket pattern calls for about 1.3 meters of 150cm wide fabric. I have a 80 cm (32 inch) loom and therefore I decided to weave 3 meters of cloth. I put a 4 meter warp (I wanted about 60cm extra warp for wastage) on the loom using a 50/10cm dent reed (12.5 dents per inch). I used almost the entire width –400 dents. Four meters multiplied by 400 dents equals 1600 meters of warp yarn.

I was far less precise with the warp meterage. My idea was to use stash yarn and luckily I had plenty.

I’d estimate I used 700 meters of yarn in the warp (3 picks per cm x 300cm x 80 cm/100). I used different yarn weights and even some roving in there, plus a bunch of my handspun bouclé, so that’s very much a ballpark figure.

How does your planned warp look?

How does your planned warp look?

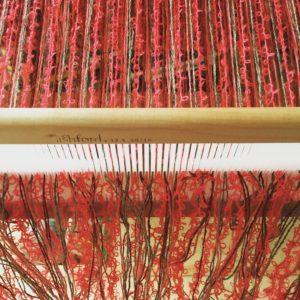
Sample and warp: Before I dressed the loom, I made some cardboard squares to test out colour combinations. This was a quick and easy way to see how the colours and yarns I picked out looked together. I wanted to see the warp colour sequence and get a feel for how the yarns worked together.

The next step was to dress the loom (i.e. warp it) which I did using the direct warping method.

Once thing I wish I hadn’t done was use boucle in the warp. BAD IDEA. It stuck and snapped and was a total nightmare. Avoid!

Weave: Weave, weave and weave. I didn’t follow a pattern and just went with by colour and texture. I used this project to do some stash busting. Very gratifying.

add some weft

add some weft

Finish your cloth: Once you’ve woven your little heart out, remove the cloth from the loom. Give it a gentle wash in some hand hot water and a small amount of gentle soap. Rinse then carefully squeeze out the water. Do not wring your fabric. Remove excess water by rolling your cloth in a towel. Hang out on the line to dry.

Part two: Cutting your cloth. Coming soon. Once I do it.

Handmade gift ideas for men

6

The leaves are just starting to change colour and fall, but the Christmas puddings are on the shelves at the shops and it’s just a matter of time before the first pre-Christmas sales begin.

Over the past few years my sister, mother and I have been giving each other handmade gifts at Christmas. Mom makes wonderful hooked rugs and cushions and my sister has made us beautiful felted stockings, knitted scarves and sweaters. I’ve woven wraps for my mom and made yarn and soap for my sister.

This year I want to make a gift for everyone in my family–luckily we are a small group! The problem has been coming up with something different and useful for my dad and husband.

I did a search for DIY/handmade gifts for men and the options some of the ideas were hilarious–a bouquet of bacon, flavoured toothpicks and “restore an heirloom axe“. Also apparently beard oil is The Thing, but we are a beardless bunch.

Not all the ideas I saw were totally crazy and here are some that aren’t beard oil, bacon, scarves or hats.

Utility tote by Don Morin

Utility tote by Don Morin

Man bag: I was telling Sal about this tote bag my dad uses as a sort of briefcase. It is a freebie from a pharmaceutical company he was given for judging a science fair. It is ripe for replacement.

I found this utility tote pattern by Don Morin. It’s perfect, and as Sal says all I have to do is stencil some drug logos on it.

There are loads of free patterns for messenger bags out there both knitted, felted and sewn. How about upcycling some jeans or natural dyeing or printing on some organic hemp fabric then sewing it up into a bag? There are so many ways to use your fiber arts and sewing skills for a messenger bag.

Finlayson "sweater" (Thread Theory)

Finlayson “sweater” (Thread Theory)

Sweatshirt: I love this Finlayson Sweater from Thread Theory. I’m going to make this up for my husband. I’ve got some jersey fabric in my stash. There are some nice organic jerseys available now that could be naturally dyed. Or maybe you have some handwoven you could use. Here’s a link to our guide to using handwoven for sewing projects.

For further inspiration: Independent designers have some beautiful sewing patterns for men now. Check out Walden, Thread Theory, Hot Patterns and Merchant and Mills.

Man scrub: Men like a good scrub just as much as women. Last year I wove washclothes using Syne Mitchell’s Loop-pile washcloth pattern from her book Inventive Weaving on a Little Loom. I used cotton, but she has a hemp/aloo version which would be a great alternative to those plastic shower poufs. Once this one has outlived its usefulness you can throw it on the compost pile and make another one.

There are knit and crochet options. Here’s a shower mitt from yarnspirations which could be knitted in hemp or cotton. For crocheters, here’s a loofah.

Do you want to make homemade soap? You should. Look no further than Humblebee & Me. Loads of idea not just for soap, but things like DIY tiger balm, after shave and lip balm.  This woman is a genius.

Slippers: Slippers are a classic dad gift. There are so many patterns to choose from including: Martha Stewart’s, Drops’ felted and these gorgeous ones from Arne & Carlos.

There are some upcycling possibilities here. Why not use old sweaters,  felt them and sew them into slippers. You could sew a bit of old denim on the bottom to make them sturdier.

Dice bag: Do you have any gamers in your life? How about a dice bag? Here’s a knitted one–twelve – sided no less! You could run up one on the sewing machine maybe with Doctor Who fabric? Or Space Cats!!!

Mug cosy: Another classic. Again there are loads of patterns on Ravelry. But you could easily use woven fabric or even sew them with your favourite novelty fabric. Free patterns galore online.

Other ideas might be making a belt on an inkle loom or knitting a pair of socks.

One last idea which is not sewing/fiber arts related, but I think is a great idea for a Fathers Day present–homemade barbecue rub. My dad would definitely use this! Thanks Martha.

Last year Sal wrote a post on gifts for the fiberista. Lots of good ideas here.

Please let us know your ideas for making for men.

Turning handwoven fabric into a garment

12
Handwoven awaiting transformation

Handwoven awaiting transformation

Rigid heddle looms may not be fancy or complicated, but do not be deceived. You’re not going to weave acres of jacquard, but don’t think placemats, table runners, scarves and hand towels are your only options on a rigid heddle loom.

Two years ago when I bought my little loom I had no idea that with some experimentation, practice and patience I’d be able to make a garment from fabric I’d created. For one thing, the idea of cutting my handwoven cloth terrified me. Also as relatively inexperienced seamstress, I wasn’t confident I could create a wearable garment.

I took the small amount of fabric I’d woven on a 20″ (50 cm) Ashford Knitter’s Loom up to Clacton-on-Sea for a lesson in sewing with handwoven with Sarah Howard. Sarah, along with Elisabeth Kendrick, is the author of Get Weaving, which I blogged about earlier this year.

Sarah helped me find a pattern that would work with the 175cm of fabric I had. We used a commercial paper pattern to get an idea of size and shape and then made some modifications for fit and the fabric.

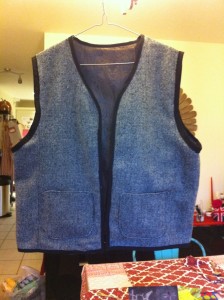
The next step was to make a paper pattern to use to then sew up a calico to see how the garment looked. I used some denim for the calico. It allowed me to see where changes were required (in the armpits!). Once that was done, I went a way with instructions to test out the pattern on store-bought fabric. Sarah says it’s important to do a trial run before diving into your handwoven. Lots of issues can be sorted out on the sample piece. For example, I found I needed to change the shape of the side pieces slightly. Making a sample made me think about bias binding and lining too.

sample garment

sample garment

My sample looked pretty good, but I realised I would have to do the pockets a bit differently on the final piece–ie with biased binding and the fabric backed by iron-on woven interfacing. I also decided that gold/black lining would not look good with the handwoven and went for a solid blue silk.

Here’s a couple things to keep in mind when you’re placing your pattern on your handwoven:

– Make sure all the pieces fit. Measure the length of fabric without the fringe.

– Think about the best use of your fabric’s selvedges and hemmed ends to reduce the potential for fraying and binding.

– Make a note of the direction of warp and weft in your fabric. How does that influence how you place your pattern on your fabric? You probably want all your pieces going with the warp.

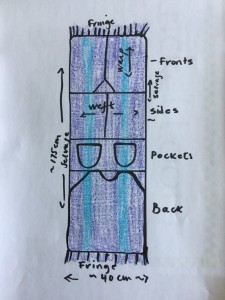
My layout looked like this:

layout

layout

I was careful to place the pockets to match up with the stripes on the two front pieces.

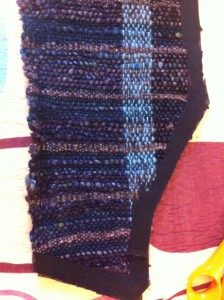
The next step was to cut out the pieces.Once I did, I carefully applied strips of iron-on woven interfacing to the fabric to prevent fraying. Then I zig-zag stitched over that.

I sewed together the fabric pieces as well as the lining. I didn’t sew in the lining, but bound the piece together all at once with bias-binding tape. I made it myself, which wasn’t difficult, but it was time consuming. However, store-bought bias tape is pretty poor so I do recommend taking the time to make it yourself.

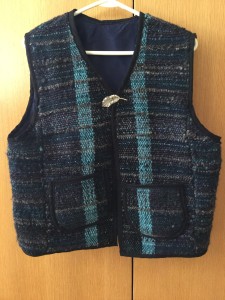
Et voila! Garment!

finished garment!

finished garment!

A few things to keep in mind when sewing with handwoven.

– Remember your woven fabric may be quite thick. How is that going to impact your seams? Will your garment work well with chunky seams?

– Use iron-on woven interface to prevent fraying. It also makes it easier to sew.

– Go slow! Once you machine sew handwoven fabric, it’s really hard if not impossible to pick out without destroying the fabric.

– Handwoven is stretchy. Think about how that might cause difficulties when sewing up or when putting in a lining.

applying iron-on woven interface

applying iron-on woven interface