Handmade gift ideas for men

6

The leaves are just starting to change colour and fall, but the Christmas puddings are on the shelves at the shops and it’s just a matter of time before the first pre-Christmas sales begin.

Over the past few years my sister, mother and I have been giving each other handmade gifts at Christmas. Mom makes wonderful hooked rugs and cushions and my sister has made us beautiful felted stockings, knitted scarves and sweaters. I’ve woven wraps for my mom and made yarn and soap for my sister.

This year I want to make a gift for everyone in my family–luckily we are a small group! The problem has been coming up with something different and useful for my dad and husband.

I did a search for DIY/handmade gifts for men and the options some of the ideas were hilarious–a bouquet of bacon, flavoured toothpicks and “restore an heirloom axe“. Also apparently beard oil is The Thing, but we are a beardless bunch.

Not all the ideas I saw were totally crazy and here are some that aren’t beard oil, bacon, scarves or hats.

Utility tote by Don Morin

Utility tote by Don Morin

Man bag: I was telling Sal about this tote bag my dad uses as a sort of briefcase. It is a freebie from a pharmaceutical company he was given for judging a science fair. It is ripe for replacement.

I found this utility tote pattern by Don Morin. It’s perfect, and as Sal says all I have to do is stencil some drug logos on it.

There are loads of free patterns for messenger bags out there both knitted, felted and sewn. How about upcycling some jeans or natural dyeing or printing on some organic hemp fabric then sewing it up into a bag? There are so many ways to use your fiber arts and sewing skills for a messenger bag.

Finlayson "sweater" (Thread Theory)

Finlayson “sweater” (Thread Theory)

Sweatshirt: I love this Finlayson Sweater from Thread Theory. I’m going to make this up for my husband. I’ve got some jersey fabric in my stash. There are some nice organic jerseys available now that could be naturally dyed. Or maybe you have some handwoven you could use. Here’s a link to our guide to using handwoven for sewing projects.

For further inspiration: Independent designers have some beautiful sewing patterns for men now. Check out Walden, Thread Theory, Hot Patterns and Merchant and Mills.

Man scrub: Men like a good scrub just as much as women. Last year I wove washclothes using Syne Mitchell’s Loop-pile washcloth pattern from her book Inventive Weaving on a Little Loom. I used cotton, but she has a hemp/aloo version which would be a great alternative to those plastic shower poufs. Once this one has outlived its usefulness you can throw it on the compost pile and make another one.

There are knit and crochet options. Here’s a shower mitt from yarnspirations which could be knitted in hemp or cotton. For crocheters, here’s a loofah.

Do you want to make homemade soap? You should. Look no further than Humblebee & Me. Loads of idea not just for soap, but things like DIY tiger balm, after shave and lip balm.  This woman is a genius.

Slippers: Slippers are a classic dad gift. There are so many patterns to choose from including: Martha Stewart’s, Drops’ felted and these gorgeous ones from Arne & Carlos.

There are some upcycling possibilities here. Why not use old sweaters,  felt them and sew them into slippers. You could sew a bit of old denim on the bottom to make them sturdier.

Dice bag: Do you have any gamers in your life? How about a dice bag? Here’s a knitted one–twelve – sided no less! You could run up one on the sewing machine maybe with Doctor Who fabric? Or Space Cats!!!

Mug cosy: Another classic. Again there are loads of patterns on Ravelry. But you could easily use woven fabric or even sew them with your favourite novelty fabric. Free patterns galore online.

Other ideas might be making a belt on an inkle loom or knitting a pair of socks.

One last idea which is not sewing/fiber arts related, but I think is a great idea for a Fathers Day present–homemade barbecue rub. My dad would definitely use this! Thanks Martha.

Last year Sal wrote a post on gifts for the fiberista. Lots of good ideas here.

Please let us know your ideas for making for men.

Sewing a simple garment with handwoven fabric

0

Whenever I show my mom one of my weaving projects she asks the same question: “is it a table runner?” The question sets my teeth on edge. Long and relatively narrow woven fabric could be mistaken for a table runner, but as my friend Sarah Howard has demonstrated many times over with a little imagination it can be so much more.

Saori weaving books show many of quick and creative ways to use handwoven to make simple garments. If you are looking for a tailored garment these aren’t for you. Take a look at what Sarah does.

What I like about these saori projects is their simplicity. You don’t need to be a whizz with the sewing machine and you don’t even need a pattern. What you do need is a tape measure and a pair of scissors (or a rotary cutter) a ballpoint needle for your sewing machine and maybe some iron-on woven interfacing. Ballpoint needs are used for sewing jersey fabrics and work great on handwoven. Definitely use one.

IMG_2162

I wanted to make the draping collar vest in the Beginners’ Saori Clothing Design book. The book is very clear that these garments are designed for the average Japanese woman—5′ 2″ (157 cm) and 120 lbs (54 kg). The draping collar vest “pattern” calls for fabric 40 cm (15 3/4 in) wide x 172 cm (1.88 yards) long. That piece is then cut into three–2 x 54 cm, 1 x 64 cm– two pieces of equal length and one longer piece which becomes the collar.

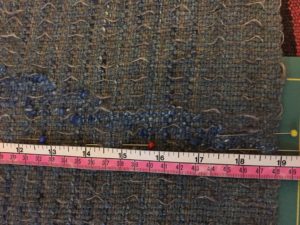
For my vest adjustments had to be made. I measured my back–from the neck to the top of my butt and from my shoulder to the top of my waist to get ballpark measurements for width and length. Keep in mind your woven fabric will shrink when you finish it. Whatever your measurements are, add on some more to account for shrinking.

I made my fabric about 50 cm (19 3/4 in) wide and ended up being 211 cm (2.3 yards). That was plenty. After washing the fabric by hand in hot water and a little soap I was ready to go.

First step was to figure out how long to make my pieces. I subtracted 172 (length of suggested fabric) from 211 (length of my fabric). That gave me 39 cm which I divided by three to get 13 cm. To increase the size of the original pattern, I added 13 cm to each piece, which gave me two pieces at 67 cm and one at 77 cm.

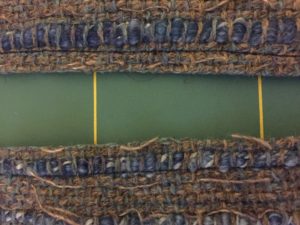
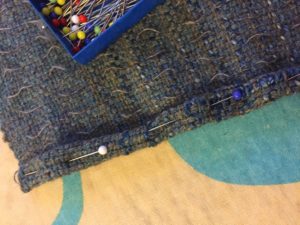
Now for the cutting. Saori weaving books suggests sewing two lines across the fabric and then cutting between the pieces. This is to minimise fraying. Remember the old saying measure twice, cut once? Definitely follow that rule when working with handwoven. In the photo below I’ve mapped out where I want to sew with a trail of pins.

pins in a line to follow for sewing.

pins in a line to follow for sewing.

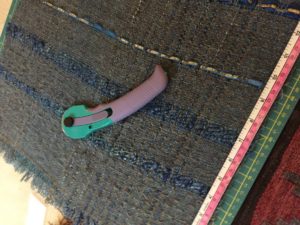
I sewed to lines and then cut between them using a rotary cutter. Scissors are fine.

cutting between the lines

cutting between the lines

The next step is adding a hem on to the tops of all three pieces. I simply rolled the fabric over, pinned it and then sewed.

pinning and sewing the hems

pinning and sewing the hems

Once the hems are sewn, lay out the three pieces of fabric right side up. The longer piece is in the middle, lining them up at the bottom and overlapping them slightly. Pin into place.

lay out fabric right side up, sew on the right side

lay out fabric right side up, sew on the right side

On the right side, sew 5 cm from the shoulder to the arm hole, leave however much you want for an arm hole (about 25-30 cm) and then sew the rest of the seam. Repeat on the other side. Flip over and make a small hem on along the bottom (on the wrong side). I ironed on a small strip of interfacing and then did a zigzag over it.

Et voila!

Finished garment

Finished garment

IMG_2169

Many ways with warps on a rigid heddle loom

2

Getting creative with warp yarns is a great way to make the most out of your rigid heddle loom. Using different coloured and textured yarns in the warp, ordering those yarns in a certain way or not at all will yield different, beautiful results without having to worry too much about pattern.

plain weave plaid

plain weave plaid

Let’s start with texture and colour. In this sample, I used two smooth yarns and two handspun boucle yarns in the warp. From right to left–  black, magenta, then the lighter

boucle and the darker one. For the weft I used the four yarns in the same order to create this nubbly plaid-like sample. Simple to weave, but lots of potential as a cloth. I could easily weave something similar and turn it into a Chanel-style jacket.

Randomly placed many-coloured warp

Randomly placed many-coloured warp

Next up is a piece I wove

recently entirely out of handspun. The plan was to make the warp yarns the feature. I randomly wound the three colours of yarn—pink, purple, green— onto the warping board. On the weft I used a single colour—a grey mohair and wool handspun with a few dollops of green and yellow as a feature. What I like about how this piece turned out is the strong warp colours slightly muted by the greyish weft. Also the slight unevenness of the handspun give the whole piece a subtle speckled effect.

Choosing handspun or many colours of yarn in the warp is one way to use colour and texture in the warp to great effect. A variation on this theme is the multi-coloured warp. Instead of using a few different coloured yarns in the warp, wind on a neutral coloured warp, carefully remove it and then put it the dye pot and apply colour.

Dyed warp

Dyed warp

In this sample, I used a commercial silk warp thread and dyed it with gold, purple, green and a little pink. Woven with a camel/silk handspun, with some saori-style accents, the warp still comes through, but this time with different colour pools.

Dyed warp, Saori-style accents

Dyed warp, Saori-style accents

You could take this technique further and go for an ikat-style weave by tie dyeing the warp or even painting a design onto it, then threading the warp onto the loom. Another approach is to take some self-striping or variegated sock yarn and wind your warp so that the colours sit together. There’s a great description of that technique here.

log cabin weave

log cabin weave

Log cabin weave is a rigid heddle loom classic. It’s simple, just alternating blocks of light and dark yarns (LDLDLDLD DLDLDLDL etc) in the warp and then weaving the same way. More about log cabin in my November post.

Using multi-coloured handspun or variegated sock yarns that have less contrast also create a nice effect. Check out this blog post on this variation on log cabin weave. I’ve also seen log cabin done with some saori-style embellishments that look fantastic.

One last technique that emphasizes warp is using the variable dent rigid heddle reed. It’s a reed that allows you to mix up the dent sizes in the reed to then use different weights of yarn. I haven’t tried out this tool myself, but apparently one of the effects you can achieve is a ribbed fabric.

All these techniques bring a lot of interest and texture without having to mess around with pick up sticks. Don’t get me wrong, pick up sticks are great, but don’t think you need to use them to get the most out of your rigid heddle loom.

Some resources for rigid heddle weaving:

Ravelry’s rigid heddle weaving group

Schacht spindle blog

Weavezine